Categories
Hens raising happy, healthy chickens

Do Hens Ever Crow

If you have chickens, have you ever heard the crow of a rooster when you don’t have a roo? Or if you do have a rooster, swear that it wasn’t his particular ‘crow’? Today I want to bring up the subject, do hens ever crow. You might not realize it, but yes, they do! And there are different reasons and causes for it which I’ll also cover.

Main Reason Why Hens Will Crow Like a Rooster

rural henhouse with chickens and deer horns
Photo by ArtHouse Studio on Pexels.com

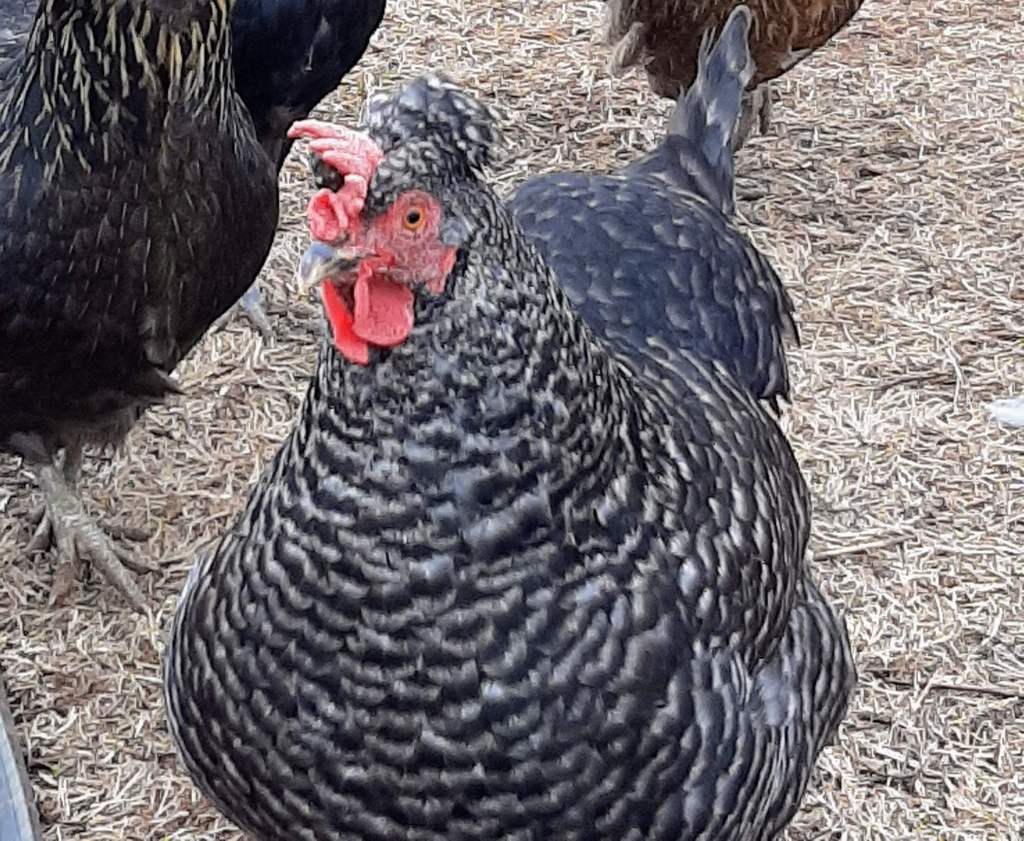
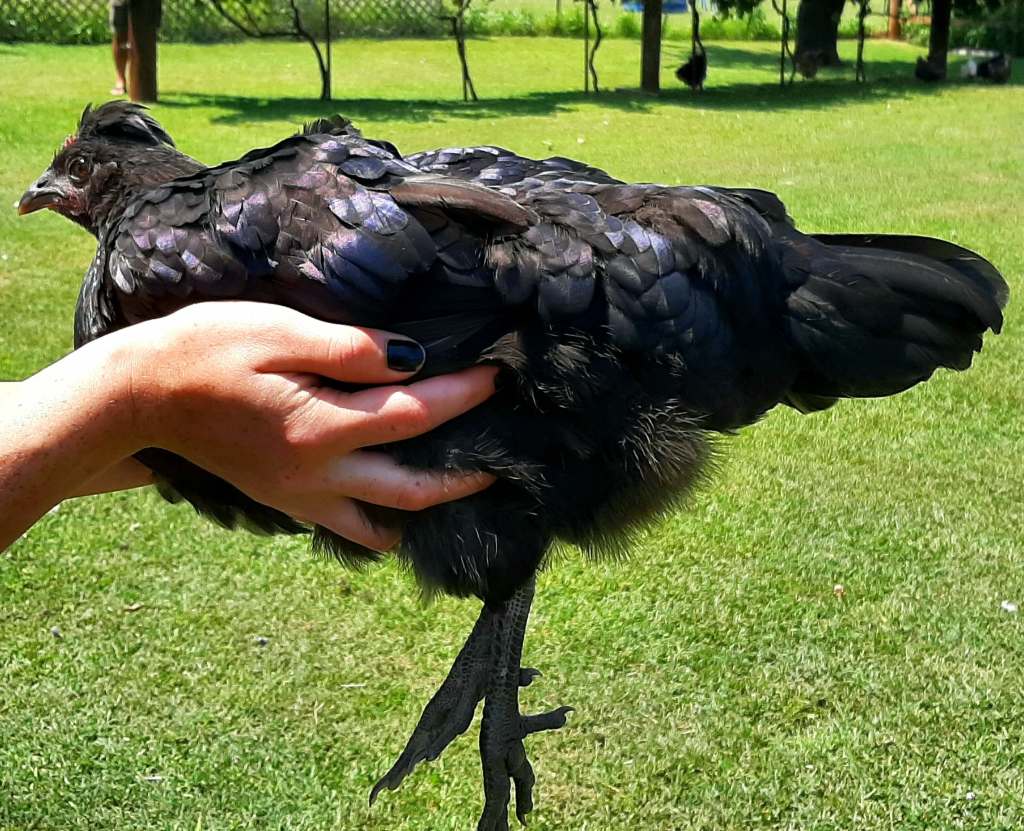
Now let’s discuss why hens will crow like a rooster. First, you want to verify that your she is really a she. Sexing adult chickens is pretty easy compared to sexing chicks. So once you’re positive you’re dealing with a hen, most of the time a crowing hen has to do with the pecking order. If there isn’t a rooster, sometimes the most dominant hen will then take on a rooster’s duties. Which includes crowing.

However there could also be times when you have a rooster and you hear the sound of another, foreign crow in your backyard. Most sites claim that a hen will NOT crow if there are other roosters around. But I’m here to tell you that’s not true. We have 2 adult roosters on our property. And I’m extremely familiar with their individual crows. The other ‘cock-a-doodle-do‘ came from one of our hens. And she mangled it.

I immediately went outside to see who was doing it. Although she must’ve been shy, because she stopped after the second crow. I have a suspicion that it was the co-parent of the broody hen we had. She’s a pretty dominant hen, in a sea of mostly docile birds. I think she crowed to warn off any possible danger to their clutch of chicks. Or possibly to tell the other chickens to stay away. Yes, I’m speculating, but I haven’t heard any more crowing. But then, they no longer are raising their chicks.

More Reasons Why Hens Will Crow

Some other possibilities are

A Longcrower is a rare breed in Kosovo, Germany, Indonesia, and Japan that has an exceptionally long crow. And evidently the hens can crow as well.

What?!? No, that’s not a typo. You might already be aware of this if you’ve had backyard birds for a while. But just in case you’re unfamiliar with this phenomenon, chickens are one type of animal that can go through a sex change, where they actually can change genders. However it also can happen to ducks.

Both female ducks and hens have only 1 functioning ovary. And both are on the left side. While the one on the right side is held in reserve. However if the left ovary gets injured by either trauma or illness, then the right one will start developing. And sometimes it develops into a male reproductive organ, except they won’t be able to father any young. At least not in the chicken’s case.

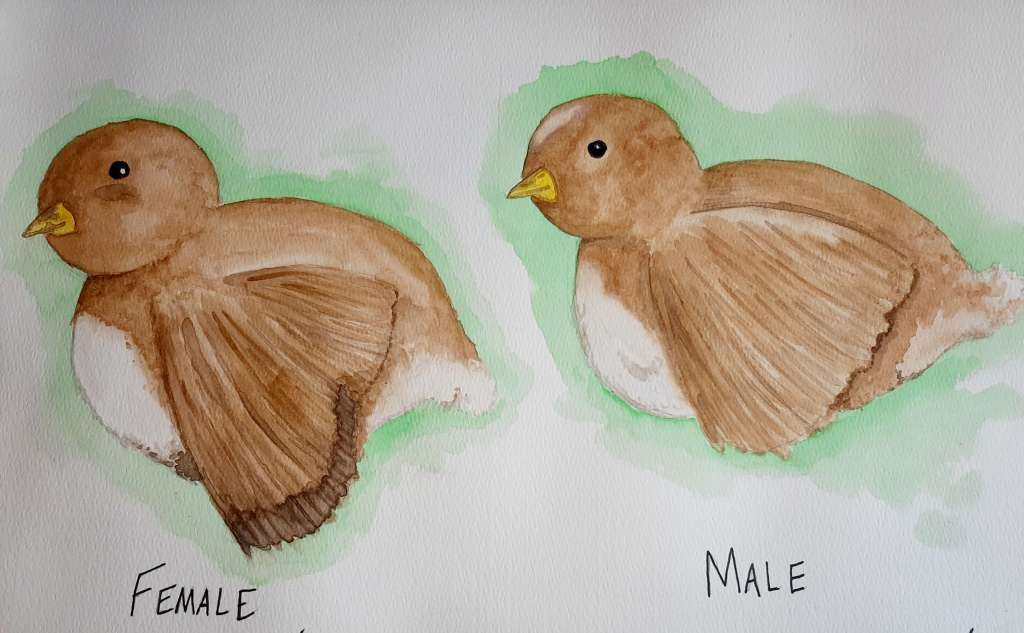
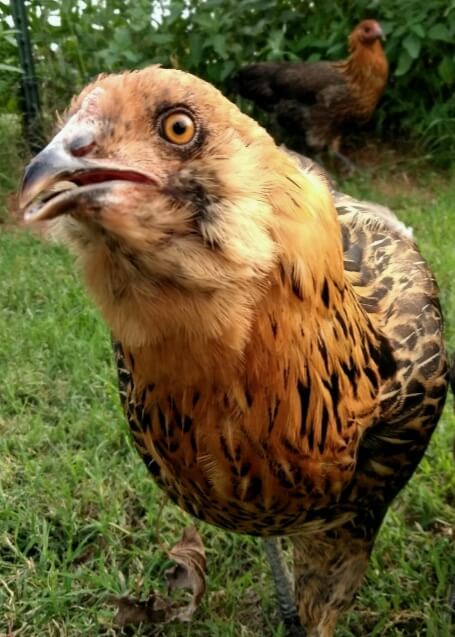
A hen that starts developing into a rooster will begin to take on more than just his crow. She will start to acquire bigger wattles and a more prominent comb. She’ll also grow more colorful plumage like that of a rooster. Additionally she will start to mount the other hens. So, in essence, she will be a he, in all but when it comes to actual reproduction.

Things You Can Do

isolated white chicken
Photo by cottonbro on Pexels.com

If you have a hen that’s crowing, and you want to stop it, there are things you can try. If she’s crowing due to pecking order issues, try isolating her for a few days. Usually this will sort out any hierarchy problems, because chickens don’t like to start back over from the bottom. However sometimes it’s necessary if there’s bullying by a dominant hen.

If, on the other hand, you actually have a rooster instead of a hen, then you will have to come to a decision on whether you want to keep him. Or whether you even can keep him. And the same goes for if you have a Longcrower hen.

But if you in fact have a hen that is going through gender change, there’s really nothing that can be done. Other than deciding on if you will keep him once he’s completely transformed, although there’s only ~ 1 in a 10,000 chance of that really happening. Also, there has not been anything reported about a rooster changing into a hen, as of yet.

I hope you enjoyed this post, and as always, if you have any questions or comments, please don’t hesitate to ask or leave a response!

Categories
Extras recipes

Sweet and Sour Chicken Legs Recipe

This sweet and sour chicken legs recipe is a favorite at our house. My mom used to make it when we were little. However I continue to make it for my own family. And it easily feeds a family of four. But It can readily accommodate a large crowd if you’re having a party. Or going to a potluck. You just have to double the recipe. Or triple it, depending on the number of guests.

Ingredients for sweet and sour chicken legs recipe:

picture of baked chicken legs on foil lined pan

  • 3 – 4 lbs chicken legs
  • 1 c sugar
  • 3/4 c soy sauce
  • 1/2 c white vinegar
  • 1/4 c water
  • 2 cloves garlic
  • 2 tbsp each corn starch and cold water
  • 1/2 tsp each ginger and pepper

Instructions for sweet and sour chicken legs recipe:

picture of sweet and sour sauce in saucepan on stovetop
  • First, heat oven to 425°.
  • Next, line a jelly roll pan with aluminum foil. And spray with non-stick cooking spray.
  • Then place the chicken legs onto the foil lined pan.
  • After that, put the pan into the oven for ~1 hour. But after 30 mins, flip the chicken legs over. Since cooking times vary, make sure the internal temp is at least 165° And that the juices are clear.
  • While the chicken is cooking, add all of the other ingredients to a small saucepan on medium heat. Next, stir and continue stirring till the mixture gets thick and bubbles.

After the chicken legs are cooked, turn off the oven. Furthermore, take the legs out of the oven. When your sauce is thick and bubbly, remove it from the heat. And brush the sauce evenly onto the legs.

Serve with white rice and a side of steamed vegetables.

Categories
Chicks Hens raising happy, healthy chickens Roosters

How to Sex Chickens

Today’s post is about how to sex chickens. Some of you might not have ever had to do that. Especially if you order from a reputable hatchery. But even then sometimes you might get a cockerel you didn’t order. Or you might order a straight run. Also, if you ever incubate your own eggs, or get a broody hen who hatches chicks, then knowing how to sex chickens is a great piece of wisdom to have.

So how do you sex chickens? And is it the same for chicks as it is for juvenile birds? Well, the answer to the second question is . . . kind of. It just depends on the bird. However I’ll get to that soon enough. But first, we’ll cover how to sex baby chickens or chicks.

person holding day old Black Ameraucana chick
How to sex baby chickens

How to Sex Baby Chickens

So, with chickens, a cockerel is a male chicken. And he will become a rooster. Additionally, a pullet is a female chicken, who will be referred to as a hen when an adult. And now let’s discuss how you can determine if the chicks you ordered are in fact pullets. The first method is

  • Vent sexing

Vent sexing is manually examining the reproductive organs of poultry. It’s also the most precise way to determine gender of all domesticated birds. However it is NOT recommended for people unfamiliar and untrained in it. Vent sexing chicks can hurt the chick if done incorrectly. That said, we definitely do not attempt it at our property. Not to mention, it’s quite invasive to the chicks. Although if you’re getting chicks from a recognized hatchery, chances are good that they’re vent sexing.

  • Feather sexing
Sketch of 2 chicks with differences pointed out in their wing feathers on how to sex chickens

Feather sexing is a technique to identify the gender of a chick based on the rate of feather growth. However it’s a sex-linked trait, which means the chick’s father has to be bred to grow feathers fast. While the chick’s mother has to be bred to grow feathers slowly. Otherwise trying to feather sex a chick won’t work, because not all chickens can be sexed this way.

I’ve never tried to determine the gender of our chicks using this method. And usually it’s because I’m too caught up with all of the chicks to even think about it.

Another option using a bird’s feathers is by looking at their wings. A pullet will have different lengths while a rooster will have all one length. If you try this method, just remember to be careful with the day old chicks. Also, this practice isn’t foolproof like vent sexing.

  • Sex link chickens
Black Sex Link hen in a yard
This is an example of a sex-link hen, a Black Sex link. However she’s an adult.

Sex link chickens are hybrids that show differences in the colors of their plumage. Or a spot will be present on one sex and not on another, between cockerels and pullets. Which makes sexing them a lot easier. Although you would have to order sex link birds in order for this to happen. But sometimes you can sex link your own birds, if you have a mixed flock, like I’ve done with some of mine.

How NOT to Sex Juvenile Chickens

In a moment we’re going to cover how to sex juvenile chickens. Because there are some differences. A juvenile backyard bird is considered a teenager anywhere from 4-17 weeks old. Whereas chickens from ~16-24 weeks of age are regarded as adults, because they hit sexual maturity, and hens can start laying eggs.

Some of the most common ways people predict chicken gender are also some of the most erroneous ways. And these aren’t limited to backyard chicken owners only. Additionally, they continue to use these flawed methods over and over again. They include determining sex by:

  • Large combs and wattles

The thinking is if the bird in question has a large comb and wattles, they must be a rooster. But I’m here to tell you that is simply wrong. Especially if you have a mixed flock. I have 2 hens that have massive combs that put my rooster to shame. So judging a bird by the size of its comb and wattles is totally unreliable.

  • Crowing

Roosters start crowing generally around 5 months of age. But some crow sooner, while others crow later. Some of the hybrids we’ve had crowed a lot sooner. However crowing alone isn’t the best indicator, since hens also can crow.

  • Size

When chickens are developing, people think that if there’s a bigger bird, it must be a cockerel. And this is a reasonable expectation if the lineages and ages of the birds are the same. When backyard chickens are mature (16-24 weeks), they will be bigger than females of the same breed.

If you have a mixed flock, then your chickens will come in a variety of sizes. So determining gender is more complicated, because you’re no longer comparing apples to apples.

  • Character
adolescent Ameraucana chicken
This is a picture of one of our most aggressive hens when she was younger.

It’s true, roosters can be aggressive, authoritative, and protective of what they consider ‘theirs.’ And a lot of times you can see them demonstrating this behavior as chicks. However it’s faulty to assume, that if you’re witnessing these mannerisms, that you have a cockerel.

Because hens that aspire to reach the top of the pecking order will also display these temperaments. Furthermore, you might notice this behavior with the chicks. There will be one chick that is more aggressive. It could be a cockerel. However it could also be a pullet.

Ok, so how do we sex chickens? Juvenile or otherwise?

The Best Way to Sex Chickens

The first method for determining the gender on your own backyard birds is

  • Be patient
plain white clock on white background
Photo by Ann Nekr on Pexels.com

First, give your birds some time. Unless you have birds that can be sex linked, just give it a few weeks till you can do some real investigating.

  • Then look at their feathers

You’re NOT determining gender by the rate of growth of feathers. You are looking at specific feathers. Around 8-12 weeks old, cockerels will start getting saddle feathers, which are close to their tail feathers. And they’re long, narrow, draping, and pointed. So, if you start seeing those, then you have a cockerel. And that is the absolute best way for backyard chicken owners to sex chickens.

The hackle and sickle feathers won’t come in till the roosters are fully adults. Which by then you will see the tell-tell rooster tail that curves up and down. There definitely won’t be any mistaking that.

And since the saddle feathers are the clearest distinction between hens and roos, and also start to fill out first, this is the preferential point of reference.

On some of my images I’ve mentioned how my hens have tail feathers that resemble sails. Not all hens from every breed will be like that. Hence not all of my hens have sail-shaped tails. But a lot of them do.

The more chickens and chicks you have, the more you will be able to recognize features of a cockerel and pullet. And gain more confidence along the way. I hope I’ve helped you figure out how to sex chickens. Now all you need to do is put it into practice.

Categories
Extras recipes

Homemade Macaroni and Cheese with Penne Pasta

This is a great homestyle recipe, using penne pasta instead of traditional elbow noodles. I used to make the box brands. And then I switched to some I found in cookbooks. But some of those were time consuming. Eventually, as I learned more about cooking and my own style, I came up with this easy, homemade macaroni and cheese with penne pasta.

Ingredients for Homemade Macaroni and Cheese with Penne Pasta:

  • 12 oz of penne pasta
  • 1 c whipping cream
  • 1 1/2 c shredded Mexican blend cheese or sharp cheddar cheese, divided
  • cracked pepper to taste
prepping homemade macaroni and cheese with penne pasta

Instructions for making Homemade Macaroni and Cheese with Penne Pasta:

  • Cook penne pasta according to package instructions.
  • While noodles are cooking, heat 1 c whipping cream in a small saucepan over med heat.
  • Add 1/2- 3/4 c shredded cheese to saucepan.
  • Add cracked pepper to taste to saucepan.
  • Stir cheese mixture constantly until it is thickened.
  • Drain the water from the penne pasta when it’s finished cooking.
  • Stir the cheese sauce into the noodles.
  • Put the penne noodle mixture into a greased 9 1/2 x 7 1/2 inch baking dish.
  • Sprinkle the remaining shredded cheese on top of the macaroni.
  • Top with more cracked black pepper to taste.
  • And bake in a 350 degree oven until cheese is melted on top ~ 5 mins.
beef and pork meatloaf muffins with homemade macaroni and cheese

This pairs well with so many foods. However it certainly has a Southern charm. So I pair mine with pork or meatloaf.

I hope you enjoyed this post. And if you make it, please let me know what you think. How do you cook macaroni and cheese? Let me know in the comments.

Categories
Hens raising happy, healthy chickens

How to Stop Chickens From Eating Their Own Eggs

Today’s post is about a terrible habit that can afflict our backyard birds. And one that’s difficult to break, that can also become almost infectious. It’s about egg eating in chickens. And if the birds leave any evidence, it gets all over the place, producing a sticky, dirty mess. We’re also going to come up with how to stop chickens from eating their own eggs. But first we’ll cover why they do it.

Reasons Why Chickens Eat Their Own Eggs

broken brown chicken egg in a nest
Photo by Klaus Nielsen on Pexels.com

So why does it happen? Well, let’s assume for the moment that you’ve done your homework, (which I’ll go over momentarily). And you still wind up with missing eggs or egg-eaters. I think the number one culprit is that an egg will accidentally get broken. And voila! Now there’s both egg shell and yolk on the ground or in the nest. Chickens are naturally curious. They check out the ooey gooeyiness. And once the birds determine that the yellow gold inside is edible, they’re instantly hooked.

Now, how would an egg accidentally break? Because that’s important. Sometimes, not always, but sometimes you can prevent egg breakages.

Ways Eggs Will Break

Eggs can accidentally break due to thin shells, either caused by a hereditary defect or nutritional deficiency. If the chicken eggs are breaking due to thin shells, put out some oyster shell for your birds.

Now I’m going to list other reasons why chickens will eat eggs.

Other Reasons Why Chickens Eat Their Eggs

multi-colored chicken eggs in nest
  • Not collecting eggs enough times during the day. If you’re experiencing egg-eating with your chickens, collect their eggs more often throughout the day. The longer the eggs sit outside with the birds, the more opportunity the birds will have to peck and possibly eat them.
  • Not enough nesting boxes. Ideally, provide 1 nesting box per 4 hens. Because, if there aren’t enough boxes, the hens will crowd into the same box, and break eggs.
  • Provide plenty of soft nesting material in the nesting boxes. If the material is squished down and flattened, the eggs could get broken. So make sure to change nesting material as needed.
  • Make sure the coop is dark where the birds lay eggs, because hens prefer laying in the dark. So, to discourage non-laying actions in the coop, organize nesting boxes along the inner-most wall, where it’s darkest. You can also add curtains to nesting boxes. And remove artificial light, if you have it.
  • Feeding eggs and eggshells. There are many sources that say you can give your birds eggshells. However, if you do that, make sure the eggshells are ground up. Because birds have good and long memories. And if you don’t, they’ll figure out where you got the eggshells from. If you feed your birds eggs, cook them first, so it doesn’t resemble what’s in a broken egg.
  • Dehydration is another possible cause of egg eating. The thought is that if a chicken is dehydrated, it will get what it needs from the eggs. So be certain to provide fresh, clean water daily.

Now that I’ve covered the reasons why they do what they do, I’ll go over how to stop chickens from eating their own eggs.

How To Stop Chickens From Eating Their Own Eggs

You might have done all of the above suggestions. And still you have egg eaters. I have read recommendations for culling the egg-eating hen. What do you do if you have several birds that are eating eggs? Even after you’ve done the above suggestions? Do you kill all of the egg eaters?

Some people recommend trimming their beaks. And if you have a steady hand, that might be a good idea.

But when we had several hens eating eggs, even after we started collecting eggs more often, I didn’t want to get rid of all of the hens I loved. They would lay an egg, and then eat it. So I found Pinless Peepers. I’ve mentioned them before. They act as blinders, and they prevent bullying and cannibalism. And egg eating.

Therefore, I ordered them. And once they arrived, we caught the chickens, and put them on their beaks. It wasn’t easy. And the birds absolutely didn’t like them. Most, if not all, of the hens had one on. I think my rooster was the only chicken not sporting a Pinless Peeper. Because he was the only one who wasn’t eating eggs.

It didn’t take long for those blinders to do their work. All of the hens hated them so much and wanted them off so badly. I think we left them on for 2 weeks. But when we removed them, each bird was a new convert.

After using the Pinless Peepers, we ended up having only 2 unreformed egg eaters. One hen of which we gave away to someone who had a lonely rooster. And the other hen died, but not directly as a result of us. Although, we had discussed it.

Thanks for reading this post. Have you ever had a chicken eat eggs before? If so, what did you try?

Categories
Extras recipes

Berries with Pound Cake

I got this pound cake recipe from my mother-in-law. However it was originally her mother’s. But, because my husband’s Aunt Ruth was the one able to get the recipe from his grandmother, it was referred to by her name. She also was the one who predominantly made it. So I hope you enjoy this recipe of berries with pound cake.

Ingredients for Berries with Pound Cake: the pound cake

  • 3 c sugar
  • 1/2 c butter
  • 1/2 Crisco
  • 6 eggs, separated
  • 1 tsp vanilla or lemon extract
  • 3 c flour
  • 1/2 tsp salt
  • 1/2 tsp baking soda
  • 1 c buttermilk

Instructions for Berries with Pound Cake: the pound cake

  • First, grease an 8 1/2 x 4 1/2 x 2 1/2 standard loaf pan with either butter or non-stick cooking spray.
  • And pre-heat your oven to 350 degrees.
  • With a beater, cream the butter, Crisco, sugar, and egg yolks until light and fluffy.
  • Next, add the vanilla or lemon extract.
  • In a separate bowl, mix your dry ingredients. And then add them alternately into your sugar mixture with the buttermilk.
  • Beat the remaining egg whites till stiff white peaks form. After that, fold them into the batter.
  • Pour the batter into the prepared loaf pan. And bake for 1 hour – 1 hour and 15 minutes or until a toothpick inserted comes out clean.
sliced pound cake on a brown plate
This is what your pound cake will look like once it’s cooled.

While your pound cake is baking, you can prepare the berries and whipped cream. For the berries, I typically go with strawberries and blueberries. But if you prefer, you can use raspberries and blackberries.

Ingredients for Berries with Pound Cake: the berries

  • 2 lbs fresh strawberries, washed, de-stemmed, and cut into bite size pieces
  • 18 oz fresh blueberries, washed
  • 1/2 tbsp white sugar
  • 1 tsp lemon juice

Instructions for Berries with Pound Cake: the berries

bowl of fresh blueberries and strawberries
  • In a medium size bowl, mix your fruit together.
  • Next, add the sugar and the lemon juice to the fruit, stirring it all together.
  • Finally, cover and refrigerate.

At this point, you’re almost finished making the berries with pound cake recipe, even though the pound cake is still in the oven. However all that remains to prepare is the whipped cream. You could use Cool Whip or Reddi Whip if you’re going for convenience. Before I started making my own whipped cream, I would use either of those other options. But then I started noticing that if I left my dessert (that had either Reddi Whip or Cool Whip) out for any length of time, then the topping would just fall apart. Or be watery. Maybe you’ve witnessed this yourself.

So then I found some recipes for diy whipped cream. And I experimented. Additionally, over time I came up with my own recipe that contains just 2 ingredients. Thus, I learned how easy it was to just make my own whipped cream. And it never falls apart when I take it out of the refrigerator. I can’t claim that homemade or diy whipped cream is healthy, because it’s fattening. Since it’s straight cream and sugar. But it doesn’t have anything else in it, unless you add something else to it. And the benefit of that is you know exactly what you’re putting into your body.

Ingredients for the whipped cream:

  • 2 cups of whipping cream
  • 4 tbsp of either white sugar or powdered sugar

Instructions for the whipped cream:

homemade whipping cream in an orange bowl
  • Using a hand mixer, beat the whipping cream on medium-high to high until it’s thick.
  • And then mix in the sugar.
  • Cover and refrigerate until ready to use.

When the pound cake is finished cooking, turn off the oven. And remove the loaf pan from the oven, allowing it to cool on a wire rack for 10 minutes. Then, run a sharp knife around the edges of the pan, to make sure the cake is loose. If it is, then flip the pan over onto a serving platter to cool completely.

Once your pound cake is cooled thoroughly, slice and serve with the berries. And top with your diy whipped cream.

Categories
All animals non-fowl

How to Help Abandoned Animals

This post is about how to help abandoned animals and how to help stop animal abandonment. It’s something I feel especially passionate about. It might have something to do with the number of animals I personally own. And maybe even how much I love animals and have always loved them.

But regardless, I think it’s important. Because I’ve heard of at least 4 separate kittens, all under 5 weeks old, who’ve been rescued recently. (Including the one we now have as of 5 weeks ago.) All of the kittens I’ve heard about were found either in the middle of the road or under bridges on the highway. Which means they were most likely thrown out of moving vehicles. At least the ones found on the highways were.

HOW TO DETERMINE IF AN ANIMAL IS ABANDONED

abandoned calico kitten and how to help an abandoned animals
This is the kitten a neighbor found in the middle of a major road, and subsequently brought her to us.

First, let’s go over how to know if an animal you’ve found is actually abandoned. How do you recognize animal abandonment and cruelty? Well, in the cases of the 4 kittens I listed above, it was easy to identify. The kittens were all without their mothers, too young to be on their own, and in the middle of the road or highways.

However, if the animal or animals are still living in a home or a yard, most animal abandonment or cruelty, is in the manner of neglect. Though, other things to look out for include

  • Animal negligence, which is a lack of veterinary care, food and water, and/or shelter. A pet might have open wounds and appear malnourished.
  • Also, you might witness direct acts of abuse against an animal. Such as the owner throws objects or strikes their pet in any way that is violent.
  • Or hoarding–there are too many animals on the property for the owner to properly take care of them all.
  • Chained or tethered animals. Animals that are tethered or chained non-stop experience a lot of pain and isolation. And if they don’t have adequate shelter, they’re subjected to all of the hazards of the weather and predators. They could also get infections around the chains or tethers.
  • And finally, animals abandoned by their owners. The homeowners left or vacated their house, leaving behind their pets. You might hear meowing or howling, indicating animals have been left behind.

HOW TO HELP ABANDONED OR ORPHANED ANIMALS

Hopefully you’ll never see any of the above things in your neighborhood. But if you were to observe any or all of them, for the most part, you have the law on your side, since every state has laws prohibiting animal abuse. So, if you know of animals or have seen animals abandoned by their owners or neglected, call animal control. Although, if you live somewhere that doesn’t have animal control, like me, then contact the humane society on this page.

a once abandoned cat
This cat was found and rescued from a trash dumpster.

HOW TO HELP AN ANIMAL YOU FOUND

Now, if you find a stray kitten or dog on the road or in your yard:

  • Try using food to coax the animal to you.
  • And for securing a dog, you need a leash. Or something similar.
  • But since cats typically don’t like being held, you should have a crate or a pet carrier.

Don’t put yourself in unnecessary danger. Older cats, especially if they’ve been on their own for a while, could be feral. So, be cautious and alert.

WARNING: If the animal runs off, appears ill, foaming at the mouth, or is showing signs of aggression, call animal control. And give them the street address where the animal was seen last. And don’t go near the animal.

  • Once you have the animal secured, check for a pet ID tag. If the animal is wearing a tag, contact the owner, so they can be reunited.

However, if you can’t reach the owner, or have to leave a message, file a found report with your local animal shelter. This is in case the owner goes there to look for their pet.

  • The pet might have a microchip and, if taken to an animal shelter, could get scanned there. And then it would quickly be reunited with its owner.

If you live somewhere that doesn’t have an animal shelter, consider taking the dog or cat to a local vet. The veterinarian would then be able to scan the animal for a microchip.

  • Finally, post fliers with the animal’s picture, description, and where you found it. You can also look up info and place ads on Craigslist, Nextdoor, and Petfinder about the animal.

WHAT TO DO IF NO ONE CLAIMS THE ABANDONED ANIMAL

3 dogs in a pen
Photo by Wendy Wei on Pexels.com

Supposing you live in a rural area and don’t have animal control or even an animal shelter, you might decide to just keep the cat or dog. And even after all of your other efforts and still no one has collected it, these are the steps to take.

  • If you already have your own pets, keep the stray cat or dog quarantined. It could have worms, illnesses, fleas, or ticks. Not to mention, it and your current pets would have to meet over a period of time to get used to each other.

It’s generally not a good idea to just throw a new pet into your mix of current pets. It’s stressful to both sets of animals. Which produces fear in cats and possibly urinary tract infections.

Until you get the stray dog or cat seen by a veterinarian, be sure to wash your hands each time you handle it.

  • Next, make sure you inform people in your neighborhood about finding a lost or stray animal. And post fliers.

The law favors the owner if you fail to do this. There’s a holding period for strays that varies by state before anyone else can own that pet. Also, it could be difficult on the dog or cat, if years down the road, they get uprooted to go back to their original owners for your failure to tell people and post the required info.

  • After covering your bases, make a veterinary appointment for the animal, if you haven’t already. Get it seen and make sure it’s healthy. It might need vaccines or de-worming.

Sometimes this step is in conjunction with the step above. If the pet is staying in an animal shelter, you might have to provide veterinary care until you can own it. But if you don’t have an animal shelter where you live, there’s more leeway. However, there’s still a time-frame before you can legally own someone else’s pet. Especially if you haven’t made any attempts to reunite them.

  • And provide the appropriate food for your new pet, along with clean, fresh water, and bedding. If your new pet is a cat, provide a litter box as well.
a dog at a veterinarian's office visit to help stop animal abandonment
how to help abandoned animals

A COUPLE OF FACTS ABOUT ANIMAL ABANDONMENT

Somewhere ~ 1.5 million healthy cats and dogs are euthanized each year in the United States. And statistics from animal shelters from 2020 indicate that ~70 million strays are living on the streets at any moment. However, just ~6.5 million cats and dogs combined enter shelters. While the rest survive the best they can, some suffer heat exhaustion in the summer. And others freeze during winter.

U.S. citizens pay ~$2 billion annually for the cost of maintaining animal shelters. While pet owners make up ~30% of the animals left behind in those shelters. And only approximately 10% of the animals in shelters are spayed or neutered.

So one of the primary ways you can help stop animal abandonment is to spay or neuter your pet, if you have one. Pets that aren’t spayed or neutered quickly overpopulate shelters. And also the streets.

HOW TO STOP ANIMAL ABANDONMENT

In addition to fixing your pets, you can also

  • Be an advocate for lost pets. Rather than dropping that lost animal you found off at animal control, try locating the owner first.
  • Avoid buying animals from pet stores and puppy mills. Instead, adopt a pet!

~ 3.2 million cats and dogs are adopted from shelters each year. And during the Pandemic we just experienced, adoptions for dogs were on the rise. However, on average, the Covid-19 pandemic affected pet adoptions last year. And the percentage of adopted cats was rising until the pandemic occurred.

  • Donate to a reputable animal rescue group. There are animal shelters, but there are also many different animal rescue groups.

They can cater to specific animals, types, breeds, etc. Helping these groups financially is necessary to keeping them operational. But also to provide veterinary care and other essentials for the animals.

  • Another way you can help stop animal abandonment and help abandoned animals is to volunteer at a local animal shelter. Not only will you see firsthand the ins and outs of shelter-life for unwanted or stray animals. But you can spend time with them. And oftentimes help them not feel so lonely.
  • Be a foster parent to a pet. Foster parents allow for less animals to be euthanized, which gives those pets more time to find permanent homes. Because, as a foster parent, your home is a temporary refuge for that pet as you help socialize and care for it.
  • Speak up or report animal abuse and neglect.
  • Lastly, be a responsible pet owner. Microchip your pets, update their tags, spay or neuter them, and only adopt another one if you’re in it for the long-haul.
2 people volunteering to help stop animal abandonment
Photo by Mikhail Nilov on Pexels.com

Thank you for taking the time to read this post. Your comments are appreciated.

Categories
Protecting Your Backyard Birds raising happy, healthy chickens

Best Way to Clean the Chicken Coop

Having backyard birds is fun most of the time. However, very little in life, in any part of our lives, doesn’t require some type of maintenance. And that includes backyard chickens. So, in this post, I’m going to go over the best way to clean the chicken coop.

If you have chickens, or have had chickens for quite a while, by now you’re aware that waiting for the muck to pile up isn’t the ideal way to scrub down a chicken coop. It’s an easier job on us, and healthier for the birds, if we tidy up regularly. Thus, this will be divided into daily, weekly, and monthly duties. Also, it’s important for you to wear a mask while dealing with the dust this can produce.

collection of chicken eggs in a teal styrofoam egg carton

Best Way to Daily Clean the Chicken Coop

  • At the end of each day, remove any leftover or remaining food in the feed dishes or feeders.

Allowing any remaining food to sit overnight can attract predators. Or pests and rodents. So, protect your flock, and don’t entice bugs or rodents by leaving food out. Empty out the feeders when your birds go in at night. And refill the feeders and waterers in the morning with fresh food and water.

  • Toward the end of the day, before the birds settle in, scrape off the feces from the chicken coop.

Bird poop, including that of your backyard chickens, has bacteria. So each day it needs to be cleared off, with a trowel or putty knife, from dropping boards and roosts. And then it can be added to your compost, if you have one.

  • Also, be sure to collect eggs.

If you have a lot of backyard chickens, this will need to be done a couple of times a day. Because if you don’t gather the eggs, they’re liable to break and make a big sticky mess when they pile up. Also, if the eggs break, the hens might eat the eggs. And then they might start breaking eggs on purpose, which is a bad habit to break.

putty knife used to scrape chicken coop

Best Way to Weekly Clean the Chicken Coop

  • Change out the nesting materials.

Whatever nesting material you use for your birds collects bacteria and ammonia. Thus, it needs to be refreshed weekly, otherwise, it could lead to health issues for your chickens.

  • Disinfect waterers and feeders.

You can make a DIY solution of equal parts vinegar and water to kill bacteria. And then scrub the waterers and feeders. Though, if you have a lot of birds, you might need to do this twice a week.

  • Wipe down walls and ceilings of the coop.

Spiderwebs/cobwebs and dust accumulate if not cleared away on a regular basis.

gallon bottle of vinegar for cleaning chicken coop

Best Way to Monthly Clean the Chicken Coop

If you remember to stay on top of the daily and weekly jobs of cleaning the coop, then the monthly tasks won’t be as difficult to handle.

  • Scrub the chicken coop.

Clean the walls, doors, and ceiling with the vinegar solution. And if you have windows, use a nontoxic glass spray.

  • Scrape the roosts.

Use a trowel or putty knife to scrape the excess droppings that have built up; and then disinfect with the vinegar solution.

person using a hose, spraying water
Photo by Karolina Grabowska on Pexels.com

Twice Yearly

This is a more in-depth, deep cleaning that only has to be done bi-annually. And ideally you should schedule it in the spring and fall.

  • Remove old nesting material, feathers, and droppings.

Use shovels, brooms, trowels, and a putty knife to accomplish this. Once done, add what you’ve collected to your compost.

  • Remove any remaining dust.

Using a hose, rinse down the coop.

  • Next, wash all the surfaces.

Use a brush and your vinegar solution to cleanse and disinfect the chicken coop. Make sure you clean the nesting boxes too! Afterward, give everything a thorough rinse with the hose.

  • Dry out the coop.

Try to get out as much excess water as you can. And then keep the doors (& windows, if you have them) open in order to dry out the chicken coop. If you have portable nesting boxes, put those and the feeders in the sun to dry faster.

  • Spread more nesting materials in coop.

After everything is fully dried, put more nesting material in the coop and nesting boxes. Wallow out depressions in the boxes where the hens will lay, because otherwise, the hens will scratch out the material.

kn95 or n95 masks for cleaning a chicken coop
Photo by CDC on Pexels.com

Things to Consider When Cleaning the Coop

I already mentioned wearing a mask when cleaning the chicken coop. This is very important, because birds carry diseases, some you’ve never even heard of. Also, you might think of wearing gloves and only shoes for out in the chicken yard. This is so you don’t bring anything into your home from the birds.

Only use natural cleaners like vinegar. And avoid anything that contains bleach, since that can be harmful to backyard chickens. Also, while you’re out cleaning their home, check to see if anything needs to be repaired. If there are sharp edges, a bird can get hurt. Or if there’s a hole in the wire, a predator could slip in.

If you have any questions or anything to add, I’d love to hear from you!

Categories
Extras recipes

Sicilian Pasta and Broccoli

This Sicilian pasta and broccoli recipe is one my mom made a lot when I was a kid. She’d tell us how, when she was growing up, her family was poor. So, they ate this meal weekly, because it was inexpensive. Also, it’s typically a meatless dish. However, the first time I prepared this for my own family, my husband complained about the evident lack of protein. Therefore, I have since added ground beef. And although it changes the original somewhat, it makes for an excellent meal.

There are a number of other Sicilian pasta and broccoli recipes to be found on the internet. But most of them are missing the tomatoes that are in this one. Or they add pine nuts. Though a lot of them are also meatless. However, whichever way you prefer, I hope you try this recipe and let me know what you think;.

Ingredients for Sicilian Pasta and Broccoli:

  • 1 lb ground beef
  • 12 oz broccoli florets, washed
  • 2 (14.5 oz) cans whole tomatoes, pulsed or diced in food processor with 2 cans of water
  • 12 oz elbow macaroni
  • 4 tbsp olive oil, divided (you can use extra virgin olive oil, butter, or any kind of oil you choose)
  • 1 tbsp minced fresh garlic
  • 1 tbsp each basil and oregano, divided
  • 2 1/2 tsp salt, divided
  • 1 tbsp garlic powder
  • 1/4 tsp pepper, divided
  • Shredded Parmesan or mozzarella cheese

Instructions for Pasta and Broccoli:

  • First, put 2 tbsp olive oil in 4.5 quart saucepan, heat over medium heat, and add ground beef, breaking up with a non-stick cooking spoon.
  • Next, while the ground beef is cooking, add 1 tbsp minced fresh garlic, 1/2 tbsp basil and 1/2 tbsp oregano, 1 tsp salt, and 1/8 tsp pepper, and stir till combined. And then stir occasionally.
  • Then cook 12 oz of elbow macaroni according to directions. But don’t drain water completely, because you might need to add some of it to broccoli and beef mixture.
  • When ground beef is browned, drain fat and set aside. In the same saucepan, on medium heat, add last 2 tbsp of olive oil, broccoli florets, remaining basil, oregano, 1 tbsp garlic powder, remaining 1 tsp salt, and 1/8 tsp pepper, tomatoes, 2 cans of water, and stir till combined, cooking ~ 6-8 minutes.
  • And add the ground beef to the broccoli mixture and stir till well combined.
  • With a slotted spoon, add the elbow macaroni to the mixture, adding some pasta water if needed. And stir till all combined.
  • Finally, serve and top with your favorite Italian cheese. Enjoy!
Sicilian pasta and broccoli

Thanks for stopping by! If you made this recipe, please let me know in the comments.

Categories
Extras recipes

Italian Sausage Sandwiches with Peppers and Onions

The first time I tasted Italian sausage sandwiches with peppers and onions was at Grapevine Mills mall in Texas. It was at this really cool eatery. And it featured all my favorite flavors: garlic, tomato, and onions on a crispy roll. But it was many years until I decided to try my hand at making the recipe.

These sandwiches are great for when you have company like a tailgating party.  And they contain delicious Italian sausage and sautéed vegetables. They are also really easy to make.  So, please enjoy this recipe.

Ingredients for Italian Sausage Sandwiches with Peppers and Onions:

Italian sausage cooking in a saucepan on the stove
  • ~1-1/2 lb of Mild or Sweet Italian Sausage links
  • 6 Ciabatta Rolls
  • 1 Bell Pepper, Seeded and Sliced
  • 1 Onion, Peeled and Thinly Sliced
  • 1/8 C Butter
  • 1/2 tsp Salt
  • 1/4 tsp Pepper

You’re probably familiar with cooking sausage. Maybe you grill it or broil it. You possibly even cook it on the stove in some oil.

However, the way I’m going to cover it might seem a little strange. Although, this way is better for cooking the sausages completely through. And also browning them evenly.

Instructions for Cooking Italian Sausage Sandwiches with Peppers and Onions:

  • First, put Italian sausage links in a saucepan. And fill pan with cold water until the sausages are covered.
  • Next, put the saucepan on the stove on med to med-hi heat.
  • Then, in another saucepan, melt the butter on med heat. And add your vegetables, salt, and pepper. Next, cover, cooking on med to med-low until vegetables are tender.
  • When the water begins to simmer in the sausage saucepan, cook ~6‐8 mins.
  • The internal temperature of the sausages should be at least 165 degrees; so, if they’ve reached that, then remove the pan from the burner.
  • Finally, turn off the heat source.
sliced red bell pepper, sliced white onion, and sliced tomato sautéing in pan

Now the sausage links are fully cooked. But they appear to be washed out. Though they won’t be for long.

Final Instructions:

  • Line a jelly roll pan with aluminum foil. And spray foil with non-stick cooking spray.
  • Next, place Italian sausage links on aluminum foil.
  • Then, turn the oven broiler on hi heat.
  • Finally, put the jelly roll pan under the broiler for 3-5 mins. Then flip sausages over to the other side. And broiler another 3-4 mins.

When the sausages are browned the way you like, take them out of the oven, and turn off the broiler.

We slice our Italian sausages in order for them to fit the Ciabatta rolls better. Though you can do it however you want. Then add your sautéed vegetables. And that’s it. A lot of times I’ll add sliced and seeded tomatoes as well. But you could also add Mozzarella cheese if you wanted.

Serve with your favorite side like roasted vegetables.