Categories
Extras recipes

Best Ways to Cook a Cockerel

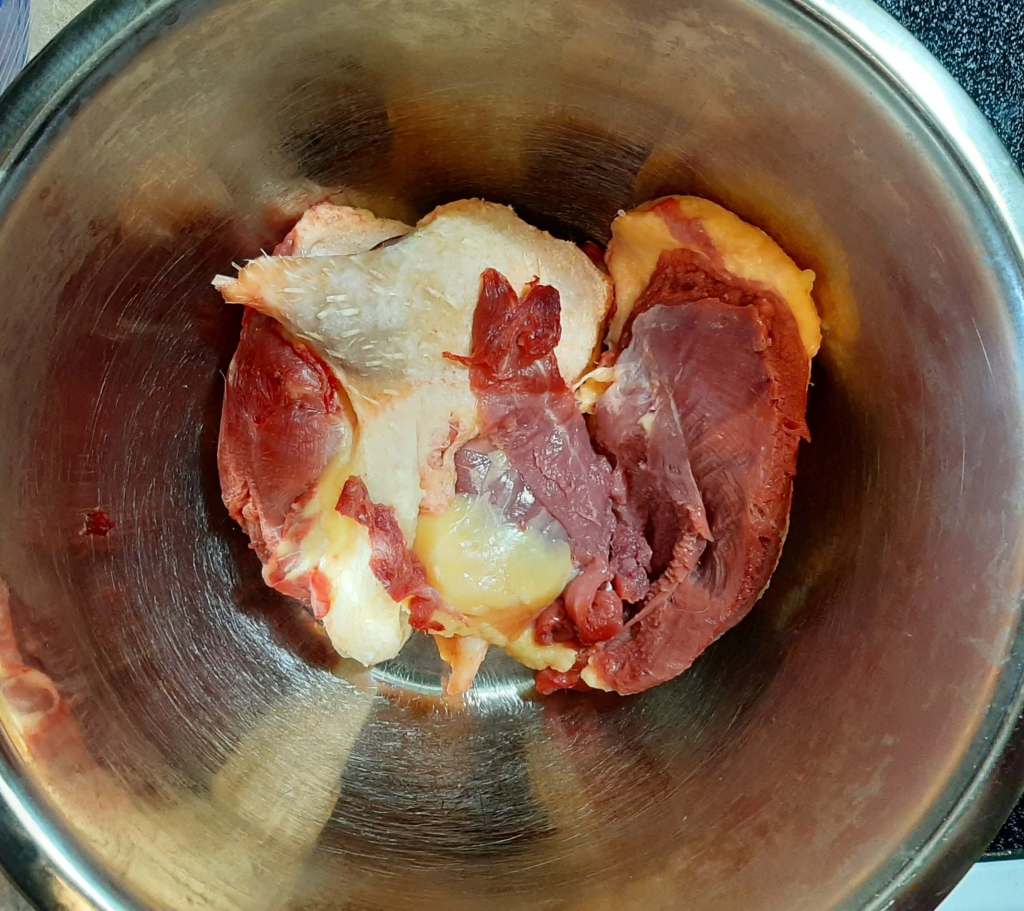
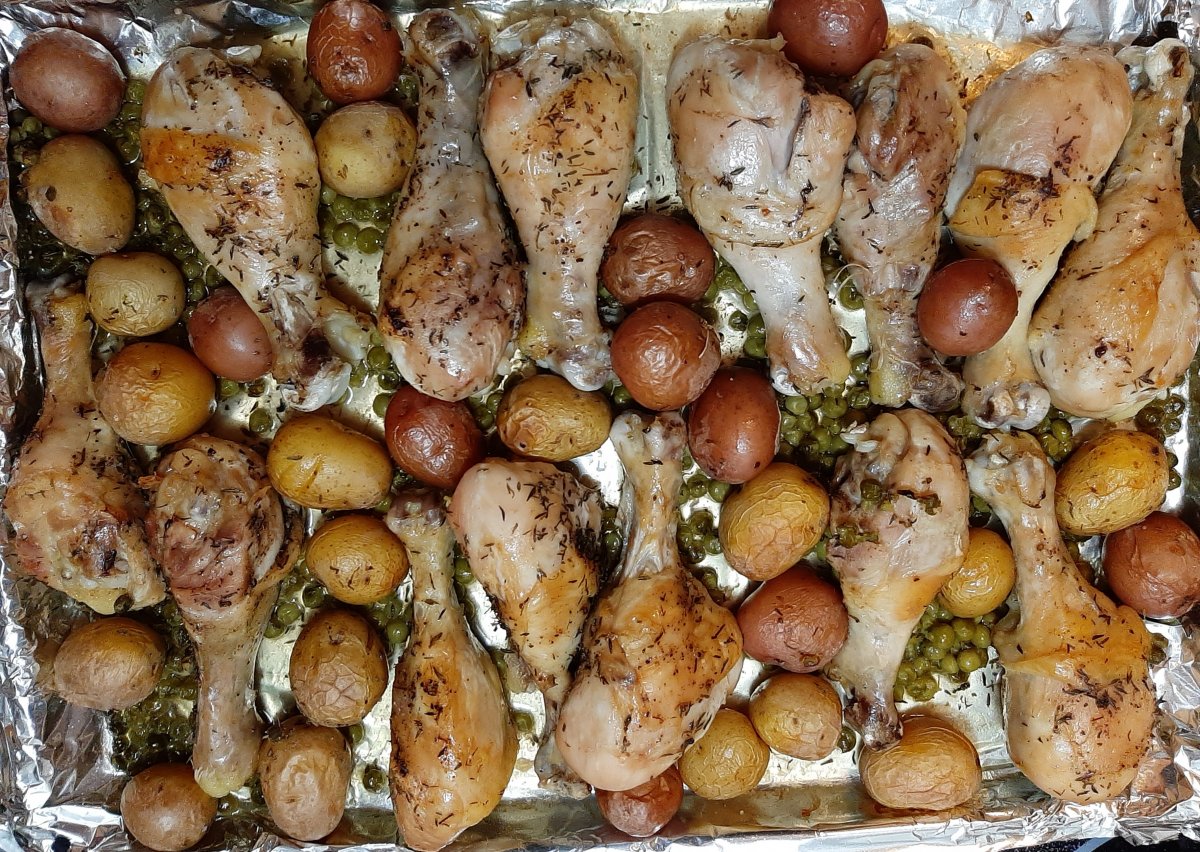
The first time I prepared chicken straight from our backyard, that was of non-broiler breed, I made it in one of the ways I usually do. Which means, in that case, I roasted it. But oh, was that a mistake. And because of that experience, I want to save you the trouble by sharing the best ways to cook a cockerel.

roasted chicken on a white plate
Photo by Maksim Goncharenok on Pexels.com

You may be asking, what is a cockerel? Well, a cockerel is basically a young rooster. The main difference between a regular rooster and a young one, being their age difference. But for our purposes, you don’t want to cook a regular old rooster. Or even one that’s a year old. And that’s due to the inherent toughness of roosters and layers in general.

young Black Ameraucana rooster

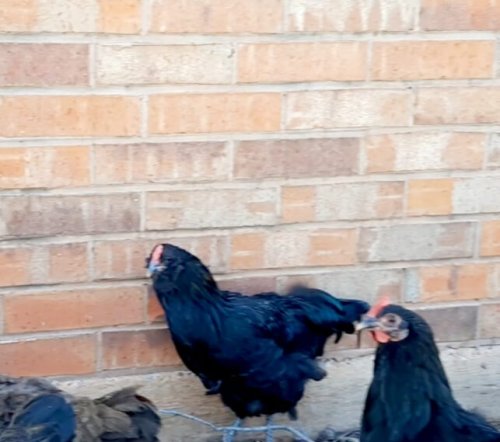
At this point you might be wondering if any of this applies to you. And if so, why would you want to slaughter any of your birds? Well, if you have layers with a mixed flock, there’s a high likelihood that you have a dual purpose breed. And supposing you have more than one rooster, or don’t want the one you have, then you have all of the elements needed to produce some of your own food.

To answer the question why though: because you would know what was going into your food, from the very beginning. There’s no doubt if the rooster was healthy, taken care of, and fed good, quality feed, that whatever meal you made of him would be healthier than the broilers from the grocery store. However you might have to get used to the flavor.

How to Cook a Cockerel

So what are the best ways to cook a young rooster? I already mentioned one way not to prepare it. And now I’ll go over the most preferable ways to prepare a cockerel.

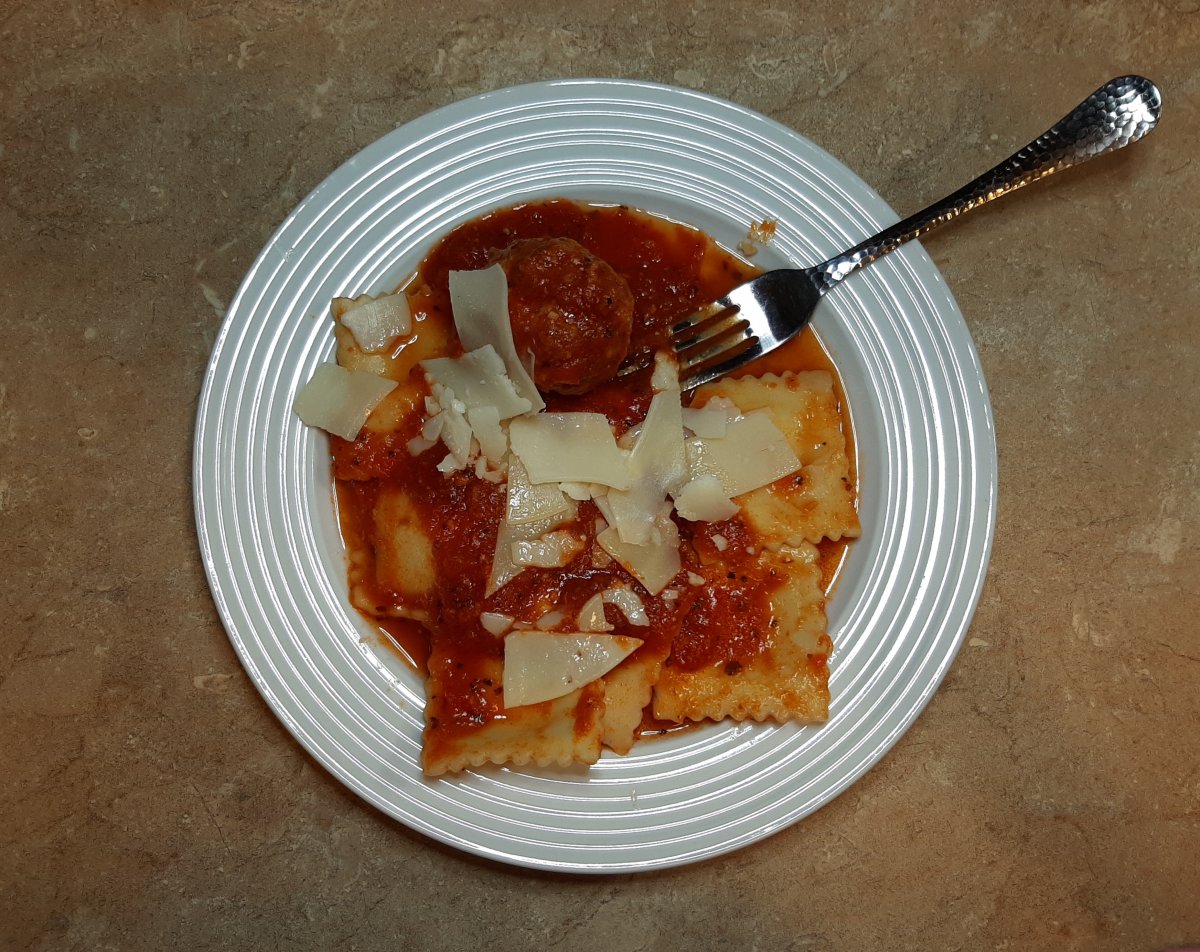
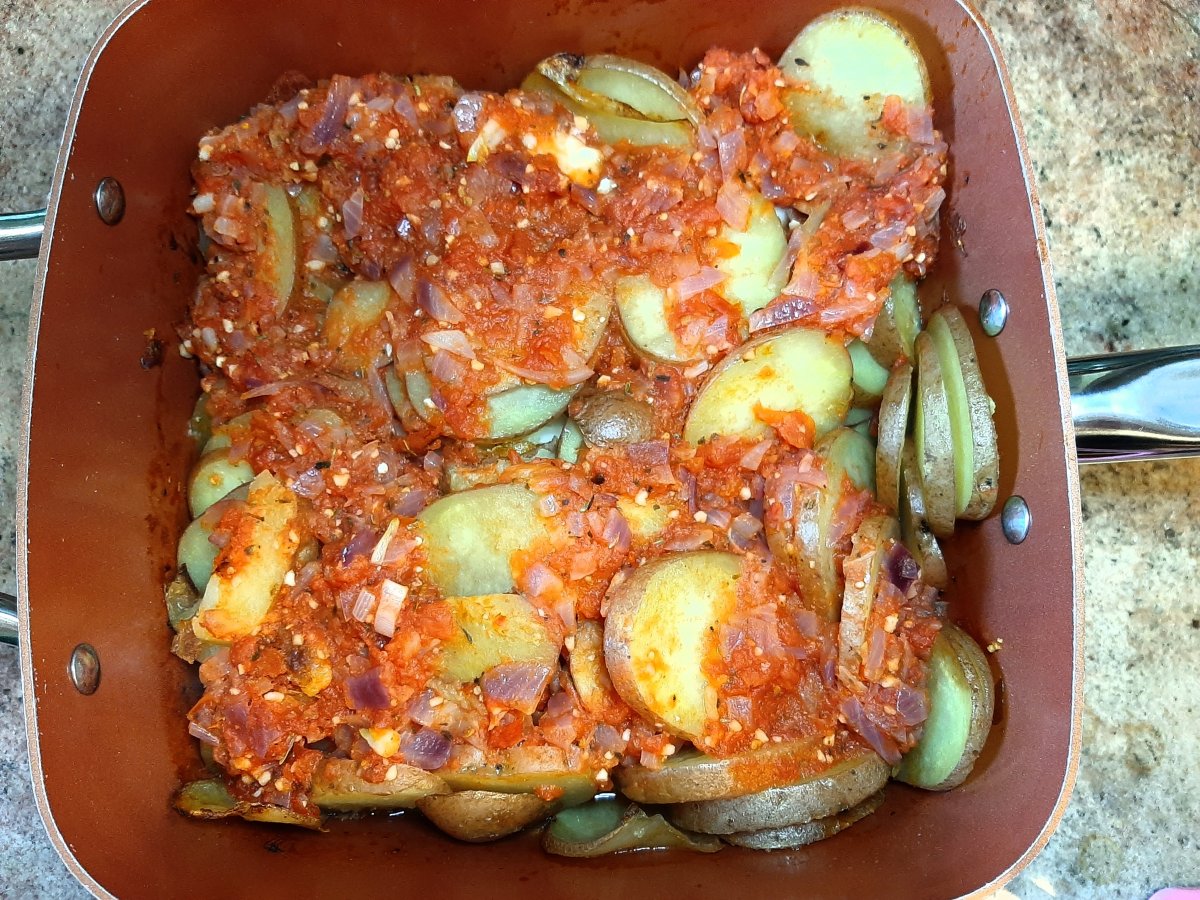
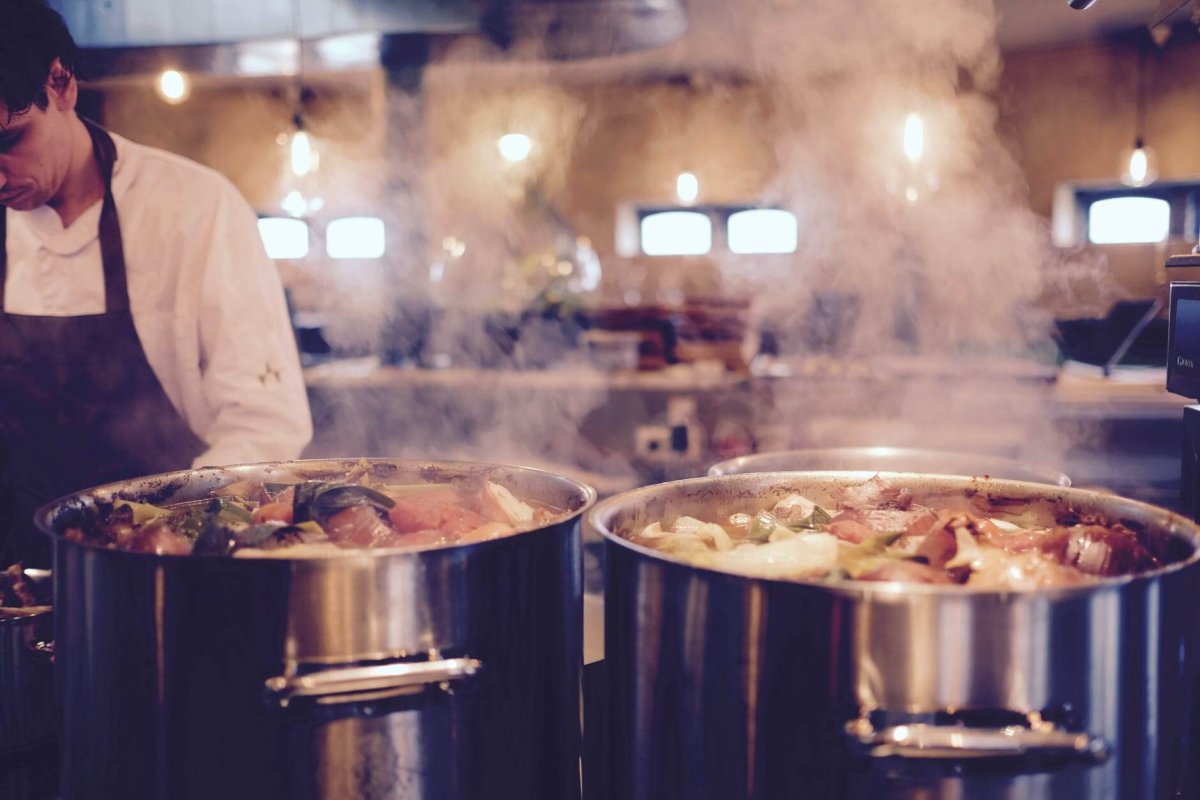
The best ways to cook a cockerel, young rooster, or a laying hen that’s been put out to pasture, so to speak, is in a soup or stew. Or prepare it in something that has a sauce or is full of flavor, like a casserole. For instance

  • Chicken Soup
Sicilian chicken soup with Acini di Pepe

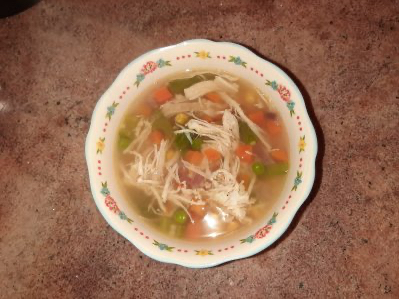
My first choice, for cooking your own backyard rooster, is some kind of chicken soup. The second time I prepared one of our own cockerels I made one of my mom’s chicken soup recipes. And it tasted like a typical grocery store chicken. My family and I couldn’t tell the difference at all, except we knew where the bird came from.

  • King Ranch Chicken
casserole of food
Photo by Ilaria on Pexels.com

Next, my second option is something like Southern Living’s King Ranch Chicken. It too is slow cooked and is full of flavor, which is essential to hide the gamey flavor of backyard bird.

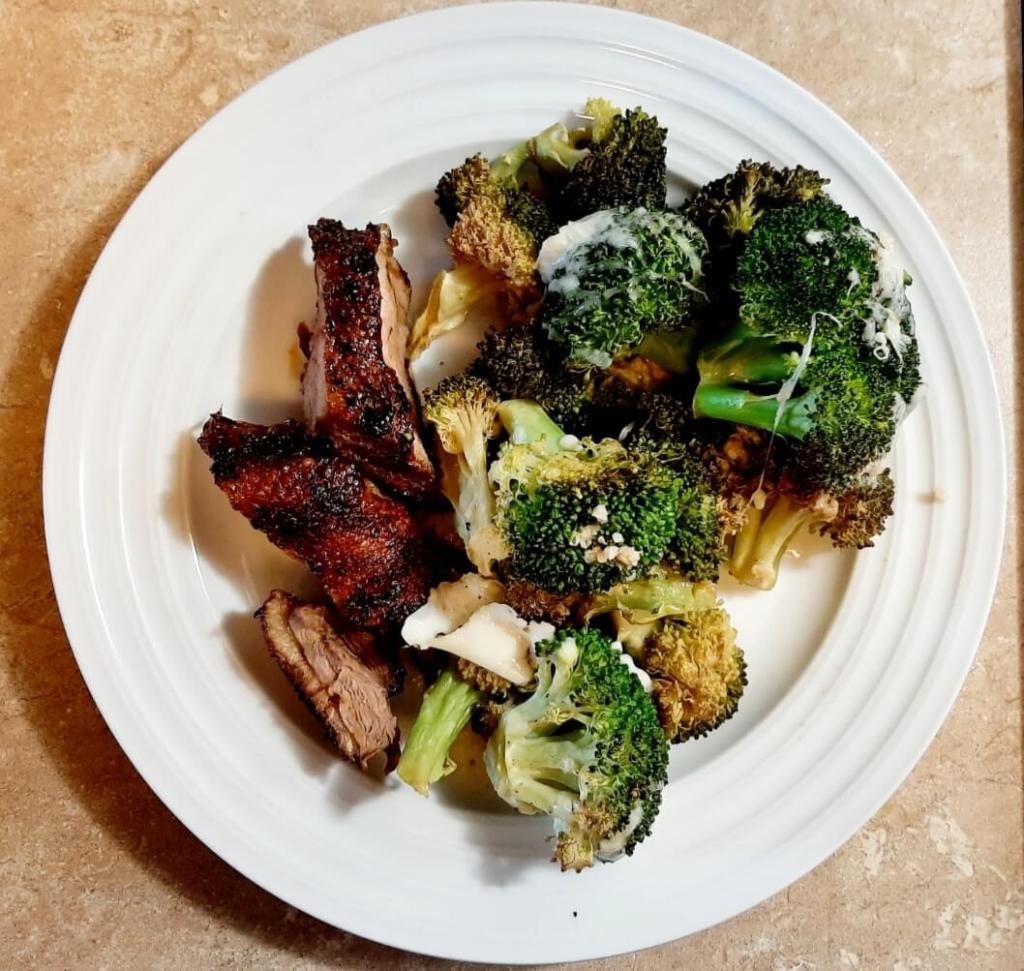
You don’t want to try roasting your backyard birds, unless you have broilers. And that’s because they won’t taste good. You’ll definitely notice the strong taste and tough meat on the bird. Which will dissuade you from ever wanting to try it again.

Have you ever tried eating or cooking backyard chicken? If so, what did you think? Thanks for stopping by, and please don’t hesitate to leave a comment!

Categories
Extras recipes

Marinated Duck Breast Recipe

This is the first time I’ve prepared duck, though I’ve tasted it before. Duck is one of those meats that is scientifically regarded as ‘white’ meat, while in cooking circles it’s more of a ‘red’ meat, due to its darker color. Also, it’s very fatty, but the taste is amazing. And it isn’t difficult to cook. Below is the marinated duck breast recipe I came up with.

Ingredients for the marinade:

Raw meat in a stainless steel bowl
  • Duck breast from 1 full size duck
  • Juice from one orange
  • Zest from one orange
  • 2 tbsp honey
  • 2 tbsp soy sauce
  • 2 tbsp rice vinegar
  • 1 tbsp minced garlic
  • 2 tbsp extra virgin olive oil
raw meat and seasonings in a freezer bag

Instructions for the marinade:

Add all of the ingredients to a large ziplock bag, and put in the refrigerator to marinate overnight.

After your duck has marinated all night, then you’re ready to cook.

Instructions for cooking marinated duck breast:

Meat cooking in a pan
  • Put 1-2 tbsp butter in non-stick pan on med heat.
  • Next, score the fat side of your duck breasts, and place the breasts in the pan, fat side down.
  • Then cook ~6-9 mins on each side; put a lid on the pan, to prevent the breasts from burning. They’re finished when the internal temp reaches 165 degrees.
Plate of cut up meat and broccoli

Serve with your favorite side, like broccoli or greens.

**My thoughts on duck: I really enjoyed it. The marinade was awesome, and even though this particular duck was over 1 year old, it wasn’t tough or gamey. And when talking to my mom about this recipe, she shared with me that she made duck one time, but she tried cooking it like turkey. However both she and my dad couldn’t eat it, because apparently it was awful. But I don’t recall this episode, because I wasn’t even around yet. I’m not sure I was even a thought at that moment.

Thanks for stopping by, and as always, feel free to ask a question or leave a comment!

Categories
Extras recipes

What to Put on Top of Oatmeal

Oatmeal is a staple breakfast food at our house. But we don’t do instant… anything, really. However don’t quote me on that, because I’d have to think about it. Anyway, there are tons of ways to spruce up your oatmeal, so I’m going to show you what to put on top of oatmeal to make it the best you’ve ever had.

round white ceramic bowl
Photo by Daria Shevtsova on Pexels.com

About 11-12 years ago we moved to Arizona for a job offer for my husband. Well, they rescinded the offer ~ 2 weeks after we got there. We were thousands of miles from family with no jobs. And the economy there was not good. We ended up homeless for 2 1/2 months, but we didn’t live on the streets, thankfully.

Instead we stayed in a state park. And it was there, amidst campfire living, that I learned to add different things to our oatmeal. To make the most out of a most unpleasant situation. And to this day our two oldest daughters reflect on that time period with nostalgia. I reflect on it with relief, that we didn’t have to stay there indefinitely. But I was thankful that we had a ‘place’ to stay.

Ingredients for basic oatmeal

  • 5 cups of old fashioned oatmeal
  • 7 cups of water
  • 5 tsps Truvia
  • 1/2 tsp cinnamon
  • 1/2 tsp salt
  • 1/8 tsp nutmeg
  • pinch of allspice

Instructions for basic oatmeal

  • Add your water to a saucepan and turn the burner on.
  • When the water begins to boil, add your oats.
  • Then stir in the remaining ingredients.
  • Lower the temperature of the burner to low.
  • Continue stirring from time to time to prevent over cooking.
  • The oatmeal will be cooked when it’s light and fluffy.
  • Then turn off the burner.

What to Put on top of Oatmeal

oatmeal with blueberries in bowl on table
Photo by MART PRODUCTION on Pexels.com

At this point, the oatmeal isn’t bland and flavorless, because you’ve added Truvia. Which is a blend of sugar and Stevia, and it’s what I normally use as a sweetener, unless I have to use white or brown sugar. And there are some spices in the oatmeal as well.

So now it’s time for some toppings. You could add raisins, which are always great, unless you don’t like them.

Other toppings you could try, which are favorites in my house, are sliced bananas and drained pineapple.

If you like dried fruit, you could also try dried apple slices, but cut them up, or put them in a food processor so they’re in smaller pieces.

sliced strawberries banana and blackberries
Photo by Suzy Hazelwood on Pexels.com

Pumpkin, chopped almonds or other nuts, and coconut flakes are also great, because not only do they taste amazing, but they’re very healthy.

Fresh fruits, chia seeds, yogurt, and granola are more options that not only taste awesome, but are also good for you.

Honey, maple syrup, and butter. These last three are what my husband and children add to their oatmeal, no matter what kind I make. You might say they have “sweet teeth”?

Some people even top their oatmeal with vegetables. Or eggs and it looks more like ramen than oatmeal. Though I’ve never tried it, so it might be delicious.

This list is certainly not exhaustive, so if you want more decadent and/or healthy ideas, then check this out.

And don’t forget to add milk. I put almond milk in mine, and that’s to make it creamier and to cool it off. But you can add whatever kind of milk you prefer.

Thanks for stopping by! Please feel free to ask a question or leave a comment!

Categories
Extras recipes

How to Cook Black Beans from Scratch

Since we love Mexican and Tex-Mex food at my house, (probably more so than eating Italian), I came up with this recipe. While both are easy to make, it seems that the former two are our go-to foods. Also, some foods are just staples. Like black beans. You can use them in soups or salads. And of course, they’re great simply as a side. Granted there are many brands of canned black beans, including refried. But DIY tastes so much better. So for today’s post I’m going to go over how to cook black beans from scratch.

I used 2 lbs of dry black beans this time. And that’s because I wanted to have leftovers. Because the last time I cooked black beans from scratch I only used 1 lb of dry beans. So it wasn’t enough for my family of 4. But you might want to split the recipe. Or you can freeze half of it. Here’s how you do that.

black beans in a blue strainer

Ingredients for Black Beans from Scratch:

  • 2 lbs dry black beans
  • ~2 – 2 1/2 qts water
  • 1/4 cup fresh cilantro or 1/8 cup dry cilantro
  • 1 Tbsp fresh minced garlic
  • 1 Tbsp cumin
  • ~2 1/2 – 3 tsp salt
  • 1/2 tsp pepper

How to Cook Black Beans from Scratch:

  • If you didn’t rinse and soak the beans overnight, then you can rinse and quick soak them now. Plan on at least an extra hour to your cooking time.

There’s a lot of disagreement on this point: to soak or not to soak? Well, I personally soak our beans. There have been times when I didn’t. And those times I noticed a significant difference in my comfort level. So now I do. Every time.

  • After soaking the beans, rinse them in a colander.

You can either reserve the soaking liquid, or dump it, and start with fresh.

  • Put the drained and rinsed beans back into the dutch oven. And cover with water. Or cover with the soaking liquid, adding enough water to be sure to cover the beans. But don’t add as much water as when soaking them.
  • Place the dutch oven on the stove. And turn the burner on med-hi.
  • Stir in your seasonings.
  • Lower the burner setting to a simmer when the water starts to boil. Then cover, cooking till the beans are soft, ~ 1 1/2 hrs to 2 hrs.
Cooked black beans in a pot

Be sure to check the water level, so the beans don’t get burned. And add more water if needed.

The beans are finished when they’re soft. You might have more liquid in it than you want. I typically cook our beans until most of the liquid is gone, but not till the beans are dry. Also, add more salt and pepper to taste.

You can serve these black beans from scratch as a side or as the main course, adding a different side. Like Mexican rice.

Thanks for stopping by!

Categories
Extras recipes

One Pan Baked Chicken Legs and Potatoes

This recipe has been in my family since I was little. In fact, I never knew it, but it’s also a generational recipe that goes back (at least) to my great grandmother on my mom’s side of the family. However, once again, I’ve done some tweaking over the years. Sometimes I add garlic, and other times I don’t. Though you can find a lot of different ways to prepare it. And most of them sound tasty. Also, this is a one-dish meal, which makes clean-up a breeze. Additionally baked chicken legs and potatoes are perfect any time of the year. So just keep reading to get the recipe.

The preparation time for this recipe is about 15-20 minutes. And even though cooking times vary, it took me 1 hour and 20 minutes. So plan on an hour at least, possibly longer. Also, the meal will serve 4 people. But you’ll have leftover drumsticks.

Baked Chicken Legs and Potatoes Ingredients:

  • ~ 6 lbs of chicken drumsticks
  • 2 lbs of Honey Sensation and Ruby Gold bite size potatoes (but if you don’t have those or would prefer a different kind, then get what you like)
  • 1 can of peas
  • ~ 2 tsps of salt
  • 1/2 tsp black pepper
  • 1 tsp thyme
Pan with Raw Chicken Legs, Potatoes, and Pease
This is what your chicken, potatoes, and peas will look like prior to putting it into the oven.

Baked Chicken Legs and Potatoes Instructions:

  • Preheat oven to 425 degrees.
  • Line a large jellyroll pan with foil. And then spray the foil with non-stick cooking spray.
  • Next, arrange the drumsticks onto the pan.
  • With ~ 3/4 – 1 tsp of the salt, 1/4 tsp of pepper, and 1/2 tsp of thyme, season one side of the chicken legs.
  • Then flip the legs over, and add the potatoes and peas.
  • And season everything evenly with the remainder of the spices.
  • Then put the pan into the oven, and cook for 45 minutes. Flip the legs over and cook until the internal temperature of the chicken reaches 165 degrees. And make sure the juices run clear.

Since baked chicken legs and potatoes are a one pan meal, you don’t need to come up with any sides. Unless you want to. And if you make this recipe, you’ll notice that there doesn’t appear to be many peas. I think it’s because they shrivel from cooking so long. Although they taste amazing from basting in the chicken juices all that time. But, if you want, you can add the peas during the last 15 minutes of cooking time.

Baked Chicken Legs and Potatoes on a White Plate
Categories
Extras recipes

Easy Recipe for Chicken Tacos

Most of us know that it’s healthier to make our own food than to eat out, order in, or buy pre-made. However it isn’t always feasible due to demands on our busy schedules. And sometimes it’s just nice to go out to for a bite to eat. But there are options available if you don’t want to spend a lot of time in the kitchen or sacrifice nutrition. Like this easy recipe for chicken tacos.

I first started making these chicken tacos within the past ~6 years. Because I wanted a simple recipe. And this is what I came up with. So I hope you enjoy them as much as we do.

Ingredients for Easy Chicken Tacos

  • 2 lbs chicken breast halves
  • 1 can mild Rotel, drained
  • 1/4 tsp cumin
  • 6-8 soft flour tortillas for tacos
  • 1 cups shredded cheddar cheese
shredded chicken with Rotel

Instructions for Easy Chicken Tacos

  • Put chicken breast halves in a pot and cover with water. Once the water boils, lower to a simmer, and cover the pot with a lid.
  • Cooking times vary, so when chicken is cooked (at 165 degrees), then turn off the burner, and remove the pot from heat source.
  • Drain off most of the water, leaving ~2 to 3 tablespoons of broth, and shred the chicken, using two forks.
  • Stir in drained Rotel and cumin. * I use only 1/2 can of Rotel, because I don’t want it too spicy.*
  • Then place the pot with shredded chicken, Rotel, and cumin back on the burner on med-low heat until the liquid evaporates.
  • Heat the tortillas in a tortilla warmer for 30 secs in the microwave. Or, if you don’t have one, you don’t need a tortilla warmer to heat them up. Here are some other options.
  • Top with shredded cheese and your other favorite toppings and a side.

I hope you try this recipe, and thanks for stopping by!

Categories
Extras recipes

Homemade Pasta Sauce with Meatballs

Today I’m sharing a recipe that I’ve been making and perfecting since my husband and I got married. And that was 20 years ago. It’s one of my family’s personal favorites. Therefore, they request it often. It’s a simple homemade pasta sauce with meatballs. Though, the meatballs are also homemade.

The base of this recipe is just a tomato sauce originally. Meaning that it contains no vegetables, other than tomatoes and garlic. However, garlic isn’t normally viewed as a vegetable. But, rather as an herb.

The Origin of My Homemade Pasta Sauce with Meatballs

This recipe is passed down from my mom’s side of the family. And I also got the basic meatball recipe from my mom, which includes pretty much all of the ingredients, except Italian sausage. But just like so many other recipes I’ve gotten over the years, I’ve tweaked this one as well. Additionally I add fresh vegetables to the sauce. And instead of just beef meatballs, I add Italian sausage.

Ingredients for Homemade Pasta Sauce with Meatballs:

  • 1 (29 oz) canned tomato sauce
  • 1 (14.5) oz canned whole tomatoes, diced or crushed in food processor
  • 6 oz of tomato paste
  • 5 oz of water
  • 1 bell pepper, chopped
  • 1/2 onion, chopped
  • 1 tbsp or 3 garlic cloves, minced
  • 2 tbsp dried oregano
  • 1 1/2 tbsp dried basil
  • 1 tsp salt
  • 1 tsp marjoram
  • 1/4 tsp black pepper
homemade pasta sauce with meatballs

Instructions for Homemade Pasta Sauce with Meatballs:

In a pot, add all of your ingredients and stir together on med to med-low heat.

Ingredients for Meatballs:

  • 1 lb lean ground beef
  • 1 lb ground mild or sweet Italian sausage
  • 1/4 cup of Italian bread crumbs
  • 1/4 shredded Parmesan cheese
  • 1 egg
  • 1/8 tsp dried mint

Instructions for Meatballs:

  • In a large bowl, add your ingredients together.
  • Then, using your hands, mix the ingredients together thoroughly.
  • Next, shape the mixture into balls. Also, you can make big meatballs or small ones, depending on what you prefer.
  • When you’ve used all of the meat mixture, add the meatballs to the sauce.
  • Get sauce to a boil. Then lower the temp to med low or low, till it’s simmering. And cover the pot with a lid. Furthermore, cooking times may vary. So cook until the meatballs are at 165 degrees at least.
homemade pasta sauce with meatballs

When the meatballs are cooked, serve with your favorite pasta and a salad. And top with grated parmesan cheese. Then enjoy! Thanks for reading this post.

Categories
Extras recipes

Italian Sausage Sandwiches with Peppers and Onions

The first time I tasted Italian sausage sandwiches with peppers and onions was at Grapevine Mills mall in Texas. It was at this really cool eatery. And it featured all my favorite flavors: garlic, tomato, and onions on a crispy roll. But it was many years until I decided to try my hand at making the recipe.

These sandwiches are great for when you have company like a tailgating party.  And they contain delicious Italian sausage and sautéed vegetables. They are also really easy to make.  So, please enjoy this recipe.

Ingredients for Italian Sausage Sandwiches with Peppers and Onions:

Italian sausage cooking in a saucepan on the stove
  • ~1-1/2 lb of Mild or Sweet Italian Sausage links
  • 6 Ciabatta Rolls
  • 1 Bell Pepper, Seeded and Sliced
  • 1 Onion, Peeled and Thinly Sliced
  • 1/8 C Butter
  • 1/2 tsp Salt
  • 1/4 tsp Pepper

You’re probably familiar with cooking sausage. Maybe you grill it or broil it. You possibly even cook it on the stove in some oil.

However, the way I’m going to cover it might seem a little strange. Although, this way is better for cooking the sausages completely through. And also browning them evenly.

Instructions for Cooking Italian Sausage Sandwiches with Peppers and Onions:

  • First, put Italian sausage links in a saucepan. And fill pan with cold water until the sausages are covered.
  • Next, put the saucepan on the stove on med to med-hi heat.
  • Then, in another saucepan, melt the butter on med heat. And add your vegetables, salt, and pepper. Next, cover, cooking on med to med-low until vegetables are tender.
  • When the water begins to simmer in the sausage saucepan, cook ~6‐8 mins.
  • The internal temperature of the sausages should be at least 165 degrees; so, if they’ve reached that, then remove the pan from the burner.
  • Finally, turn off the heat source.
sliced red bell pepper, sliced white onion, and sliced tomato sautéing in pan

Now the sausage links are fully cooked. But they appear to be washed out. Though they won’t be for long.

Final Instructions:

  • Line a jelly roll pan with aluminum foil. And spray foil with non-stick cooking spray.
  • Next, place Italian sausage links on aluminum foil.
  • Then, turn the oven broiler on hi heat.
  • Finally, put the jelly roll pan under the broiler for 3-5 mins. Then flip sausages over to the other side. And broiler another 3-4 mins.

When the sausages are browned the way you like, take them out of the oven, and turn off the broiler.

We slice our Italian sausages in order for them to fit the Ciabatta rolls better. Though you can do it however you want. Then add your sautéed vegetables. And that’s it. A lot of times I’ll add sliced and seeded tomatoes as well. But you could also add Mozzarella cheese if you wanted.

Serve with your favorite side like roasted vegetables.

Categories
Extras recipes

Sicilian Cod Fish Recipe

This Sicilian cod fish recipe is another one of my mom’s recipes from when she was growing up. It was passed down from her grandma.  And it’s delicious and easy to make. There are other ones out there, however they typically feature black olives. But I’m not sure if the difference in ingredients is due to where in Sicily each person/ group was located. Or perhaps it was because of money, or even preference. Though I hope you enjoy it as much as we do!

Ingredients for Sicilian Cod Fish Recipe:

  • 4 cod fillets
  • 1or 2 baking potatoes, (depending on the size) washed, peeled, and sliced
  • 1 (14.5 oz) can whole tomatoes, diced or pulsed in food processor
  • 1 red or white onion, peeled and diced
  • 1 cup flour
  • 1 tbsp minced garlic
  • 1 tsp garlic powder
  • 1/2 tsp salt
  • 1/4 tsp pepper
  • And Italian seasoning to taste
prepping Sicilian cod fish recipe

Instructions for Sicilian Cod Fish:

  • Heat oven to 350.
  • Mix flour, salt, pepper, and garlic powder together. And then coat the cod fillets with the flour mixture.
  • In a skillet, on medium heat, add just enough olive oil to sauté the fillets until they are lightly brown on each side.
  • Remove the fish when they’re browned on each side. And in the same pan, add the sliced potatoes, and cook till almost fork tender.
  • While the potatoes are cooking, in another skillet on medium heat, add olive oil and cook diced onion and minced garlic until onion is transparent, not burned.
  • When onion is transparent, add diced tomatoes and season to taste with salt, pepper, garlic powder, and Italian seasoning.  Simmer and then place fish and potatoes in an oven-proof casserole dish.  Pour the onion and tomato mix over the fish and the potatoes. Then bake at 350 for 30 minutes or until potatoes are cooked and tender.
prepping Sicilian cod fish recipe

I used red potatoes when I made this. But, the recipe calls for baking potatoes. However I just used what I had on hand.

Sicilian cod fish and potatoes

Thanks for stopping by! And don’t forget to leave a comment! And if you made this, let me know what you think.

Categories
Extras

Chicken Soup With Acini Di Pepe

This chicken soup with Acini di Pepe recipe was passed down through the generations on my mother’s side.  It goes back when, I’m told, her ancestors lived in Sicily till they emigrated to New York.

My mother learned this recipe from her mom.  And she probably started making it by the time she was a pre-teen.  Then she handed it down to her daughters.  It’s one of my kids’ favorite things to eat when they go to her house, even if it has stewed tomatoes in it.  Even though it can be considered an old recipe, it’s quite simple to make.  And I’ve even made some tweaks of my own.

Ingredients for Chicken Soup with Acini di Pepe

 chicken soup with mixed vegetables in cream colored bowl
  • 2 chicken breast halves
  • 1 Tbsp Better Than Bouillon Roasted Chicken Base
  • Salt to taste
  • 1/4 tsp pepper
  • 1 small diced red onion
  • 2 diced celery, leaves removed
  • 1 diced carrot or 10 oz package of mixed vegetables
  • 1/4-1/2 cup fresh or canned whole tomato, diced or pulsed in food processor
  • 1 Tbsp dry parsley
  • And 1/2 cup Acini di Pepe (Da Vinci is the brand I use)

Instructions

  • First, cook chicken with 1 Tbsp Better Than Bouillon chicken base in 2 1/2 quarts of water over medium high heat.  When it starts to boil, lower to a simmer, and put a lid on the pot.
  • Next, when the chicken is cooked, check if it has enough salt, and add salt to taste, if needed.
  • Then, remove chicken and shred once it’s cooked through.
  • Add pepper, onion, celery, tomatoes, and carrots or mixed vegetables to pot, and simmer for 9 minutes.
  • Next, add parsley, and increase heat to medium high, to get water boiling.
  • And add Acini di Pepe last, when everything is cooked, and cook for 8-9 minutes more in boiling water.
  • Then put shredded chicken back in pot and heat through. 
  • Finally, serve immediately.

I hope you enjoyed this post, and if you make this soup, please let me know what you think!  Also, feel free to change it as you like!