Categories
Chicks ducks Extras raising happy, healthy chickens

Raising Chicks and Ducklings Together

After having chickens for any length of time, it’s only natural to progress to another domestic bird. Moreover, it’s also reasonable to have questions about raising chicks and ducklings together. Unfortunately most websites discourage you from attempting it, saying there are too many differences. However raising both together isn’t impossible. And the two have more in common than not.

Most sites even claim you cannot incubate, hatch, and brood chicks and ducklings together. Although that is simply not true. It can be done, as others have done so. What’s more, I’ve also incubated, hatched and raised ducklings and chicks together a few times.

But it is a lot of work. Likewise you don’t have to raise them together. Unless you find yourself incubating some chicken eggs and end up getting some ducklings. In that case, you might want to read this.

Brooder Basics Between Ducklings and Chicks

Below you’ll find some key points when raising both ducklings and chicks together.

  • Feed is the same for both
red and white bag of medicated chick feed

First, you can feed either medicated or non-medicated chick starter to both birds, EXCEPT only give ducklings chick starter for 2-3 weeks. After that, switch to grower, unless your chick starter is only ~ 18% protein.

Yes, there used to be a time, long ago, when ducklings couldn’t have medicated feed. However that is no longer true. Read this article by the National Library of Medicine regarding the lack of adverse effects of medicated feed and ducks. Plus, it’s what I feed my ducklings, and they’ve never had a problem.

In addition to chick starter, you need to add niacin, because ducklings require 10mg of it to thrive and grow. And you can find it in brewer’s yeast. Just sprinkle ~ 1 TBSP per cup of feed. Further, it’s perfectly safe for chicks and chickens.

  • Feeders and fountains
yellow and white chick fountain in chick brooder with black chicks in background

Given the duck’s bill, provide chick starter in a shallow dish. Having water in a regular chick fountain works just fine. And Cornell University College of Veterinary Medicine even found that nipple waterers worked ok.

  • Brooder temperature is similar for both

Managing the brooder temperature till both kinds of poultry are feathered out is comparable. Even though the beginning temperature for each is a 5° difference, it’s important to not lose sight of monitoring how the birds react to the temperature. If they huddle, they’re cold. But if they’re moving as far away from the heat source as possible, then they’re hot. It’s really quite simple to just watch them.

  • Clean brooder & change bedding daily
hardware cloth and wood brooder with chicks and fountain

In order to prevent choking, ducklings (and ducks) drink water as they eat. And it’s this combo that creates a daily mess in the brooder. A big, wet, stinky mess, sometimes several times a day, that, unless cleaned up on a regular basis, could compromise the health of the chicks. And it’s this that I consider the biggest hurdle to raising ducklings and chicks together.

  • Bullying
digital art of brown chick makes fun of yellow duckling on black background
Digital Art, Courtesy of Sarah Smith

Harassment by ducklings is another often mentioned reason not to raise chicks and ducklings together. Though, in my experience, chicks are just as likely to bully ducklings.

We have successfully brooded and thus, raised a few generations of chicks and ducklings together. And this is what seems to work for us. First, understand that the type of bird you raise more of usually has the advantage. So if you raise more chicks, they might dominate the ducklings, for a time. But if you raise more ducklings, then they might be the antagonizers.

Tips for Brooding Chicks and Ducklings Together

duckling on screen of brooder
This is a picture of one of the ducklings we’ve raised with our chicks this year; they’re all juveniles now.

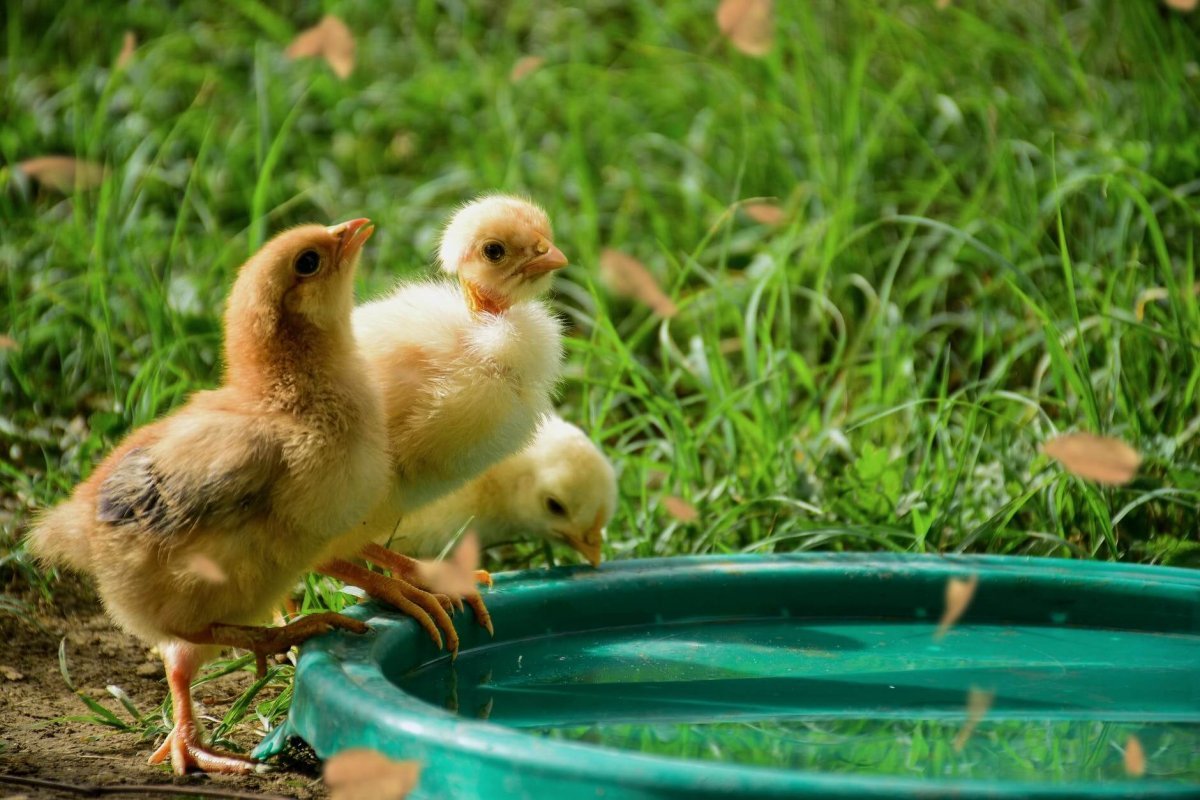
When we got our first ducklings, we started small: we only got 3. And since ducks are naturally bigger, we’ve kept our duckling and duck numbers small. Plus, we’ve incubated and hatched most of our own ducklings with our chicks. Also, given that ducklings take an extra week to incubate, the chicks have a week to get bigger and sturdier.

However, before jumping into raising babies together, decide first if you can commit the course. Especially due to the fourth item on the list: cleaning up the mess.

Then, if you are, resolve to
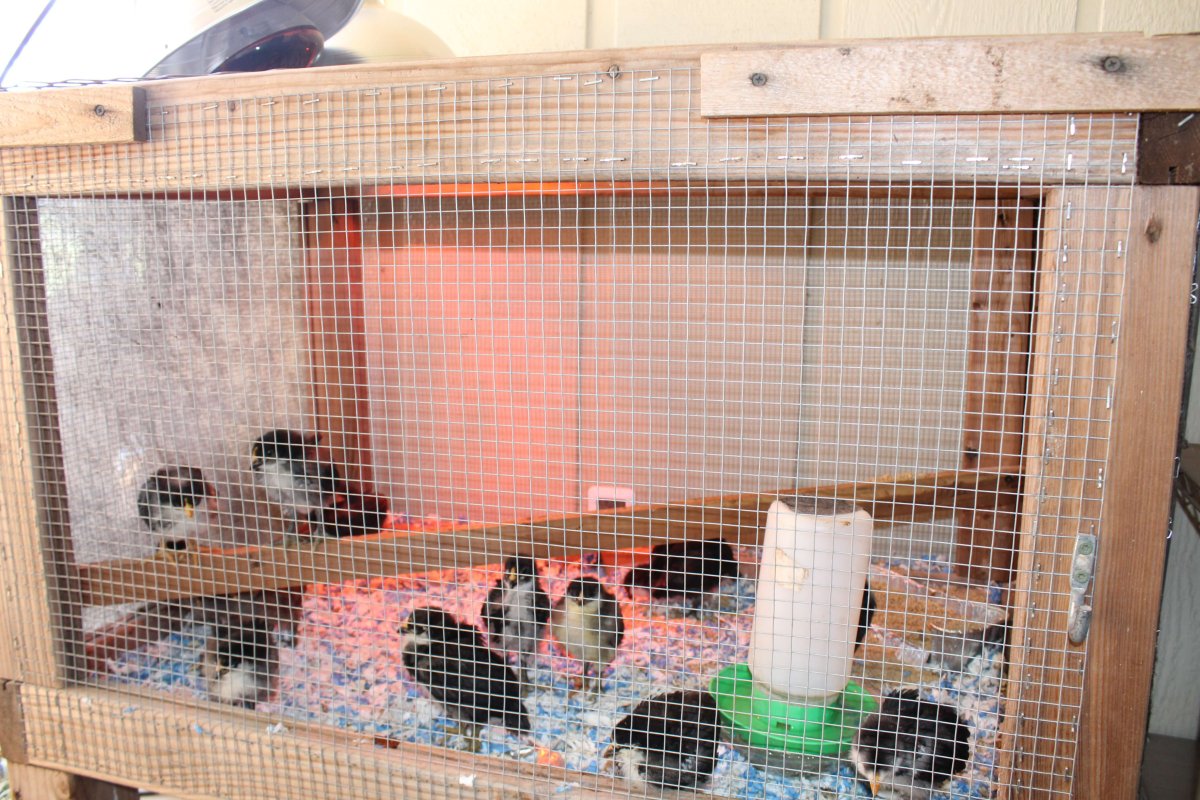
  • check your brooder
empty gray plastic box
This empty Rubbermaid box is the first brooder we use when raising chicks, ducks, or a combination. However, as they grow, we move them to something much larger.

Ducklings need almost 179% more space than chicks. Though both their space requirements will double in a month. So make sure the brooder box will house them both comfortably, along with their feed and water.

  • either incubate or purchase chicks before any ducklings
3 newly hatched chicks huddling near a chick fountain

Considering that ducklings are bigger than chicks, plan on having the chicks for ~ 5-7 days before the ducklings. This will help them gain a little weight and not be so wobbly before the newbies arrive.

  • have at least three times as many chicks as ducklings
person holding 2 ducklings

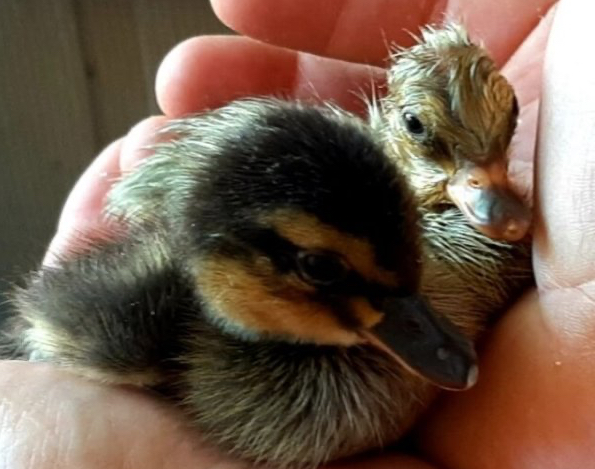
By having more chicks than ducklings, this could make the chicks the aggressors. Although the ducklings will be able to handle it, because they’re bigger. Also, depending on the breed you pick out, will likely determine if the chicks will be aggressive. But this is true for ducklings as well. We have mostly Ameraucana chickens, while we have Pekin and Mallard ducks. And they’re all pretty laid back. Plus, once both hit the juvenile or teenage years, the roles reverse.

Additionally, never get a lone chick, chicken, duck, duckling, or any type of backyard bird. It will get bullied and most likely have a miserable life. Therefore, at least get 2 ducklings and 8 chicks, if you want to start small.

It certainly is easier to raise them separately. But it’s not impossible to do both together, especially if you follow these tips. And don’t forget to clean the brooder and change the bedding daily.

Juvenile Ducks and Chickens

mixed flock of juvenile ducks and chickens hiding in bushes outside
You can’t see them all, but you should be able to see some chickens and ducks in this photo.

When raising ducklings with chicks, once they’re teenagers, they become a flock. They stay together, and feed and water together. I wouldn’t say that they’re buddies. But they consider themselves a unit of some sort.

At this stage, you continue to keep their grower feed the same, whatever you get. And continue supplying brewer’s yeast, as well as how you supply the feed and water.

Tips for Peaceful Integration

Before moving your juvenile ducks and chickens in with your existing flock, there are some things you’ll need to take care of, such as

  • make sure you have space
enclosed space with chicken wire and wooden beams
We were maxed out on space, so my husband is adding on to our coop.

Despite the fact ducks can be housed in the same coop as chickens, they need twice as much space as the latter. So just be certain you have enough of it, but you don’t need to make or get anything extra for them. However, if your chickens use a ramp to get in at night, make sure it’s not too steep for the ducks.

In addition, ducks can’t roost. And they prefer sleeping out in the open. Therefore, it might be ideal for the ducks to nest in the run, away from roosting chickens.

  • have coop well ventilated

According to Cornell University College of Veterinary Medicine, ducks ingest and eliminate more h2o than chickens. And their poo is over 90% moisture. For that reason, the coop needs adequate ventilation. Again, nothing fancy: a couple of predator-proof windows and air exhaust vents on the roof.

  • slowly integrate ducks and chickens with the flock
Juvenile ducks and chickens outside interacting

Either when the juvenile birds are feathered out, or the ducks are 3-4 weeks old, it’s time to introduce the newbies to your existing flock. The ducks will nearly be adult size by then, but the juvenile chickens will still be small-ish. Though that’s ok, once again, depending on your breed(s) of chickens. Mine don’t bother the young ones until they look like adults. **If you live somewhere cold, just make sure the temperature is ~ 75°, since the ducks won’t be fully feathered at 3 weeks.

So put the newbies in a pen where the existing birds can observe them, as they please, for a few days. Then watch for any aggressive behavior as they mingle with limit. Usually there are some curious chickens or some looking for food. Otherwise they’re not too interested after the initial inspection.

  • Supply extra water

While the newbies are being gawked at by the establishment, have a source of water available for the ducks. But it can be as simple as a pan of water, depending on the number of ducks you have. However the important thing is that they can get in to clean and maintain their feathers. When everyone is finally incorporated together, you can get a kiddie pool.

In Summary

If you really want to raise chicks and ducklings together, it’s totally doable, since they can eat the same food, and eat and drink out of the same containers. You just have to add brewer’s yeast to their diet. Plus, they can be brooded similarly.

But the mess is real, and you have to be diligent to clean it daily. And there are definitely some breeds of ducks that are bullies. Therefore, if you’re still unsure, I recommend doing some more research, by clicking on any of the links highlighted in this post.

Do you have ducks, or do you want ducks? If you have them, what’s the easiest part of raising them? Your comments are appreciated.

If you enjoyed this post, please like, share, and please don’t forget to follow!

Advertisement
Categories
Chicks raising happy, healthy chickens

Raising Baby Chicks

Recently I wrote an article about incubating chicken eggs. Whether or not you’ve ever experienced hatching chicks, it’s possible you’ve been around day-old chicks. And you can appreciate how raising baby chicks is different from raising adult birds.

In the event you have hatching chicks, or purchase them either from a feed store or a breeder, you first need a brooder. Because, just like incubating chicken eggs, you need a place to put the chicks. And that’s the purpose of the brooder.

The best brooder is a broody hen, because she can hatch and then raise her offspring. However it’s not ideal if you want a surplus of chicks. Or if the eggs aren’t due the same day, or you don’t have a broody hen.

And similar to incubating chicken eggs, temperature is just as important with raising chicks. So, if you purchase a brooder, it will have a heat source. Though, if you make your own, it will need one. But before we get into brooders and heat sources, let’s discuss chicks. How many do you want? Are you raising chickens for eggs? Or are you interested in meat production? Maybe a little of both? And how much space do you have? Having adequate space and shelter are 2 of the most important needs when raising and caring for chickens.

Raising Baby Chicks: Space

several black and white baby chicks eating and stretching in wooden and wire mesh brooder

There doesn’t seem to be much consensus in the chicken community as to how much space individual chicks should have. I’ve seen numbers from 1/2 square foot all the way to 5x that amount or more. However, there’s more agreement when it comes to adult birds. But back to baby chicks. They will grow, so their space should too; plan on them being in their brooders for about 6 weeks.

For example, each year that we’ve hatched our own eggs we always first put the hatchlings in a 2’3″L x 1”6″W x 16″H Rubbermaid box. And we’ve hatched maybe 1-3 broods each year for the past 6 years. However we don’t have big clutches. The first and this last time we had 13-14 chicks each; the biggest broods. And that’s because we like to be able to spend time with the chicks, imprinting on them. Further, if you incubate your own eggs, you have to figure that you’ll get unfertilized eggs as well.

And we don’t keep them in the Rubbermaid box. Currently our newest group is in a 3’2″L x 2’0″W x 22″H wood and wire mesh box. It’s the luxury mobile brooder; it can be moved out to the yard, so everyone can see each other when the time is right.

Now I’m going to cover brooders and heaters.

Brooders and Heaters

baby chicks roosting near chick fountain with red heat lamp giving light in background
This is a nighttime shot.
  • Conventional Hover Brooder: This looks just like a box, hence the Rubbermaid box. You can purchase one or make your own. And if you’re in a hurry, you can use cardboard. Also, the heater used in this type of brooder is infrared, which is ideal for lots of 200 chicks or less. And for every 50-75 chicks, provide a 250-watt red lamp. The red light is better, because it’s easier for the chicks to sleep, and it reduces pecking.
  • Radiant Heater/Brooder: This combusts gas to heat radiant surfaces. Plus, it has more even heat distribution. And it can be used for larger operations.
  • Hot Air Furnace: Forced air heats the air with gas, electricity, water, or diesel, and needs more ventilation. This type is also for larger scale operations.
  • Pancake Heater/Brooder: The Pancake brooder is similar to the Radiant brooder, in that they both use gas. And usually just heats the birds on the floor like the Radiant brooder.

Raising Baby Chicks: Temperature

250 watt red heat lamp sitting on steel diamond mesh

Now that you know about brooders and heaters, until the chicks feather out, the temperature in the brooder needs to start out at ~ 95°. But, week-to-week, decrease it by 5°, so the chicks can begin acclimating. By the time they reach 6 weeks old the temperature should be 65-70°.

You can keep a calibrated thermometer in the brooder. Or you can just watch the chicks and monitor their behavior. If all the chicks are huddled together under the light, cheeping or not, they’re cold. But if they’re spread out far from the light, wings held out from their bodies, and panting, they’re too hot. You want them moving around, displaying normal behavior: eating, drinking, sleeping, and playing. Therefore, if they act like they’re too cold or too hot, you can adjust the position and distance of the lamp until the chicks show you that they feel comfortable.

Furthermore, if using the 250-watt infrared red lamp, then have a back-up in case one goes out. In addition, some sites recommend placing the chicks in an unused room with the door closed. And then others warn of the dangers of this lamp and fires. While the danger is real, especially if out of sight, you should keep these tips in mind:

  • Keep hardware cloth or steel diamond mesh as a lid so the chicks have some ventilation. Also, that way your chicks won’t jump on the lamp. Plus, the lid protects against potential threats, such as pets or other creatures. And the chicks won’t be able to get out.
  • Use a lamp guard, so the hot bulb won’t be touching anything.
  • If you use a clamp, even better! That makes it secure.
  • And if using an extension cord, check for cuts, abrasions, and pinches. Don’t use a damaged cord. If it’s in bad shape, buy a new, thicker gauge extension cord, so it won’t be as prone to damage.
  • Lastly, make sure the fixture is porcelain, not plastic. The difference is whether or not there will be a fire.

Bedding

small animal paper bedding

Most chicken aficionados recommend pine shavings for chicks. And then switch to straw when they’re adults. In the past I used pine shavings too. However, when we lost our bunny, we had a whole lotta unopened bedding for him. So my husband wanted to use that for the chicks. Let me say, it’s far superior, in my opinion, to pine shavings for little chicks: there’s no dust, smell, and it’s more absorbent. Plus, since it’s paper, it’s safe if the chicks peck at it.

Don’t use newspaper. Not only is it non-absorbent and you’ll have a stinky problem, but it’s slick for the chicks. Thus, they could wind up spraddle or splay legged.

Spread about 2-4″ of litter on the bottom of the brooder. But you don’t need as much during warmer months. Though, if you have chicks when it’s cold, you’ll need more litter to help keep them warm.

Also, chicks are messy, like human babies, except they don’t wear diapers. So, to prevent disease, plan on changing out the bedding regularly. How regularly? I don’t know; that’s going to depend on the number of chicks you have. Obviously the more you have, the more they’ll scratch their feed, poop, pee, and generally make a mess. Additionally, the bigger they get, the bigger and sooner the messes will get.

Raising Baby Chicks: Food and Water

person interacting with baby chicks in a Rubbermaid brooder with chick feeder and fountain
This is one type of chick feeder; but there are others. Or you can make your own.

Always provide fresh, clean water for your chicks in a chick fountain; it’s the easiest set-up. And don’t be surprised to see chick poo in the water. That’s why it’ll need to be cleaned out. Additionally, in all of the broods we’ve had, I’ve never had any chicks who didn’t instinctively know how to drink or eat. But we’ve had a couple that had issues; my rooster who hatched 8 days early, so if we didn’t intervene he would’ve died. Thus, there might be extenuating circumstances where you might have to dip a chick’s beak into the water, to get them started.

Provide chick starter with 18-22% protein, because you want them to get a good start. Further, supply it in a feeder, in an attempt to keep it in one area. But, since chicks already know how to scratch their food, it’ll end up all over the brooder and look like perfectly good food. However, they’ll also poo all over the brooder, including their food. Thus, their poo will need to be removed and feeder refilled.

Their feed comes in medicated or non-medicated; medicated chick starter helps protect against coccidiosis. Though, it’s not a substitute for cleanliness or good practices. Also, their feed contains all the nutrients they need. But after a couple of weeks, if you want, you can try to offer them treats. However, don’t be surprised if they’re scared of you at first and your offerings, unless you have only a very small group. And if they are hand-raised, this is very rewarding, because in the long run they won’t be shy and will associate you with good things.

Playtime

Several molting baby chicks roosting and eating in a wooden and wire mesh brooder

Chickens, including baby chicks, love to roost when resting. You can add roosting poles a few inches from the bottom of the brooder as early as 2 weeks after hatch day. But not all of them will perch that early.

However, your chicks could be totally different from mine. This is from my own experience and from others with similar flocks. I’ve read about flocks where the chicks were 12 weeks old before they were interested in roosting. So go ahead and offer them; but it’s ok if the chicks aren’t interested.

And you can use different things for roosts: Dowels, 1x1x8″ wood board, bricks, or sticks from your yard. Just make sure they fit the brooder, are secure, and offer enough space per chick. But, trust me, they don’t all roost until they’re older.

Furthermore, chicks look like they’re molting within a few days of hatching, which is good; it means their feathers are coming in. And that also means, on warmer days, you can bring them outside in the sunshine. But if you don’t have a small brood, keep them in a collapsible pen or rabbit cage that they can’t get out of. That’s to keep them safe from predators, including pets, accidents, or getting lost.

We’ve only had 2 broods we didn’t keep enclosed when going outside. And that’s because there were only 4 chicks both times with 3 of us chick-sitting. Otherwise, they’re always locked up at such a young age, because they move too fast and aren’t aware of all the dangers. Remember, at this point, they’re able to fly a little bit!

Raising Baby Chicks: Safe Handling

3 newly hatched chicks on pine shavings next to chick fountain

Should you handle your chicks? How soon and how often? Well, yes, handle your chicks. If you purchase them, ASAP. But if you’re hatching them, wait till they’re ready to be moved to the brooder. However, don’t handle the chicks for very long, especially if they don’t have their feathers, because they’ll be cold. And hold them securely. Don’t walk around or hold them like you would a baby on their backs. Because it causes them distress, and they have difficulty breathing. Here are some other tips for holding chicks:

  • Wash your hands right after holding chicks and chickens.
  • If washing your hands isn’t an option, use hand sanitizer.
  • Supervise children when they are around and holding chicks; quick movements scare chicks.
  • Avoid eating where chickens live; and avoid touching your mouth before washing your hands.
  • And oversee the hand washing of young children.

In Conclusion

Raising baby chicks is a fun and educational experience, one the whole family can enjoy. And they grow so fast. Furthermore, there are things you can do to help your chicks make the transition into adult backyard birds, ensuring their health and production.

Thanks for stopping by! If you enjoyed this post, please like, post a comment, share, and please don’t forget to follow!