Providing helpful information regarding our feathered, feline, and canine friends while also sharing fun stories. And locally we provide pet sitting services.
Possibly you’ve seen the memes related to backyard chicken owners, with laughable signs of poultry addiction. They’re pretty funny and can be spot on. We were like that in the beginning too: Buying chicks, adolescent hens and roos, and always keeping our eyes open for more. But how do you know when you have enough? Or is it something you should figure out in advance? Well, I’m going to help answer the question, how many chickens should I have?
Assuming you’re not a commercial chicken breeder, and you already have birds, you likely know the legal situation of owning them where you live, whether in the city or suburbs. I live in the country on only an acre. And there are no limits like they have in the cities.
But if you’re interested in getting into chicken-keeping and you live in the city, a lot of cities are now embracing raising chickens. However most don’t allow roosters due to crowing. Plus, there are limits to how many birds you can keep. So, if you live in an area with restrictions, that answers the question about the number of birds you can have.
Although, if you live on acreage, you have more freedom in the amount of birds you can own. In addition, it will affect whether or not you’ll keep roosters, because then it’s solely your decision. And since space won’t be an issue, collecting too many birds will be a temptation. Trust me.
How to Decide Chicken Numbers
Digital Art, Courtesy of Sarah Smith
Before answering our question, I’m going to present some facts that influence chicken-keeping. And, in effect, they will help determine how many birds you should have.
Decide the Amount of Birds Based on Purpose:
Layers
Or show chickens
So the first way to come up with how many chickens you should have, is knowing your reason for having them. Are you getting chickens to sell eggs? Or do you want show birds for competitions?
Solution to Choosing Birds Based on Purpose:
If you’re getting layers, settle on how many eggs you want a week. Also, do you have a family? And are you going to try to sell eggs? Some breeds produce more eggs, and some less.
However, if you’re only getting chickens for personal use, then starting out with 3 to 4 hens will yield ~ dozen eggs weekly.
Similarly, for show birds, think about how many birds you need to enter competitions. But if you’re new to showing chickens, starting out with 3 birds is fine, as long as they’re all hens.
Calculate how much space you have for any and all chickens
And if you already have a coop with run, then measure its dimensions to determine how many chickens you can fit in it
Most experts agree that eachchickenneeds~ 3 to 4 square feet in the coop. That’s where the hens lay eggs and the birds shelter at night. And if there are predators, your birds will go there to hide.
In addition, figure another 5-10 square feet per bird in the run. The purpose of the run is managed safety for the birds to get exercise and daylight. But it’s not ideal for chickens to stay in confined space. They do best when they can forage and have free access to the whole yard. However, if you decide to keep your birds confined all the time, then calculate at least 10 square feet per bird.
And for pasture-raised or free-range chickens, plan on at least 108 square feet per bird
If you choose to have pasture-raised chickens, account for predators. So you’ll need a fence with hardware cloth to keep your chickens in and predators out. Living where we do, on only 1 acre, we don’t have that many. But we have neighbors with 5 acres who suffer coyote attacks, as well as other predator depredations to their flocks.
Determine Amount of Birds by Cost:
Financial commitment
Initial expenses are higher the more birds you have: if you don’t have a coop, you either need to build one yourself. Or you’ll have to buy one, or hire someone to build one. Plus, your monthly expenses on feed and bedding will be more. We spend ~ $200 a month on feed. And you’ll have added vet bills with more chickens. Not to mention, if you have electricity to your coop, that’s another expense that’s increased the more birds you have.
Can be labor intensive
Regardless of who makes the coop, they need one. Besides that and as a result of them eating, chickens poop a lot. So the more you have, the more poop you’ll have to clean out of their coop and run. Even if you clean in the recommended way, if you have 30 birds, it’s still a lot of work. Although, if you have a tractor coop and run, cleaning it won’t be as much of an issue, as I bring up here.
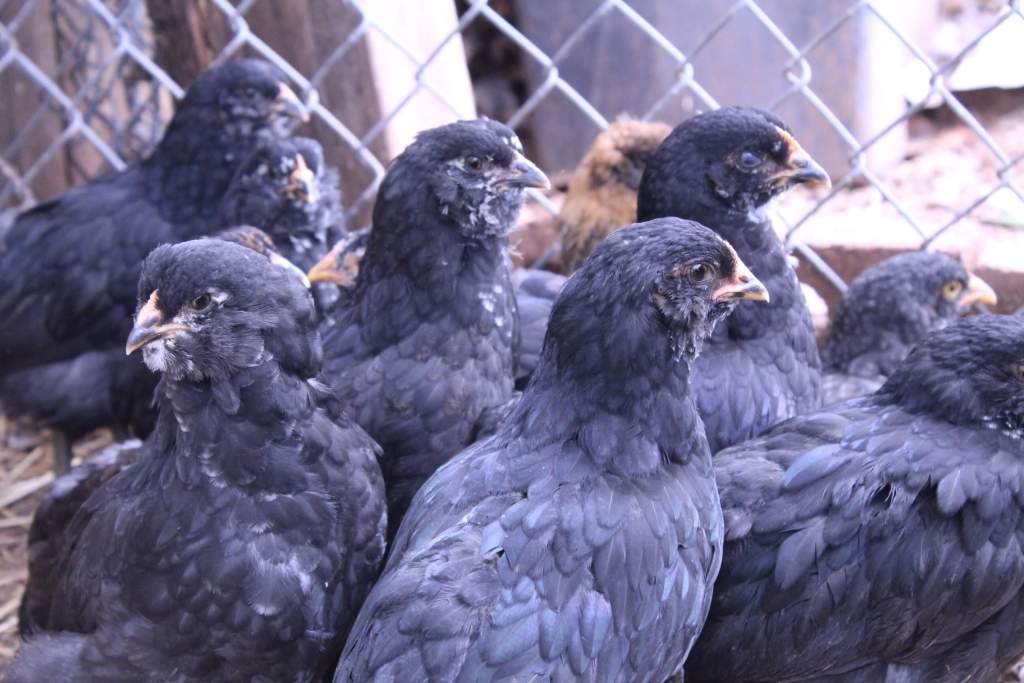
My 20-year-old daughter thinks we have too many birds. But I’m not there yet. Yes, we have over 30 chickens and several chicks. But some of our birds are close to retirement age with signs of a decrease in egg production, which is why I have chicks now. I’m preparing for the future.
So, How Many Chickens Should I Have
From center going clockwise, Davis, Bumblecade, and Smiley.
To recap, if you live in the city or suburbs, check with your municipalities to find out their regulations. And that will give you the information you need. Though, if you live in the country, determining numbers really comes down to how many you can manage, financial and otherwise.
However, 3-5 hens is a great start to chicken-keeping no matter where you live. It’s kinda like just getting your feet wet. But the one hard and fast rule is that there has to be a ratio of no less than 10 hens to every rooster. Or else your hens will get abused by too much attention. I’ve seen it, and it isn’t pretty. Therefore, just make sure you get all girls.
If you have chickens already, how many do you have? And are you happy with that amount? Also, how did you decide on your chicken numbers? Your comments are appreciated.
Thank you for taking the time to read this. If you enjoyed it, please like, share, and please don’t forget to follow!
Last month several cities from Texas to California experienced triple digit temperatures. And the heat was made worse some places by humidity. Plus, due to La Niña, the heat’s to last for many areas. Further, we all know how important heat safety is for people. But what about animals? For instance, do you know how to take care of chickens in hot weather?
I’m sure everyone’s heard or read the story of the recent heat that killed the ~ 2000 head of Kansas cattle. Although cattle can sweat to some degree, chickens can’t. Therefore, they rely on us to make sure they don’t overheat.
Most poultry people say that chickens will pant in 80° weather. However I think that can depend on where you live. If you live further north, your birds will be used to temperatures there, not where I live. And vice versa. So you see, birds can acclimate to the weather.
For example, I have a flock comprised of mostly Ameraucana chickens, and they don’t start panting until the temperature gets to the 90s. However, the juvenile birds aren’t used to the temperatures. Thus, they look more bothered by the heat than the adults. Also, if the weather were to spike suddenly, then that could be an issue for all of them.
Additionally, chickens normally lose heat through their combs, wattles, and other non-feathered areas. But once the temperatures rise, heat loss changes to evaporative, which causes water loss. And a lot of water loss causes changes in electrolyte balance.
Signs of Light and Moderate Heat Stress
Chickens may pant, but otherwise still run around normal
And they may hold their wings away from their bodies
Solution for Light to Moderate Heat Stress
Provide fresh clean water in waterers
Add ice to water
Cool down the run with hose
And provide icy treats
Dangerous Signs of Heat Exhaustion
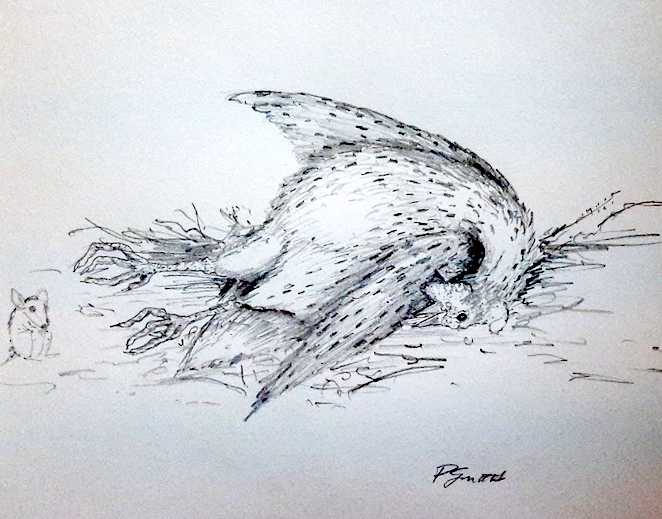
Sketch, Courtesy of Paul Smith
Panting heavily
Wings held away from body
Pale comb
Or lethargic, limp, or unconscious
Solution for Heat Exhaustion
If you have a chicken in the above conditions, act quickly, because they are in danger of dying. The most important thing is they need to be cooled quickly.
Submerge them (to their necks) in cool water, NOT ice water.
And then move them indoors until they recover.
Also, provide them with electrolyte water in a medicine dropper, careful not to aspirate them.
Preventing Heat Stress and Exhaustion
It’s much easier to prevent a problem than trying to fix one when it occurs. Since we already know it’s going to be a hot summer, especially in the Midwest, let’s plan on an ounce of prevention.
Shade
Trees in the yard
This is more of a longterm project. But when we moved into our house over 7 years ago, there were only 2 decent sized trees and a few small trees. Since living here, we’ve added several fruit trees and pruned the others. Now the birds have a choice of where to sit in the heat of the day.
Tarps or cloths on the run
If your run doesn’t have a roof, or it gets full sun, then add some type of shade for your birds.
Cooling Down the Coop and Run
Misters
For evaporative cooling, this is an inexpensive solution. However, if, like us, you have well water, then you’d have to add a salt system to your outside water. Then that would require a whole-house water filtration system. And it could be cost prohibitive. So…
Hose the run
Spray down the dirt in the run with the trusty hose. So long as you don’t make it muddy, it will cool it down for the birds. You can also spray the outside of the coop for added benefit.
Ventilation
Likely your run will have enough ventilation. But coops are usually smaller. So install
And if you have electricity to your coop, then add a fan for increased circulation. But be sure it and any cords are out of the birds’ reach.
Water
Provide multiple sources of fresh, clean, cool water
Locate them ideally in shady spots
When it starts heating up, add ice, ice blocks, or frozen water bottles to cool the water
Also, you can add electrolyte solution to the water
And since chickens won’t get in a kiddie pool, provide shallow pans of water for them to wade in
Feed
Given that digestion increases body temperature, birds won’t eat as much during hot weather. And you may notice egg production decrease as well. Therefore,
Feed your birds early morning or later in the day when it’s not as hot
Limit scratch
And provide frozen treats
Suggestions for Frozen Treats
Freeze 2 halves of a watermelon; then put them in the shade for your chickens to nibble on. It provides them with cool, refreshing water and ice. And it keeps them cool.
With 2 cans of whole kernel corn, fill each cup of a 12-cup muffin tin ~1/2 to 3/4 full and freeze. Then serve to your chickens in the shade.
Chicken Ice Cream
1-2 c of plain non-fat Greek yogurt
1 frozen banana, thawed slightly; then sliced
2 c frozen blueberries
In a large plate or medium bowl, mix all of the ingredients together. Then serve to your birds in the shade.
I have been making the above treats for my chickens since we started our real flock. And at first, they would react strongly to the frozen blueberries. However, now they’re all very used to them and welcome the cold treats. Plus, it’s funny to see them get brain freeze. They just shake it off and grab some more.
With the heat we’ve had, and are expected to have this summer, I have a list of things I’d like for our birds. Space is already at a maximum, so I want to increase the size of our coop, to make room for the newbies. Some of our hens and our senior rooster are in their older years. No telling how much longer they’ll be around.
Also, my husband needs to cut out a couple decent sized windows on their coop for air flow; then predator-proof them. And I would love to get an automatic waterer for them. But the only source of water is on the opposite end of our acre. We built their coop where there is more shade. So in order to supply them with an automatic waterer, we’d have to dig a trench and add pipe. My husband is going to look into it. With the amount of birds we have, it’s definitely worth it to me.
What do you do for your birds when it’s hot? Have you ever had one suffer heat exhaustion? What did you do? Your comments are appreciated.
If you enjoyed this post, please like, share, and please don’t forget to follow!
Recently I wrote a post about certain breeds of chickens that could fly. And in it I mentioned three ways to prevent your birds from taking flight. Today we’re going to look more closely at wing clipping. Because, if you’ve never done it, it can seem daunting. Also, I’ll explain how to clip a chicken’s wings. However, first, let’s find out whether or not you should clip their wings.
Reasons to Clip a Chicken’s Wings
This was our first raised garden bed, before we built the 4 1/2 foot fence dividing the yard. The chickens easily destroyed the garden, even with the chicken wire.
If you have pasture raised chickens, then you probably don’t have them penned in an enclosure all day. Which means you likely have fence line separating your property from your neighbor’s. And if you have one of those flighty breeds, they possibly frequent your neighbor’s yard. Therefore, the main reason to clip your birds’ wings is to keep them in their yard and on your property. And the other reasons to clip your chickens wings include:
To restrict your chickens from destroying your garden, if you have one
In addition, to keep them from getting mauled by a predator
And lastly, to prevent them from getting run over by any vehicles, if you happen to live close to any roads
On the other hand, if you keep your birds in the run, then you don’t need to worry about clipping any wings. But just having a fence won’t deter a determined bird. Because, as I mentioned in my last article, some breeds can fly over 10 feet!
Pros and Cons to Clipping a Chicken’s Wings
We had to clip this hen’s wings after administering first aid; she flew into a neighbor’s yard, and my husband rescued her from being nipped by their dogs. Thankfully they weren’t big dogs, or the damage would’ve been worse.
A couple of the advantages of wing clipping are that
It’s safe and painless if done correctly.
Compare it to a dog getting its claws trimmed; but NOT to declawing a cat. Or it can even be compared to a human getting a haircut.
In addition, your chickens will re-learn behavior.
If you’re new to this, you might be scratching your head, saying, What? But it’s true, chickens can be motivated and taught certain behaviors. I’ve witnessed it in my own birds. With each bird that needs and gets its wings clipped, they no longer need to be re-clipped, because they’ve learned not to cross those forbidden boundaries.
And wing clipping is temporary, since chickens molt.
Thus, new feathers come in.
The disadvantages to clipping chickens’ wings include
If done improperly, it can cause bleeding
Also, if birds are in open pastures, roaming at will, then wing clipping limits their ability to get away from predators
And finally, some people think it makes the birds look less attractive
When to Clip and When NOT to Clip
Believe it or not, there are actually better times and situations in which to clip your chickens’ wings, if that’s something you’re considering.
First off, don’t clipany chickens’ wings unless they have their adult feathers.
Chicks go through several molts before they’re finally considered adults themselves. And if you clip their wings while they’re juvenile, you’ll just have to do it again. And again. Also, when feathers are growing, there will be blood in the shafts.
Growing feathers are dark or black, while fully formed ones appear clear or white.
Another thing to think about is that they might not even be flighty. I agree with chickenskeepingsecrets.com, which says,
you can clip as soon as the birds have all their adult feathers and it becomes necessary. (Emphasis mine)
Therefore, if your birds aren’t showing signs that they’re flying over any fences, then there’s no need to do any wing clipping.
And lastly, I already pointed out that birds in open pastures, roaming at will, would be hindered if their wings were clipped.
The BEST time to clip your chickens’ wings is when you have adult backyard birds that are repeatedly being a nuisance, getting into the neighbor’s yard, your garden, a busy road, or trying to get mauled by some animal. And most, if not all, sites recommend you first catching your birds. Forget that. Who wants to chase around a bunch of chickens all day?
Rather, here’s the alternative: Before letting them out in the morning one day, have someone help you clip their wings, one bird at a time.
Materials Needed to Clip a Chicken’s Wings
Partner to help you
Having someone assist you with clipping your birds’ wings will make the job easier and go faster.
Good pair of scissors
You need sharp scissors to cut through the shafts; alternatively, you also could use sharp wire cutters
In the event you cut too short, and a feather starts to bleed, dip the feather in some styptic powder or alum, until it’s coated.
Instructions for Clipping a Chicken’s Wings
Tiny Nuts already had his wings clipped, as you can see by the straight edges.
Get your partner and supplies; and without letting any birds out, (if that’s possible) set-up shop for wing-clipping
Since we can stand up normal in our run without trouble, that’s where we usually take care of things, like wing clipping. However, your coop and run may be different. If it’s smaller, you’ll have to get creative.
One person needs to hold the bird firmly, making sure one chicken wing is held securely against the chicken, so there’s no flapping, while the other person will clip the free wing
Next, have the person with the scissors locate the primary feathers; are the shafts dark or clear? If they’re clear, then they’re safe to trim
With a steady hand, only trim back the 10 primary feathers about 50% of the way; (unless you know your bird is a flyer, start small)
Notice the primary feathers.
Now, it’s at this point that a lot of sites suggest you’d be finished, because supposedly having one clipped wing would unbalance a chicken. And I also tried that approach my first experience with wing clipping. However, all of my Ameraucana chickens can fly with this unbalanced design. Hence, we clipped more. And when that didn’t work, we clipped more, and jaggedly.
Thus, you can trim only one side, but if you have one of the flighty breeds, like me, you just might have to go back and trim more than just the primaries and make it look ugly; remember to check the shafts, and if they’re clear, you can trim them.
Digital Art Courtesy of Sarah Smith
Again, most sites adamantly advise against trimming the secondary feathers. But obviously they’ve never had Ameraucanas; otherwise they’d never suggest such a thing. Though there are a couple of sites that are familiar with the more determined flyers. So, if you have birds like I do, and you want to protect them, then you need to clip more than the primaries. It’s that, or risk them getting into trouble.
Conclusion
We’ve only had to re-clip this hen’s wings one other time after her molt; she learned her lesson after that.
Wing clipping, if done correctly, is a safe and painless way to prevent your chickens from flying from the safety of their enclosures. Whether a few chickens or the whole flock like to get out, clipping wings can offer some respite.
Clipping a chicken’s wings is only temporary, and many sites suggest repeating the procedure annually. However, I disagree. Just like waiting to see if wing clipping is even needed, wait and see if repeating the process is necessary.
For example, I have only had to repeat the procedure on one hen after her molt. The whole idea for me is to re-teach my birds, because they are teachable, contrary to what anyone might think. When their wings are clipped, they’re grounded for that time frame. So when their molt is ended, and their wings are in and they’re free again, hopefully they’ve learned not to go where we don’t want them to go. And that’s just what I’ve personally discovered happens with my own birds.
What do you think about wing clipping chickens? Have you ever done it?
Thanks for reading this post. Your comments are appreciated. If you liked this, please like, share, and please don’t forget to follow!
We spend a lot on our pets. Not just in money, but also in time. Americans reportedly spend ~$2300 annually just on their cats and dogs alone. And that doesn’t even take into account chicken, rabbit, and reptile lovers. But there are more signs you’re a crazy pet parent than spending money on your pet.
While there are plenty of “crazy lady” memes, I use the term crazy a bit more endearing. Additionally, I don’t single out just women, because I’ve found that men can be just as fond of their pets. However, what does “pet parent” even mean?
The term pet parent is considered by some people concerned with the rights of animals to be more acceptable than owner .
Collins English Dictionary
But it’s really just someone who looks after and cares for their pet.
Now I’ve broken this up into three sections. And the first set of signs you’re a crazy pet parent that we’re going to examine is the cat lover. Cats are mysterious. And they can be elusive or playful. Maybe you’re guilty of being crazy for cats. Or you know someone who’s heading down that path? Just continue reading to find out.
Signs You’re a Crazy Pet Parent: for Cats
This is Meow Meow, when she still lived in the house and there was only Moses to deal with. She liked to sleep on me.
You might be a crazy cat person if you
hardly goon vacation, because…what would happen to your cats?
mayeven read fiction books about cats with your kids
talk to your cats, and reply to them when they meow
have more than a couple of cats
gladly make room for your cat to be comfortable on your bed; BUT if some human tries the same, you push back
buy your cats presents
don’t get mad if your cat steps on your laptop keyboard, because she wanted to be near you and get your attention; however, now you just anticipate her and close your laptop to prevent any mess-ups
sleep with cat food on the nightstand so the kitty knows where it is; cats are creatures of habit, right?
don’t mind if the cat scratches the furniture
get them special treats
havecat themeditems
FaceTime your cat in the event you’re ever away
celebrate your cat’s birthday
sing to your cat or make up songs about your cat
and if your cat takes your chair when you vacate it, it’s ok; you just take another one and move all of your stuff over
The second set of signs you’re a crazy pet parent that we’re going to investigate is the chicken lover. Chicken popularity has been going strong since Covid. So that means more crazy chicken parents. And the newer parents you are, the crazier you are. Trust me, I know. But that doesn’t mean that old chicken parents stop being crazy for their backyard birds. We just share our joys with fellow crazies.
Signs You’re a Crazy Chicken Parent
You might be a crazy chicken person if you
talk to your chickens
don’t run the chickens out of the garden even if you’re spouse tells you to
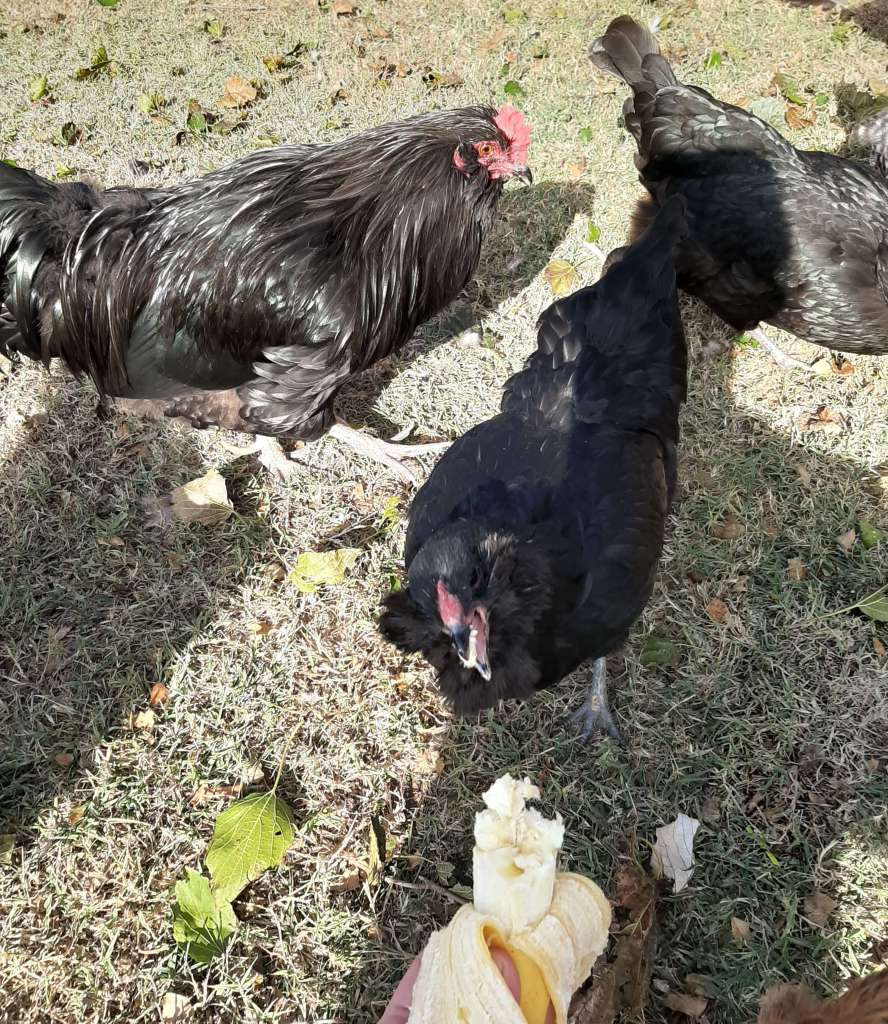
make special treatsfor them
cook oatmeal for your family; and then make extra for your chickens, because they love it
thank the chickens after they eat the treats
name all of your chickens
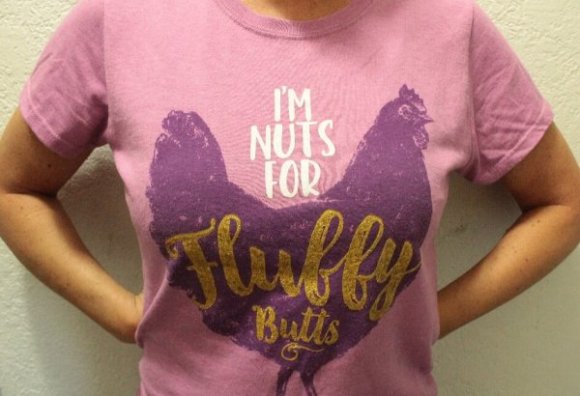
have chicken t-shirts and wear them proudly
read chicken blogs
have chicken themed items in and out of your house
save food for your birds, and ask others to do so as well
encourage the rooster; and believe that he actually listens
are happier seeing and watching your chickens than TV; and they think you’re pretty darn special too
talk about your chickens to anyone who will listen, but you’re starting to notice their eyes glaze over
might have even let a weak baby chick sleep in your bed, snuggled in a hand towel
and when you go outside, your backyard birds flock to you
Finally, the last signs that you’re a crazy pet parent we’re going to consider is the dog lover. Dogs have been man’s best friend since, what seems, the beginning of time. They’re faithful, loving, and trustworthy. What’s not to like?
leave TV or music on for your dog when you’re ever away
buy your dog toys
flavor your dog’s food, because they don’t like plain dog food
take your dog on outings
let your dog sleep on your bed, even if they take up most of the bed
spell words out so your dog won’t understand
don’t mind dog hair on your clothes, furniture, or the occasional fur in your food
baby-talk to your dog, no matter their age
love giving your dog belly rubs, and your dog loves it too
let your dog chew on you, because it’s how they say, “I love you”
have birthday parties for your dog
usually don’t go out of town for long, or go far
ignore anything your dog does that could be construed as badbehavior, because you love your dog; and “they’re such a good dog,” you say in the baby voice
and if you’ve ever stayed at a non dog-friendly hotel before, you might’ve snuck your dog in. Don’t worry. I won’t tell, if you won’t
There are some common traits all of these pet parents have in common that I have yet to list. Therefore, if you have cats, dogs, and chickens, please keep reading.
On occasion, you’ve been known to spend more on pet food, bedding, litter, etc, than on your own groceries.
Furthermore, you have more pictures of your pets than your children.
And you talk more about your pets than your kids. In addition, you’re more animated when you share about your pets.
Additionally, you post more on social media regarding your pets.
Also, going out of town for any type of vacation is difficult, because of all of your pets. So you don’t even know what a vacation is anymore. But it’s worth it, because who will love your pets like you do?
And you admit that the word “fret” is in your vocabulary regarding your pets occasionally.
Finally, you might be a crazy pet parent if your neighbors are constantly trying to bring you strays.
Conclusion
This concludes the signs you’re a crazy pet parent. And I confess that I’m guilty of 98% of them. But it’s ok, because I love my pets. And if it turns out that you’re a crazy pet parent, it’s perfectly ok. Because, you’re accepted.
Also, I’m going on vacation next week for 10 days. So I might not post. We haven’t had a real vacation in 4 years. But back then we didn’t have the extra cats and our dog that we have now. We had Moses, but he was allowed to come on vacation with us then.
In addition, the place where we’re going now is not pet-friendly. Although, that hardly matters, because Sophie would need tranquilizers to go on vacation. Anyway, this will be the first time that we left Sophie and Poppy for an extended time. So we have some anxiety about that. Therefore, if you think of it, please pray for our pets and neighbors. We have a lot of pets. Over 30, and some chicks that we’ll eventually sell. Thus, it’s a huge responsibility, however we have great neighbors.
Are you a fellow crazy pet parent? Do you struggle with going out of town because of your fur or feather babies? Or do you have awesome neighbors who help you out? Let me know how you handle these issues in a comment. And thanks for taking the time to read this post. Also, if you enjoyed this piece, please like, and follow for more.
We often trade nice spring temperatures for severe spring storms. And for broody hens and their chicks outside, it can be a dangerous time. Because, if a chick gets wet, it can suffer hypothermia. Therefore, you need to know how to revive a baby chick.
If you have chickens for any number of years, you’ll see many things. And sometimes it can be all at once. Like broody hens, chicks, illnesses, near death, and even revival from death.
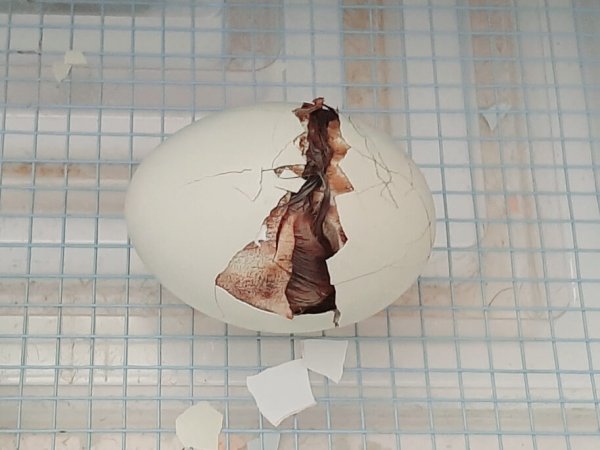
For example, we have 4 broody hens with only 2 hatched chicks right now. And that’s not including the chicks we incubated and hatched recently. Well, the last set of thunderstorms we had flooded an area near the back of our coop. And for some reason, one broody hen and her chick stayed out in the rain. So, when we went to check on the birds, it was lifeless. Or it appeared that way.
Thus, I’m going to cover different methods to revive baby chicks, since you might find chicks at various stages of weakness.
How to Revive a Baby Chick:
Weak and Dehydrated Chicks
The first time you might need to revive a baby chick is if you order chicks from a hatchery. That’s because the nature of shipping chicks includes lack of temperature control and long shipping times. And the lack of temperature control raises a chick’s body temperature, causing it to pant, thereby resulting in dehydration.
Signs of a Weak and Dehydrated Chick
Difficulty breathing, such as panting
Isolation
Sleepiness
And refusal to eat and drink
The first thing to do when you get mail order chicks is put them in the brooder that you prepared ahead of time. Next, provide lukewarm water, because they had a long trip. You don’t want to give them cold water, since it could shock their systems. And as they’re getting settled, do an assessment on them. Do they look healthy? Are any of them showing symptoms listed above?
Solution for Weak and Dehydrated Chicks
In the event you have a weak and/or dehydrated chick, do the following:
Remove the chick from the brooder, and wrap it in a hand towel
Next, provide electrolytes; you can give this to all of the chicks
If the chick is too weak to drink on its own, assist it every ~ 10-15 minutes for an hour. (You’ll know a chick is drinking when it tips its head and smacks its beak. Don’t force anything down its beak; it can go into the lungs and cause more issues.) Then, steadily extend the time between assisted waterings. And keep it away from direct heat, since this could keep it dehydrated. However, keep it warm in a hand towel.
In addition, after ~ 2 days, you can give a chick some egg yolk
Chicks who were simply chilled should rebound within an hour
How to Revive a Baby Chick:
This is the day after the storm. And you can see the small one is just fine.
Wet and Hypothermic Chicks
If you incubate and raise your own chicks, it’s possible you won’t ever have to revive a wet and hypothermic chick. Although, if you have chickens that tend to go broody, that’s another story. Especially with spring weather and the threat of flooding.
But spring weather isn’t the only cause for concern. Sprinkler systems and chicks falling into waterers can also cause baby chicks to quickly fall prey to hypothermia.
Signs of Wet and Hypothermic Chicks
Your first sign you have a wet and hypothermic chick is that the chick is wet; it’s pretty obvious. And the other sign is that it might look dead. It may even flop lifelessly, when you pick it up, but all is not lost, if you’re quick. And you don’t give up.
Solution for Wet and Hypothermic Chicks
First, bring the chick inside
Next, gently dry it with a towel to get rid of the extra moisture
Then, blow dry the chick on the lowest setting; but holding it, making sure the air isn’t too hot to burn the chick
Some sites recommend putting the chick straight under a heat lamp after this. However, I think it should depend upon the severity of the symptoms. If your chick was conscious when you found it, then after it’s dry, put it under a heat lamp. But, if your chick was unresponsive, then it will take you a while to get it to waken. It will be weak and tired, although persevere, so it doesn’t die.
When we rescued the chick, the momma hen was so distraught; it was storming, and we took her baby away. So after we revived her chick, and it was in the clear, we brought the momma hen inside. (We didn’t want to risk putting the baby back out in the wet and cold. And we didn’t want the momma hen to needlessly suffer.) Then, after getting it situated and set-up, we put both of them in a dog crate. Just looking at the chick the next day, you couldn’t tell it had almost died.
Have you ever had to revive a baby chick? Or did a baby chick ever get caught in the rain or waterer?
Thanks for stopping by! If you enjoyed this post, please like, post a comment, share, and please don’t forget to follow!
When we were younger we learned that feathers and hollow bones allowed birds to fly. You may be curious to know that chickens also possess those traits. And yet, can chickens fly? Well, yes and no.
When chickens are only a few weeks old, they can fly or flit around. And that’s the closest they come to resembling flying around like other birds. But when they’re older, they don’t fly so much as use their wings to propel up and over objects. So they don’t cover much distance. That’s because not all of their bones are hollow.
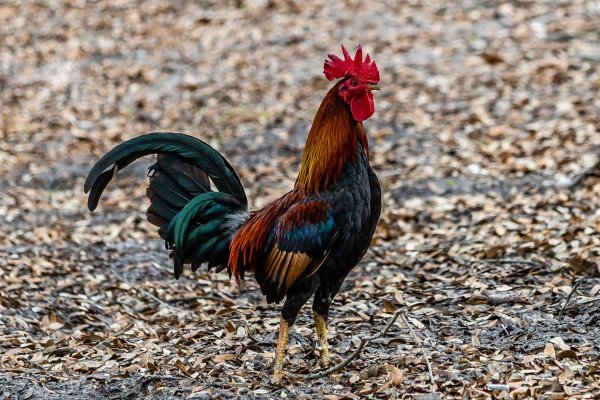
Modern poultry descends from the Red Jungle Fowl, which has the ability to take off and fly away from danger. However this amazing bird isn’t suited for long flights. And present-day chickens have had this capability bred out of them with heavier body mass.
But still, there are backyard birds that have maintained this talent.
Chicken Breeds that can “Sort of” Fly
Megatron, the rooster boss.
The following is a list of breeds that can manage the art of flying better than their counterparts.
Heavier birds, like Wyandottes and Black Sex-links, can’t even get off the ground. Although, why would chickens want to fly in the first place?
Reasons Chickens Might Fly
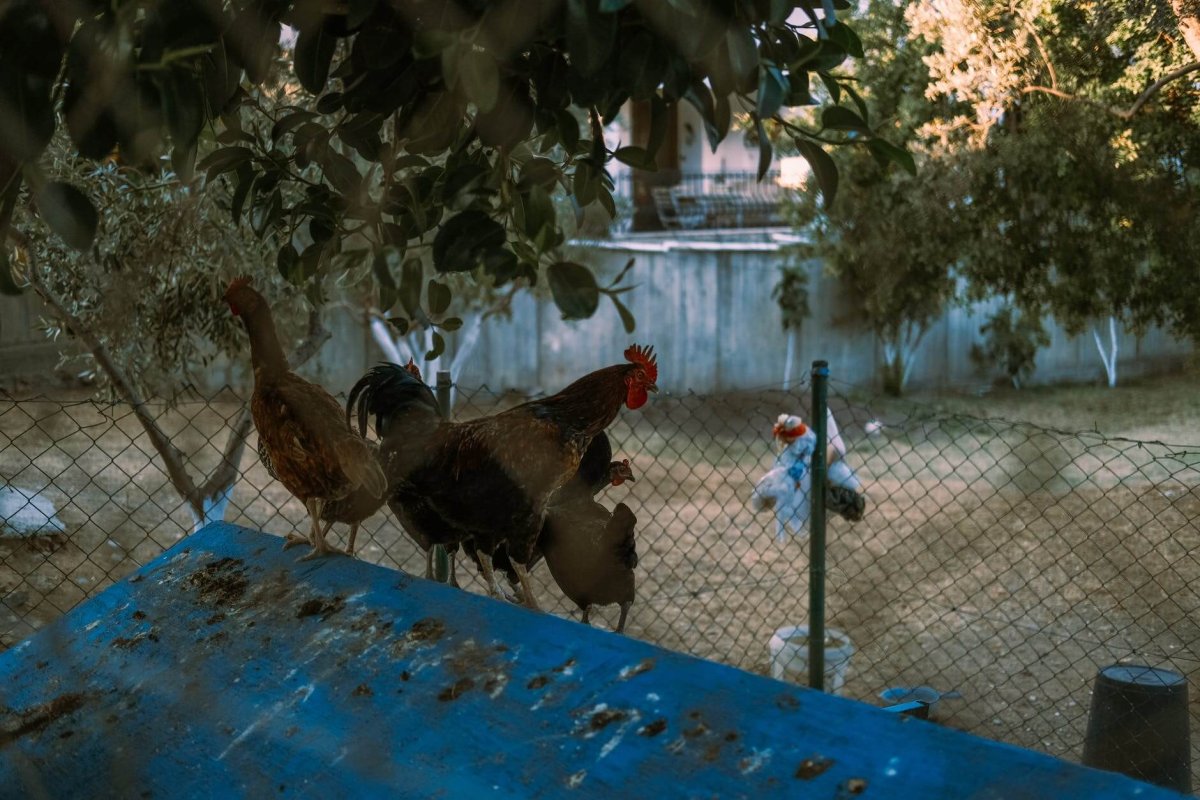
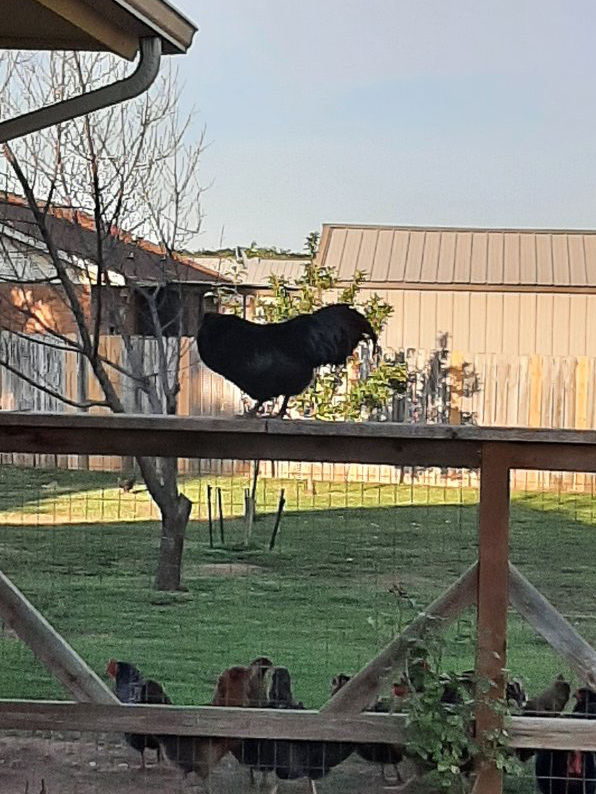
In this picture, Tiny Nuts just flew back over the fence, while some of his hens stayed in the front yard. And one hen is on the fence, about to cross over to the other side.
The Grass is Always Greener.…
Chickens love to explore and will go in your neighbor’s yard, because the grass and bugs are way better than what’s in your yard! Or maybe they just think the fence is some cool obstacle they’re meant to cross, and your yard and your neighbor’s yard just belong to the birds.
Henhouse Bullying
Introducing new birds, chicks figuring out the pecking order, and 2 adult roosters can and will cause some birds to seek out new territory.
I noticed that’s what Tiny Nuts has been doing with his harem, while it was raining yesterday, and he wasn’t allowed in the run. I figured out that he just wants his own place where he and his girls can live in peace.
Predators
And the last reason backyard birds will fly away from their own yard is if there is a threat, such as a predator.
How High can Chickens Fly
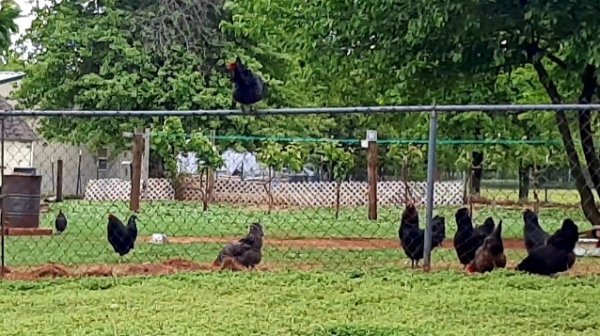
Our neighbor’s 6 ft tall fence. (The yellow yard stick isn’t truly a yard stick, as it measures 48 inches. It’s for comparison purposes.)
A four foot fence is not a deterrent to the breeds I listed above. For example, on separate occasions, both my Ameraucana rooster and his hatchery mate flew over my neighbor’s 6 foot fence. While their dog attacked Soundwave, Megatron slept in their barn overnight. But both were recovered and are fine.
Since having Megatron, I have seen some amazing aerodynamics. Also, his genes have been passed to all of his offspring. In addition, he inspires the other chickens to take risks as well, even if they can’t quite fly. They’re convinced the grass is greener.
How to Prevent Chickens from Flying
I have seen material that suggests building a covered run or a taller fence as the right option. And though neither is bad, they just aren’t going to stop your backyard birds from flying over your fence if you have one of those “flying” breeds. None of mine have ever “flown the coop”. But when they’re approaching adulthood, they fly over the fence all the time. Further, you might not want to build a 10 foot plus tall fence all over your yard. And if you have a very big yard, it could be cost prohibitive.
Rather than building a bigger fence, another option posed by cleverpetowners.com is to trick their eyes with stakes and fabric. You can find their suggestion and instructions here.
And the final option is wing clipping. Despite being somewhat controversial, if done properly, it is not painful to the birds at all. Furthermore, it isn’t permanent. The controversy stems from the idea that it promotes irritation, feather-picking, starting a vicious cycle. And that the birds whose wings are clipped are hindered from exercise and can’t get away from fearful situations.
From my own experience of raising chickens on an acre for 7 years, I can say that none of that exists. The birds whose wings we clip just seem to be expanding their territory. And usually it’s their rooster leading them into danger. Once the wing clipping has commenced and is finished, the only thing the birds find is that they can no longer go where they wish to go. So they have to be content in their own yard. There’s no feather picking and no irritation. And they certainly aren’t hindered from exercising, because they can still walk just fine.
As far as the fearful situations go, we only live on an acre; and the only predators that lurk around us are dogs or hawks. And the dogs can’t get to our birds with our sturdy fence. Additionally, our birds know to run to their coop at the first sign of danger. Or they use burst flight to get away, unless their wings are clipped. Therefore, if you live on a lot of land, you might not want to clip your chickens wings. I don’t think my in-laws do, and they live on 40 acres. Thus, they get a lot more predators. So, in that case, wing clipping could put the birds at a disadvantage.
In Conclusion
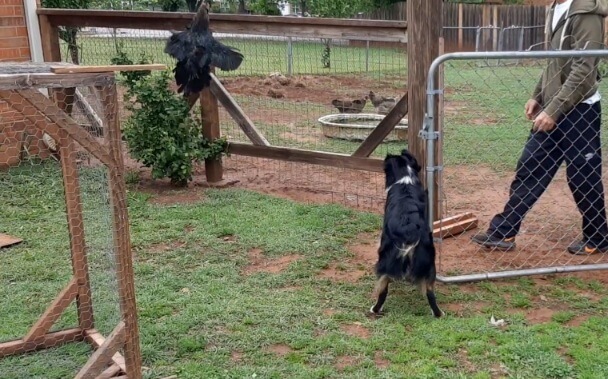
Can you see Tiny Nuts fly vertically? It’s not the best picture, but none of my birds need a running start to fly. And he was never in danger from Sophie.
We learned that chickens descend from Red Jungle Fowl, which can fly. And many chicken breeds can still fly vertically. We also learned that they fly to get to greener pastures and to avoid conflict and predators. In addition, most backyard birds that fly can easily clear 6 feet, while some can fly over 10 feet. Further, the suggestions to prevent your birds from flying include building a taller fence, tricking them with stakes and fabric, and/or wing clipping.
Thanks for stopping by! If you enjoyed this post, please like, post a comment, share, and please don’t forget to follow!
Not long ago I wrote an article about the best chickens for laying eggs. And the past few posts have been on chicks. But if you’re interested in backyard birds and aren’t too concerned about eggs or meat, then I’ll tell you the best chickens for beginners.
You’ll still have to take where you live into consideration. That’s because it will affect the birds you choose. Therefore, if you a pick a breed that has a large comb and wattles, living in a warmer climate will be ideal. Likewise, if you live in the Northern Hemisphere, then picking ones with smaller combs would be better.
Further, some of these chickens were mentioned before as excellent egg layers. But all of the ones on today’s list, including the previously mentioned ones, are easy going, simple to care for, and for newbie chicken owners.
Best Chickens for Beginners: Ameraucana
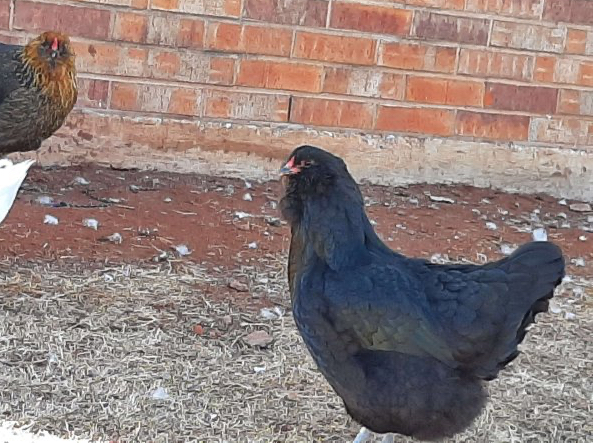
Ameraucanas are my personal favorite backyard bird. I have black, brown red, and bryngyld varieties. Though, as far as I know, the bryngyld variety hasn’t been approved by the APA. And if hand-raised from chicks, they never forget you. But, even if they weren’t raised from chicks, they learn and adapt quickly. Also, they come in beautiful colors. In addition, they are
Dual purpose
Lay ~ 200 blue eggs per year
Friendly
Not generally broody if you get them from a hatchery; although I had one brown red one who did go broody; and the one Black Ameraucana chick she raised goes broody annually
Have a pea comb, so they do better in winters and in cool climates
Best Birds for Beginners: Australorp
Come in 3 varieties
Also dual purpose
Lay ~ 300 light brown eggs annually
Friendly birds
Can go broody, so if you want chicks, this is the best brooder
Have a single comb, so better suited for warm climates
Best Chickens for Beginners: Barred Plymouth Rock
Dual purpose
Tame and good with children
Lay ~ 200 light brown eggs each year
Can go broody
Also have a single comb, so they do better in warm climates
Best Birds for Beginners: Brahma
Gentle giants, came from China
Dual purpose–used to be what we ate before the modern broiler
Very well suited to Northern climate with the pea comb
Stands confinement well
Can go broody
Comes in 3 varieties
Lays ~ 150 medium brown eggs annually, producing most during the winter
And has a single comb, so warm weather is more suitable
In Summary
So you see there are a number of backyard birds that would be great for first time chicken keepers. Additionally, most of them still produce a lot of eggs. And they’re friendly. Some even look and act like they could be lap pets.
Thanks for stopping by! If you enjoyed this, please like, post a comment, share, and please don’t forget to follow!
Whether you just started raising chicks, or have been for many years, it’s possible you’ve seen some common chick problems. Especially if you had or have a large brood. And similar to adult birds, there are some issues they’re prone to when they’re very young. However, most are preventable. Therefore, with the proper care and attention, they should be ok.
Common Chick Problems: Dehydration
One of the most common issues day-old chicks can suffer is dehydration. But it seems to be more prevalent in cases where chicks are shipped. And some people believe dehydration in day-old chicks occurs when their body temperature exceeds 104°; normal is 103°.
How to Prevent Dehydration
Make sure the temperature in the brooder is ideal: that all of the chicks are either moving around, eating, drinking, or sleeping. But not as far away from the heat source as possible, with their wings spread out, and panting.
Treating Dehydration
Signs you have a dehydrated chick:
Panting
Sleepiness
Isolation
Refusal to eat and drink
If you have a dehydrated chick, remove it from the heat, wrap it in a towel, and administer electrolytes, with a medicine dropper if necessary, one drop at a time.
Common Chick Problems: Pasty Butt
Another common condition in new chicks is pasty or sticky butt. Actually it goes by a few names. But it’s basically when chick poo sticks to their vents or bottoms. And it can be serious if left untreated, because it can clog them up.
Preventing Pasty Butt
Make sure the temperature of their water in the brooder is ~ 95-100°. Shipped chicks are more apt to be dehydrated and get chilled. So if their first drink is cool or cold, they’re also more likely to get pasty butt. Also, be sure they are drinking well before they start eating. Further, add 2 TBSP apple cider vinegar per quart of water for the chicks’ first week of life to minimize the risk of pasting.
In addition, keep proper brooder temperatures. In the first week, you want to start at 95°. And every week reduce the temperature by 5°. But the main thing is to observe the chicks’ behavior. If they’re happy and comfortable, they will sound happy and contented. However, if they’re uncomfortable, one way or another, they’ll let you know.
Treating Pasty Bottom
Also, if you have any chicks who currently have Pasty Butt, clean them up before it hardens. Run a light stream of warm water over their bottom. Next, carefully pick off the mess with your fingers. But be mindful not to tear out any down or rip the delicate skin. However, if the poo has already hardened, you may have to pick a little off at a time, intermittently adding warm water. And when you’re done, apply Vaseline to the chick’s bottom to keep the area from being irritated and to keep poop from sticking.
If you have any chicks with frequent Pasty Butt, it could be their diet. And you might have to switch their feed.
Common Chick Problems: Coccidiosis
Coccidia are a protozoan parasite that attack the intestinal tract. And Coccidiosis is a worldwide issue, affecting large and small flocks. Though, adult chickens usually have immunity to the ones in your own yard. Which means, baby chicks could be wiped out if they’re exposed to coccidia from your chickens or someone else’s, because immunity is a process.
Symptoms of Coccidiosis in chicks include listlessness, huddling, paleness, bloody or even foamy droppings, and comparatively smaller chicks if they’re all the same age.
To Prevent Coccidiosis
Either vaccinate day-old chicks or give them medicated feed, but don’t do both. Because, if you do both, it negates their effectiveness, and the chicks won’t be protected at all.
Keep brooders clean and dry.
Provide fresh, clean water daily.
Make sure there’s enough space for the chicks.
Provide enough ventilation to dry the litter/bedding material.
Encourage immunity by introducing chicks progressively to your existing flock by 4 weeks old.
Provide probiotics in chick water.
Quarantine new flock members for at least a week. And restrict access to your birds’ yard by other chicken farmers. Also, don’t share equipment.
And don’t toss food or treats on the ground, because it can get contaminated.
Treating Coccidiosis
Signs of coccidiosis in chicks are ruffled feathers, diarrhea that can be bloody, lack of appetite, sleepiness, and droopiness. So, if you have any chicks that you suspect have coccidiosis, then set up a separate “sick” brooder, to prevent spreading it further. Then buy Corid, which is the brand name for Amprolium, or Ampromed-P from Valley Vet. Treat the whole brood, not just the ill chick. 1/2 teaspoon per gallon of water. And it must be the only water option for 5 days.
After treatment, give the chicks a vitamin supplement like Nutri Drench.
Common Chick Problems: Marek’s Disease
This sickness is a highly contagious disease that causes immunosuppression and neurological disorders in birds. Generally young chickens are more at risk from one day old to one month. You may not see signs for 3 to 6 weeks, but symptoms of Marek’s include
Paralysis: loss of motor control, staggered movements in either one or both legs with inability to stand or balance
Immunosuppression: makes birds more vulnerable to other illnesses
Wry or twisted neck when cervical nerve is involved
Trouble eating and breathing
Tumors in lungs, liver, kidneys, or ovaries; and skin lesions or bleeding feather follicles
Discolored iris, deformed pupils, or blindness
Weight loss, loose watery, and/or bright green stools
And brain swelling
To Prevent Marek’s Disease
There’s a vaccine for Marek’s disease, however it has to be given no later than day one of hatching. But Marek’s disease isn’t 100% preventable, even with vaccines. Vaccinated birds might never get sick. But if chickens are exposed to the virus, whether or not they’re vaccinated, they can still get the virus and infect other birds.
So practice good biosecurity: Keep your coop clean, and have designated shoes for your chicken yard. And wash your hands when visiting other chicken yards. Then change your clothes after those visits. And don’t forget to quarantine birds before introducing them to your flock.
Treating Marek’s Disease
There’s no cure for Marek’s disease, however you need to separate the chick from the rest of the brood. Although, just remember there are several issues that can mimic Marek’s disease. And disinfect with a virucidal product, and wear PPE gear to protect yourself.
Common Chick Problems: Pullorum
Pullorum disease is caused by the Salmonella bacteria. And it’s also highly contagious. In addition, it can be spread from hen to baby chick through the egg. But it can also be spread by contaminated feed, water, rodents, game birds, contaminated clothing, shoes, and equipment.
Symptoms of Pullorum in chicks is lack of appetite, huddling, weakness, and white diarrhea. Furthermore, mortality is very high within the first 2 weeks, including in the incubator.
To Prevent Pullorum
Buy hatching eggs from a reliable source. And keep your coop and run clean and dry. Additionally, practice good biosecurity. Also, keep your flock’s food and water away from wild game birds.
Currently the recommended treatment is euthanizing your flock, since it’s very contagious, and to prevent further outbreaks. And then you must disinfect with a virucidal product; remember to wear PPE. Also, in some states, you’re required to report the disease to the authorities.
Common Chick Problems: Aspergillosis
This is a fungal disease that causes pneumonia in chicks, so it’s routinely called “brooder pneumonia.” The fungus, Aspergillus, can live in feed, bedding, and even animal tissue. It produces spores, which spread through the air, only to germinate, to complete its fungal life cycle. Aspergillus spores can be inhaled by healthy birds and mammals and be completely harmless. Though, there are a couple of factors that can change this.
A habitat with high levels of spores can overwhelm the body’s natural defenses, such as day-old chicks in brooders.
Birds with other illnesses are more at-risk to infection.
Situational factors, including extreme cold, high levels of ammonia or dust can stress birds and lower their immune function. And this lowers their ability to fight infections, increasing the likelihood of developing aspergillosis.
And if you have chickens or chicks on antibiotics, they will be more vulnerable to aspergillosis, because antibiotics kill all bacteria, including ones in the respiratory tract.
Symptoms of aspergillosis included gasping, open-mouthed breathing, lack of appetite, increased thirst, drowsiness, eye swelling, blindness, and/or wry neck.
To Prevent Aspergillosis
Practice good sanitation by cleaning and disinfecting brooders and incubators. Also clean feeders and waterers and replace with new feed and fresh, clean water. Store feed in dry, clean containers, free from dust. And replace bedding regularly, especially if wet.
Treating Aspergillosis
Symptoms of aspergillosis in chicks include weakness, gasping for breath, and sudden death. So if you think you have a chick infected with aspergillosis, you should call your veterinarian. Anti-fungals, like Nystatin, are recommended for 4-6 months, but it isn’t clear whether the doses are for adult birds or not. Also, most people might not try the treatment, because it might not work. It takes a long time, and your chicks might not be able to handle it.
Common Chick Problems: Infectious Bronchitis
IBV, or Infectious Bronchitis, is an avian coronavirus that only affects chickens. And it’s commonly referred to as a cold. The virus sheds from infected birds through respiratory secretions and/or feces. And it can spread through the air, food and water, or contact with contaminated equipment and clothing. Symptoms of IBV include
Sneezing, coughing, and rattling sounds when breathing
Pink-eye and labored breathing, possible facial swelling with simultaneous sinus infection
Weak, huddling under heat lamps
Not eating while losing weight
Depending on the strain, there can be respiratory symptoms, then weakness, ruffled feathers, wet droppings, more water intake, and then death
There are available vaccines, however there are also many strains. And then multiple boosters are required. Thus, the vaccinations are more ideal for commercial producers, not backyard enthusiasts. Though, for backyard flocks, continue to practice good biosecurity, and keep a clean coop and brooder. And sanitize equipment and shoes you use in the chicken yard. Also, quarantine birds and chicks that show signs of respiratory issues.
Treating Infectious Bronchitis
If you think you have a chick or chicks with IBV, there is no treatment, although antibiotics for 3-5 days might help fight off any secondary infections. But for brooding chicks, it’s a good idea to raise the temperature 5° till symptoms go away. And make sure ill birds aren’t exposed to other stressors. Further, add electrolytes to their water.
Birds can recover, though they can still shed the virus for up to 5 months.
Common Chick Problems: Rot Gut
Rot Gut is caused by toxins produced by Clostridium perfringens, which is a bacteria present in the intestinal tract of birds. And in normal circumstances the good bacteria keep the Clostridium perfringens population small in numbers.
But when the circumstances change in the intestines, Clostridium perfringens increases, toxins are formed, and the disease emerges. Possible causes of Rot Gut are overcrowding in the brooder, diets high in animal by-products, and previous intestinal issues, like Coccidiosis. And symptoms include listlessness, ruffled feathers, rotten smelling diarrhea, and death.
To Prevent Rot Gut
Treat your birds like kings and queens with plenty of space, new food, and fresh, clean water daily. Also, either vaccinate the chicks for Coccidiosis or provide medicated chick starter.
Keep the coop and/or brooder clean and well ventilated.
And monitor your birds frequently for illnesses or anything out of the ordinary.
If you have a bird or chick you suspect has Rot Gut, bacitracin, penicillin, or lincomycin can be used. But the disease advances quickly, often causing permanent intestinal damage. So it’s easier to prevent it before it happens, than try to stop it once it’s in your yard or brooder.
Common Chick Problems: Mushy Chick Disease
Mushy chick disease, aka navel-yolk sac infection and omphalitis, is caused by many different bacteria. Naval deformity in newly hatched chicks makes an opening for any and all bacteria. And artificially hatched chicks are more at-risk for this than naturally hatched chicks. In addition, symptoms can be different depending on the particular bacteria, but can include
Droopy heads
Not eating
Offensive odor
Swollen or distended, leaky navel
Open navels
Weak, huddling under heat source
And death often starts at hatching
To Prevent Mushy Chick Disease
This disease is totally preventable by good hygiene practice. Therefore,
Avoid egg sweating, because bacteria can then penetrate the shell
Clean and disinfect equipment, incubators, and brooders
Don’t incubate dirty eggs
Apply iodine to any unhealed navels
And don’t transfer newly hatched chicks to the brooder until they’ve fluffed out
Treating Mushy Chick Disease
Similar to Pullorum, Mushy Chick Disease doesn’t have an agreed upon treatment. Most people humanely cull their sick birds rather than trying to treat them. And that’s because there are many different strains of bacteria that can cause it. So, if you’re dealing with Mushy Chick Disease, by the time you find out which strain you’re dealing with, the chicks might already be dead.
With that being said, add electrolytes to the water, keep the brooder bedding dry, by changing it often, and make sure there’s good ventilation.
Common Chick Problems: Splayed Legs and Curled Toes
Splayed, or spraddle, leg is basically muscle weakness in the legs and feet. It looks like the chick’s legs are to the side, making it unable to walk. And it can be caused by inconsistent temperatures during incubation, slick surfaces in the brooder, or a vitamin deficiency.
Additionally, chicks can hatch with either crooked, curled toes, or curly toe paralysis. Or they can develop crooked or curled toes after hatching. And the same things that cause splayed leg also cause toe problems. Symptoms of curly toe paralysis include a sudden appearance of chicks walking on their hocks, while chicks with crooked toes will have one or more toes that curve sideways, making them walk on the sides of those toes.
To Prevent Splayed Leg
Provide good, high quality feed to your backyard birds. And limit the treats to snack-size portions only.
Before incubating, calibrate a separate thermometer; and then place that in the incubator to monitor the temperature. Further, have a back-up plan in the event the power goes out.
Avoid slick surfaces in the incubator during hatching, and also in the brooder. Provide either pine shavings, sand, paper towels, cloth, or small animal paper bedding.
And provide adequate space and heat in the brooder. Because, if chicks get chilled, they’ll huddle together. And in some cases, chicks could stack on top of each other, hurting the ones below.
To Prevent Curly Toe Paralysis and Crooked Toes
Follow the same guidelines above, in preventing splayed legs, when also preventing curly toe paralysis and crooked toes:
Provide high quality feed to breeding hens
Have stable temperature in the incubator
And avoid slick surfaces and crowding in the brooder
Treating Splayed Leg
Splayed leg is treatable, and the younger the chicks are, the better the results. The main thing is to make a leg brace to restrict movement. You can use a Bandaid, Vetrap, a hair tie, or a rubber band to bind the chick’s legs together in a normal position. But be sure the legs are in the correct position and that the brace isn’t too confining. Then change the brace every 24 hours to check how the legs are progressing. And make a new one if needed.
Treating Curly Toe Paralysis and Crooked Toes
This was Baby Nay, when he was first hatched.
To treat crooked toes in chicks, you need to align the toes correctly, then use Vetrap to keep them in place. Then leave the Vetrap on for ~ 24-48 hours to check your progress.
Curly toe paralysis can be cured the same way as crooked toes, with Vetrap or a Bandaid shoe, by also straightening and binding the toes. However, you need to supplement with Riboflavin, because this problem is commonly associated with that deficiency. A lot of sites will tell you to make a cardboard “shoe” if more than one toe is involved. Well, we did that with Baby Nay, our rooster whose egg got stepped on. (We had to assist his hatch 8 days early.) And one of his issues was curly toes, so we made him cardboard shoes.
Also, just a few weeks ago we hatched 14 chicks. And the last chick to hatch was kinda wobbly. I wasn’t too concerned, because they’re all kinda wobbly soon after hatching. However she didn’t improve, so I checked out her toes, and noticed she had several curly ones. But instead of making the cardboard shoes, my husband just used Coban, which is similar to Vetrap. It was a lot easier than making cardboard shoes. Plus, it worked better, because it stayed on better. Although if you want to make cardboard shoes,
First, place a small piece of cardboard under the chick’s feet.
Next, trace the feet.
Then cut out the outline of the chick’s feet.
And correctly align the chick’s toes before taping them to their shoes.
Finally, check after 24-48 hours.
Now it’s possible you could have a more advanced case of curly toe paralysis, where the chick is actually walking on its hocks. In this scenario you would need to have a cushion, like foam, for the hocks. So you would secure the foam to the hocks with tape. And then continue making the rest of the shoe.
Signs of Healthy and Sick Chicks
This list certainly isn’t exhaustive, though I tried. But for those of you who are new to this, you might not know what healthy or sick chicks look like. Some symptoms can definitely be obvious, while others not so much. So if you hatch them yourself, whether or not the eggs came from your hens, we’ll cover that first. For the first day of hatching, chicks will be tired. And that’s completely normal, because it takes a lot of energy to hatch out of an egg. They won’t even be interested in drinking or eating for maybe 2 or 3 days. Though, personally, we start offering it by day 2.
After you have the temperature adjusted properly in the brooder, and the chicks have gained their strength, they will have energy appropriate for their ages. And they will start sounding like babies. If you’ve had kids or been around kids, you’ll know what this means. When they’re hungry, thirsty, cold, or hot, they will cry or cheep. Or when something else is wrong, someone is getting bullied, or falls over, they will cry or cheep louder. But my point is that healthy chicks eat, drink, sleep, move around, and yes, they do make noise. The older they get, the noisier they get. However they shouldn’t sound distressed.
Likewise, if you get or have chicks that you purchased or had shipped to you, then their behaviors should resemble chicks that are 2 day or 3 day old chicks: They have energy, they’re eating, drinking, sleeping, etc.
Signs to Watch Out for
But even if you hatched chicks, or had them for more than 48 hours, here are some things to keep an eye on:
Sleepiness: sleeping a lot or just standing around
Head twisted back over the shoulders could indicate wry neck or stargazing
Hunched or ruffled appearance
Bad smells: try to determine where the smell is coming from
And last but not least, if a chick is off by itself, doing any or all of these things is also a cause for concern
To Summarize
There are many common chick problems. And most, if not all, of them can be prevented by regular cleaning and disinfecting brooders and coops. Also, by providing new food and fresh clean water daily, and practicing good biosecurity. Biosecurity, according to the Poultry Extension
refers to the measures taken to prevent the introduction and/or spread of disease in a poultry flock. It is important for every poultry operation to develop, and implement, a biosecurity plan.
But then the article goes on to say more in depth about how to implement that plan. You can check it out here.
Thanks for stopping by! If you enjoyed this, please like, post a comment, share, and please don’t forget to follow!
Recently I wrote an article about incubating chicken eggs. Whether or not you’ve ever experienced hatching chicks, it’s possible you’ve been around day-old chicks. And you can appreciate how raising baby chicks is different from raising adult birds.
In the event you have hatching chicks, or purchase them either from a feed store or a breeder, you first need a brooder. Because, just like incubating chicken eggs, you need a place to put the chicks. And that’s the purpose of the brooder.
The best brooder is a broody hen, because she can hatch and then raise her offspring. However it’s not ideal if you want a surplus of chicks. Or if the eggs aren’t due the same day, or you don’t have a broody hen.
And similar to incubating chicken eggs, temperature is just as important with raising chicks. So, if you purchase a brooder, it will have a heat source. Though, if you make your own, it will need one. But before we get into brooders and heat sources, let’s discuss chicks. How many do you want? Are you raising chickens for eggs? Or are you interested in meat production? Maybe a little of both? And how much space do you have? Having adequate space and shelter are 2 of the most important needs when raising and caring for chickens.
Raising Baby Chicks: Space
There doesn’t seem to be much consensus in the chicken community as to how much space individual chicks should have. I’ve seen numbers from 1/2 square foot all the way to 5x that amount or more. However, there’s more agreement when it comes to adult birds. But back to baby chicks. They will grow, so their space should too; plan on them being in their brooders for about 6 weeks.
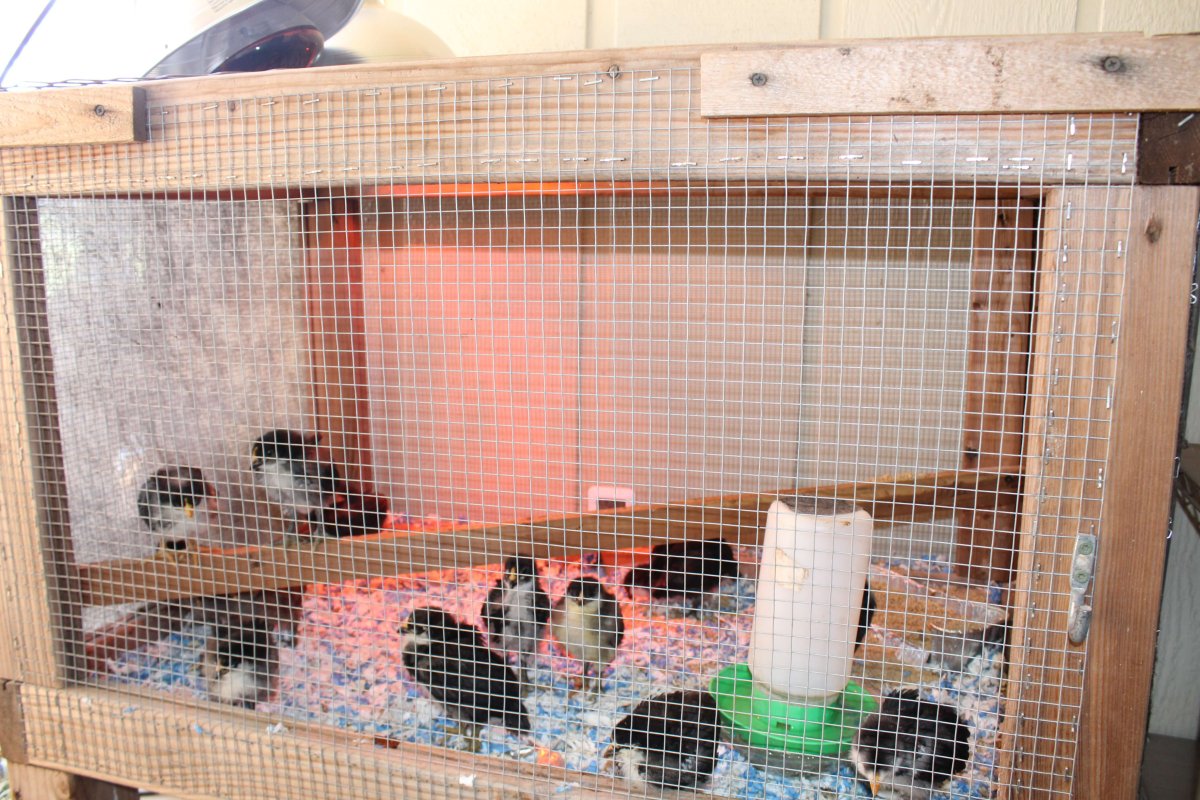
For example, each year that we’ve hatched our own eggs we always first put the hatchlings in a 2’3″L x 1”6″W x 16″H Rubbermaid box. And we’ve hatched maybe 1-3 broods each year for the past 6 years. However we don’t have big clutches. The first and this last time we had 13-14 chicks each; the biggest broods. And that’s because we like to be able to spend time with the chicks, imprinting on them. Further, if you incubate your own eggs, you have to figure that you’ll get unfertilized eggs as well.
And we don’t keep them in the Rubbermaid box. Currently our newest group is in a 3’2″L x 2’0″W x 22″H wood and wire mesh box. It’s the luxury mobile brooder; it can be moved out to the yard, so everyone can see each other when the time is right.
Now I’m going to cover brooders and heaters.
Brooders and Heaters
This is a nighttime shot.
Conventional Hover Brooder: This looks just like a box, hence the Rubbermaid box. You can purchase one or make your own. And if you’re in a hurry, you can use cardboard. Also, the heater used in this type of brooder is infrared, which is ideal for lots of 200 chicks or less. And for every 50-75 chicks, provide a 250-watt red lamp. The red light is better, because it’s easier for the chicks to sleep, and it reduces pecking.
Radiant Heater/Brooder: This combusts gas to heat radiant surfaces. Plus, it has more even heat distribution. And it can be used for larger operations.
Hot Air Furnace: Forced air heats the air with gas, electricity, water, or diesel, and needs more ventilation. This type is also for larger scale operations.
Pancake Heater/Brooder: The Pancake brooder is similar to the Radiant brooder, in that they both use gas. And usually just heats the birds on the floor like the Radiant brooder.
Raising Baby Chicks: Temperature
Now that you know about brooders and heaters, until the chicks feather out, the temperature in the brooder needs to start out at ~ 95°. But, week-to-week, decrease it by 5°, so the chicks can begin acclimating. By the time they reach 6 weeks old the temperature should be 65-70°.
You can keep a calibrated thermometer in the brooder. Or you can just watch the chicks and monitor their behavior. If all the chicks are huddled together under the light, cheeping or not, they’re cold. But if they’re spread out far from the light, wings held out from their bodies, and panting, they’re too hot. You want them moving around, displaying normal behavior: eating, drinking, sleeping, and playing. Therefore, if they act like they’re too cold or too hot, you can adjust the position and distance of the lamp until the chicks show you that they feel comfortable.
Furthermore, if using the 250-watt infrared red lamp, then have a back-up in case one goes out. In addition, some sites recommend placing the chicks in an unused room with the door closed. And then others warn of the dangers of this lamp and fires. While the danger is real, especially if out of sight, you should keep these tips in mind:
Keep hardware cloth or steel diamond mesh as a lid so the chicks have some ventilation. Also, that way your chicks won’t jump on the lamp. Plus, the lid protects against potential threats, such as pets or other creatures. And the chicks won’t be able to get out.
Use a lamp guard, so the hot bulb won’t be touching anything.
If you use a clamp, even better! That makes it secure.
And if using an extension cord, check for cuts, abrasions, and pinches. Don’t use a damaged cord. If it’s in bad shape, buy a new, thicker gauge extension cord, so it won’t be as prone to damage.
Lastly, make sure the fixture is porcelain, not plastic. The difference is whether or not there will be a fire.
Bedding
Most chicken aficionados recommend pine shavings for chicks. And then switch to straw when they’re adults. In the past I used pine shavings too. However, when we lost our bunny, we had a whole lotta unopened bedding for him. So my husband wanted to use that for the chicks. Let me say, it’s far superior, in my opinion, to pine shavings for little chicks: there’s no dust, smell, and it’s more absorbent. Plus, since it’s paper, it’s safe if the chicks peck at it.
Don’t use newspaper. Not only is it non-absorbent and you’ll have a stinky problem, but it’s slick for the chicks. Thus, they could wind up spraddle or splay legged.
Spread about 2-4″ of litter on the bottom of the brooder. But you don’t need as much during warmer months. Though, if you have chicks when it’s cold, you’ll need more litter to help keep them warm.
Also, chicks are messy, like human babies, except they don’t wear diapers. So, to prevent disease, plan on changing out the bedding regularly. How regularly? I don’t know; that’s going to depend on the number of chicks you have. Obviously the more you have, the more they’ll scratch their feed, poop, pee, and generally make a mess. Additionally, the bigger they get, the bigger and sooner the messes will get.
Raising Baby Chicks: Food and Water
This is one type of chick feeder; but there are others. Or you can make your own.
Always provide fresh, clean water for your chicks in a chick fountain; it’s the easiest set-up. And don’t be surprised to see chick poo in the water. That’s why it’ll need to be cleaned out. Additionally, in all of the broods we’ve had, I’ve never had any chicks who didn’t instinctively know how to drink or eat. But we’ve had a couple that had issues; my rooster who hatched 8 days early, so if we didn’t intervene he would’ve died. Thus, there might be extenuating circumstances where you might have to dip a chick’s beak into the water, to get them started.
Provide chick starter with 18-22% protein, because you want them to get a good start. Further, supply it in a feeder, in an attempt to keep it in one area. But, since chicks already know how to scratch their food, it’ll end up all over the brooder and look like perfectly good food. However, they’ll also poo all over the brooder, including their food. Thus, their poo will need to be removed and feeder refilled.
Their feed comes in medicated or non-medicated; medicated chick starter helps protect against coccidiosis. Though, it’s not a substitute for cleanliness or good practices. Also, their feed contains all the nutrients they need. But after a couple of weeks, if you want, you can try to offer them treats. However, don’t be surprised if they’re scared of you at first and your offerings, unless you have only a very small group. And if they are hand-raised, this is very rewarding, because in the long run they won’t be shy and will associate you with good things.
Playtime
Chickens, including baby chicks, love to roost when resting. You can add roosting poles a few inches from the bottom of the brooder as early as 2 weeks after hatch day. But not all of them will perch that early.
However, your chicks could be totally different from mine. This is from my own experience and from others with similar flocks. I’ve read about flocks where the chicks were 12 weeks old before they were interested in roosting. So go ahead and offer them; but it’s ok if the chicks aren’t interested.
And you can use different things for roosts: Dowels, 1x1x8″ wood board, bricks, or sticks from your yard. Just make sure they fit the brooder, are secure, and offer enough space per chick. But, trust me, they don’t all roost until they’re older.
Furthermore, chicks look like they’re molting within a few days of hatching, which is good; it means their feathers are coming in. And that also means, on warmer days, you can bring them outside in the sunshine. But if you don’t have a small brood, keep them in a collapsible pen or rabbit cage that they can’t get out of. That’s to keep them safe from predators, including pets, accidents, or getting lost.
We’ve only had 2 broods we didn’t keep enclosed when going outside. And that’s because there were only 4 chicks both times with 3 of us chick-sitting. Otherwise, they’re always locked up at such a young age, because they move too fast and aren’t aware of all the dangers. Remember, at this point, they’re able to fly a little bit!
Raising Baby Chicks: Safe Handling
Should you handle your chicks? How soon and how often? Well, yes, handle your chicks. If you purchase them, ASAP. But if you’re hatching them, wait till they’re ready to be moved to the brooder. However, don’t handle the chicks for very long, especially if they don’t have their feathers, because they’ll be cold. And hold them securely. Don’t walk around or hold them like you would a baby on their backs. Because it causes them distress, and they have difficulty breathing. Here are some other tips for holding chicks:
Wash your hands right after holding chicks and chickens.
If washing your hands isn’t an option, use hand sanitizer.
Supervisechildren when they are around and holding chicks; quick movements scare chicks.
Avoid eating where chickens live; and avoid touching your mouth before washing your hands.
And oversee the hand washing of young children.
In Conclusion
Raising baby chicks is a fun and educational experience, one the whole family can enjoy. And they grow so fast. Furthermore, there are things you can do to help your chicks make the transition into adult backyard birds, ensuring their health and production.
Thanks for stopping by! If you enjoyed this post, please like, post a comment, share, and please don’t forget to follow!
It’s almost Spring: The grass is getting greener, the weather is turning warmer. And it’s time for growing things and new life, such as new chicks. Generally speaking, you can incubate chicks any time. But most chickens, including Jungle Fowl, breed and then rear their young in spring or summer. So I’m going to go through, step-by-step, on how to incubate chicken eggs.
If you’re wanting to incubate chicken eggs, the first thing you need is an incubator. Before even getting the eggs, you have to have somewhere to deposit them. And there are different options for various budgets and sizes of flocks. However, try to get one from a reputable dealer.
Incubators: How to Incubate Chicken Eggs
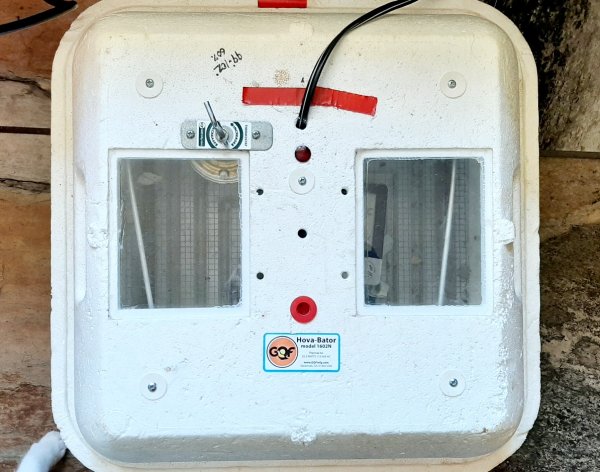
Incubating chicken eggs takes 21 days. The less expensive incubators are made out of Styrofoam. But some of them aren’t as stable at holding temperature as other kinds, especially if you keep it in a cooler room or one that’s drafty. The first one we got 7 years ago was an inexpensive Hovabator. It worked fine until this season. So we bought a new, forced air incubator with an automatic turner and thermostat.
In addition, there are cabinet style incubators in case you want to hatch hundreds of chicks. Or you can make your own if you enjoy working with your hands.
How Incubators Work
Both temperature and humidity are important for chick development. If the temperature is a little bit low, the chicks will take longer to develop. But if it’s too low, they won’t make it to hatch. Likewise, if the temperature is a little bit high, the chicks will develop faster. However, if the temperature is either too high or just a little high but not enough for the chicks to develop fully, the chicks will end up dying. Also, if there is too much fluctuation in the temperature, or lack of stability, this can cause the chicks to stop developing, and they will not hatch.
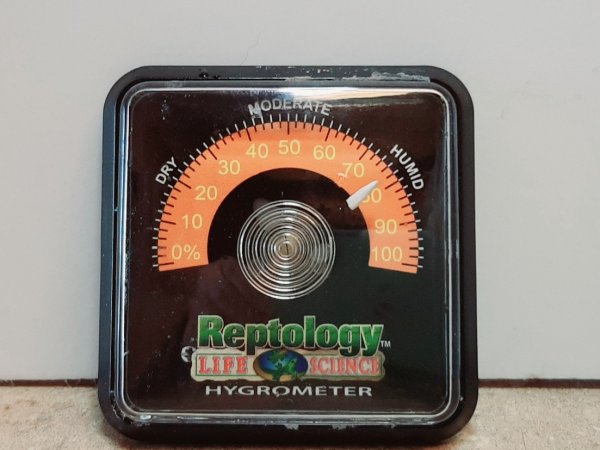
Further, for the first 18 days of incubation, the humidity needs to be around 45-55%. But the last 3 days it needs to be raised to 60-65%. If humidity is too low, the chicks will be too weak to hatch. But if humidity is too high, it can similarly affect the chicks. The chicks may not be able to easily move around their eggs or get enough air. And can likewise die.
Temperature: How to Incubate Chicken Eggs
Now before you start hatching chicks, you need to make sure the temperature is correct by calibrating it. This is before you add the eggs. However you need a separate thermometer in order to do this. It’s recommended to have an aquarium thermometer with a probe on it. Although, since Covid, it might be difficult to find.
But if you find one, then fill a glass with ice. Next, add tap water until it’s full; and stir. Wait about 30 secs and then put your thermometer in the glass to check the temperature. And if it reads 32°, it’s correct. But if it’s off, then you’ll have to make mathematical adjustments. Hopefully it won’t be off by much. Therefore, the temperature for a forced air incubator with a fan needs to be 99-100°. And for a still air incubator, the temperature needs to be 100-101°.
Humidity: How to Incubate Chicken Eggs
You also need to calibrate the hygrometer. Again before adding any eggs. You can get a hygrometer at any pet store. Then put a teaspoon of salt in a bottle cap or a small cup. Next, add a few drops of water to moisten it. And enclose that inside a see-through, sealable container, like a ziplock bag, and let it sit for ~ 6 hours. Then check the reading. If it says 75% humidity, it’s correct; if not, you just calculate what the humidity is based on how much it’s off.
Adjusting Humidity
Most incubators provide areas to add water. However, keep in mind that if you have a manual thermometer and thermostat, when you add water for humidity, it will lower the temperature. This happened with our first Hovabator. So we would usually just add damp paper towels; the humidity and temperature would stay ideal that way.
Set Up Your Incubator: How to Incubate Chicken Eggs
Now that we’ve covered some basics, it’s time to set up the incubator. Then let it run ~ 24 hours before adding any eggs. Whether it’s new or you’ve used it before, this time period will let you know if it’s running properly. Don’t forget to add your calibrated thermometer and hygrometer to make sure the temperature is correct!
If you are using shipped eggs or refrigerated eggs, make sure they settle ~ 24 hours at room temperature before putting them in the incubator. Adding cold eggs to a warm environment will crack them. And the embryos will not develop.
Also, if you have an incubator with an automatic turner, just be sure to put the eggs in the way the instructions advise. This is intended to to keep the yolk and air sac intact, which will improve hatch-rate. However, if you don’t have an automatic turner, you need to rotate the eggs at least three times daily; more, if you can. Use a Sharpie pen to mark an ‘X’ on the eggs, or something similar, to help you know whether the eggs have been turned the proper number of times.
Candling the Eggs
After about a week you can candle your eggs and see whether they’re fertilized. Other than when the eggs actually hatch, this is the most egg-citing part of incubating chicken eggs. Although some eggshells are more difficult than others until later on. Maran and ‘Cauna eggs can be very difficult to see anything after only a week.
To candle an egg, it’s best to use a small diameter, very bright flashlight. Next, go to a dark room and place the egg over the light. And if the egg is fertilized, you should see a red blob in the center with veins going out from it. But if you have either a Maran, blue, or green egg, you likely won’t be able to tell at this stage.
From this point on, you can candle the eggs weekly to check on development if you want. As the embryo develops, you will notice it taking up more space in the egg. And if you have one of those thicker or darker shells, you will definitely start seeing something. By day 16, the embryo takes up a lot more of the egg, and is in hatching position.
However, candling can also show if development stops. There can be different stages that development stops, or even more heartbreaking, they make it to hatch day, and fail to hatch. I recommend giving it a few days, but before discarding them, do a float test. Continue reading for instructions.
Lockdown
It’s pipped.
This typically refers to the last three days before hatch day. Lockdown is when you want to increase the humidity. And if you have an automatic turner, remove those. If not, then stop rotating the eggs now. Then position the eggs on their sides with the air cell at the top. That’s where the chicks will pip.
You may have read or heard that you should never open the incubator at this point, that your chicks would be ‘shrink-wrapped’ and die. No, you don’t want to open the incubator and leave it open for long periods of time. Although, if you need to add water for humidity or to transfer a chick to the brooder, you shouldn’t have the incubator open for long. And as long as you make sure the temperature and humidity get back up to where they need to be quickly, your chicks should be fine.
Then you just wait. You might get some early hatchers or some late ones. This happens if the temperature was off, but all in all, they should hatch pretty much within a day of each other. They’ll start pipping. And then they’ll unzip their shells, which means they work around the shells in a circle in order to get out. And they can go ~ two days without food and water, because of the nutrients from their yolks. You should wait until they’re completely fluffed out before moving them to the brooder.
Some Late or No Hatchers
Unzipping the egg takes a lot of energy. Just be patient for your little chicks.
If you’ve got some late or no hatchers, I would give it extra time. Like 5 extra days at least. Then smell the eggs. And if they pass the sniffer test, then do the float test. It’s kinda similar to the one designed to test bad eggs. However, in this test,
Make sure the water is 100° and still before adding the egg you want to test.
Next, be positive the egg you’re testing is past its due date and free of pips and cracks. Otherwise, you can drown the chick.
Then add the egg, making sure the water settles before adding another late egg.
If the egg sinks, it’s a dud and never developed.
But if it’s a high floater, like a fishing bobber without weights, it could still be a dud, or the chick died.
However, if it’s a low floater, it developed to full-term. Though, something happened, and the chick didn’t make it to hatch.
But if it’s a low floater and moving around a lot, the embryo is moving, and the egg is viable. It’s just a late hatcher!
Should You or Shouldn’t You Assist in Hatching?
There are tons of literature out there insisting you shouldn’t help a chick hatch. However, there’s one article I read that succinctly points out why assisting a hatch is beneficial. Although, at the end of the day, it’s for each person to decide for themselves.
And miracles happen everyday. What one person says will be a tragedy, can actually become the boss of the yard. You just never know. For example, Baby Nay, our now re-homed Maran-Ameraucana mix rooster hatched 8 days early.
A couple of years ago his egg got stepped on by either his mother or another broody hen outside; his ‘mother’ was kinda wacky and didn’t do the best job looking after her eggs. So my youngest brought his egg inside. She and my 19 year old thought he was pipping and unzipping and having trouble. But when Hannah helped out and saw him, she knew something was wrong and was scared. When they consulted with me, as I knew the dates, he was 8 days early. Thus they got him under the heat lamp, and then it was a waiting game. Waiting to see whether he would make it.
Well, I got him some electrolytes when I got home and watched while eventually, that first day he finally sat up. Then he cried a lot. So I kept him snuggled with me for 3 days, just in my arms. That’s probably why he knew his name and wasn’t afraid of people. But most of our birds are that way. That bird lived; in fact, he made it to challenge his dad, and almost killed Megatron if I hadn’t intervened.
So if you made it this far and have chicks, congratulations! And if you have any questions, please don’t hesitate to ask.
Thanks for stopping by! If you enjoyed this post, please like, post a comment, share, and please don’t forget to follow!