Providing helpful information regarding our feathered, feline, and canine friends while also sharing fun stories. And locally we provide pet sitting services.
Author:KS
I breed Black Ameraucana chickens and Easter Eggers that are Black Ameraucana mixed with either Cuckoo Maran or Barred Rock. And I donate eggs to people or organizations in need. Further, I've started chicken and other pet sitting in my area. Details are on my About page.
My parents were both realtors when I was growing up in Dallas. And each year the Collin County Association of Realtors had a chili cook-off in the spring, which my parents participated in. But most of the entries, if not all of them, were classic chili. However, now that I cook, I know there are so many more choices out there. Although, the first time I made this easy white chicken chili was just a couple of years ago.
I think the main difference with this and classic chili is obviously one is white, while the other is red. But the other main difference is in this recipe, the meat, or chicken, has to be pre-cooked. And you can cook it pretty much any way you want to; including buying a roasted chicken and shredding the meat.
Ingredients for Easy White Chicken Chili:
1 tbsp extra virgin olive oil
1 tbsp minced garlic
6 cups chicken broth
1 chopped onion
1 tbsp dried cilantro
2 tbsp lime juice
1 tsp ground cumin
1/2 tsp dried oregano
1/4 tsp each red pepper sauce and salt
11 oz white shoepeg or whole kernel corn, drained
1 can each (15 or 16oz) great northern beans and butter or lima beans, drained
2 cups shredded cooked chicken breasts
crushed tortilla chips
1 fresh diced tomato
chopped green onion
shredded Mexican blend cheese
sour cream or Greek non-fat plain yogurt
Instructions for White Chili:
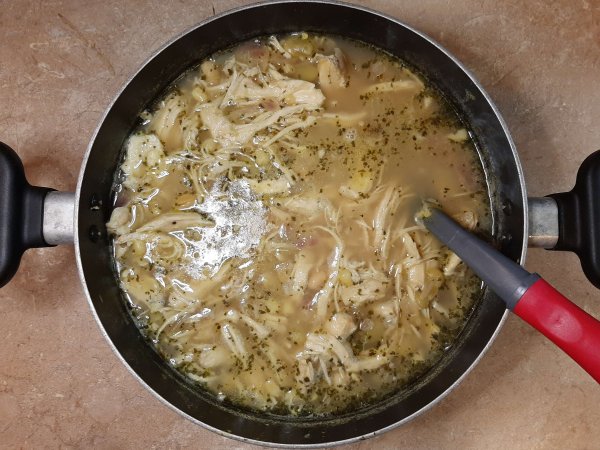
First, heat olive oil in 4 quart Dutch oven over medium heat. Then cook onion and garlic in oil. And stir intermittently, until onions are cooked through.
Next, add the rest of the ingredients, aside from the chicken. Stir and heat to boiling.
Then reduce heat, and simmer uncovered ~ 20 minutes.
After that, stir in the chicken, still simmering until hot.
At this point the white chicken chili is finished. However, no chili is complete without toppings. Thus, add some shredded cheese, crushed tortilla chips, chopped green onions, fresh diced tomatoes, and sour cream.
Similarly with my Cincinnati-style chili, I found this originally in Betty Crocker’s Cookbook, 9th edition, which was printed in 2000. And again there isn’t a link online, but if you’re interested, you could probably find it at Etsy, Ebay, or something similar.
Thanks for stopping by! If you enjoyed this post, please like, comment, share, and please don’t forget to follow!
It’s been cold and windy the past few days. Perfect weather for Cincinnati-style chili. Although, chili is great to eat in summer too, due to the availability of garden fresh vegetables.
And there are so many ways to make it. White, crockpot, BBQ, and classic are just a few of the options. But there are even Paleo and vegetarian versions. Furthermore, each recipe varies in the length of time to cook, from 30 minutes to several hours.
Which brings me to the different methods of cooking chili: Instant Pot, pressure cooker, stove-top, and slow cooker. Though, there are possibly even ways to cook it in the oven.
Although, most of my cooking history, I’ve made chili on the stove. Until recently. You see, our neighbors gifted us with an electric pressure cooker. But my husband was the only one to try it out, and he loved it immensely. So, after watching and tasting his results, I made this Cincinnati-style chili in the electric pressure cooker to save time.
Ingredients for Cincinnati-Style Chili:
1 lb ground beef
1 onion, chopped
2 (14.5 oz) cans whole tomatoes, pulsed
1 (14.5 oz) cans tomato sauce
2 tbsp chili powder
1 tbsp fresh garlic minced
2 (15 or 16 oz) cans of kidney beans, rinsed and drained
1 1/2 tsp ground cumin
1/4 tsp each of salt and pepper
1 tbsp extra virgin olive oil
~ 10 oz angel hair pasta
1 (15.25 oz) can of whole kernel corn, drained
2 fresh tomatoes, diced and seeded
1 cup sour cream or plain Greek yogurt
shredded Mexican blend cheese
Putting it All Together:
Put the olive oil in the pressure cooker; then add the garlic, onion, and beef, and turn the pressure cooker on saute and beef, cooking until beef is brown; stirring occasionally.
Next, stir in the rest of the ingredients, except the pasta. And cover and lock the pressure cooker, pushing button for pressure, still on beef; and it will cook for ~30 mins.
When the chili is finished, cook the angel hair pasta according to the package instructions; drain when cooked to al dente.
And spoon ~ 3/4 cup chili over ~ 1 cup noodles. Top with shredded Mexican blend cheese, chopped onion, sour cream, fresh chopped tomatoes, etc.
Cooking this in the electric pressure cooker cut my cooking time in half. So, if you’re short on time, that’s a definite plus. Also, originally I got this recipe from Betty Crocker’s Cookbook the 9th edition, printed in 2000. But I couldn’t find a link to it online.
Thanks for stopping by! If you enjoyed this post, please like, comment, share, and please don’t forget to follow!
About 5 months ago I wrote a post on egg facts. And in it I mentioned that pasture-raised eggs can last months, as long as they haven’t been washed, because of the bloom. But what is the bloom on an egg? Well, back then I didn’t get into it.
The bloom, or cuticle, is a protective layer that the hen’s body deposits on the outside of the egg just before she lays it. You might be curious to know that eggshells have around 8000 microscopic pores between the calcium carbonate crystals forming the shell. And the pores permit moisture, gas, and bacteria to pass between the inner and outer eggshell.
So nature has this defense against contamination, which is the bloom. And it prevents bacteria from transferring from the outside of the egg to the inside.
However, if you wash eggs, or buy store eggs which are washed, this protective layer is removed. According to NPR, there was no standardized way to wash eggs 100 years ago, although many people naturally did so. Then people got sick; Europe and the U.S. couldn’t agree as to what to do. So in the 1970s the USDA developed a way to clean eggs, that all commercial producers here have to adopt.
But once eggs are washed, they have to be refrigerated, because then they are susceptible to bacteria. Maybe you’re aware that Europe doesn’t wash their eggs. Though their poultry are vaccinated against Salmonella, whereas the USDA doesn’t require our birds to be. Additionally Europe’s eggs aren’t refrigerated, due to the intact cuticle. Thus, both methods are working toward the same goal: preventing people from getting food-borne illness, specifically Salmonella.
Should you wash your eggs? Personally, we don’t until it’s time to cook or use the egg(s). However, that being said, we’ve had some eggs that looked disgusting. Like a duck that smashed an egg and got some other eggs sticky. Or the same duck just likes to make a mess out of laying her own eggs. In the first case, the only thing to do is clean the egg(s) with water. And in the second case, it just depends on how bad of shape the egg(s) are in whether we would need to clean them.
Guidelines Regarding Washing and Refrigerating Eggs
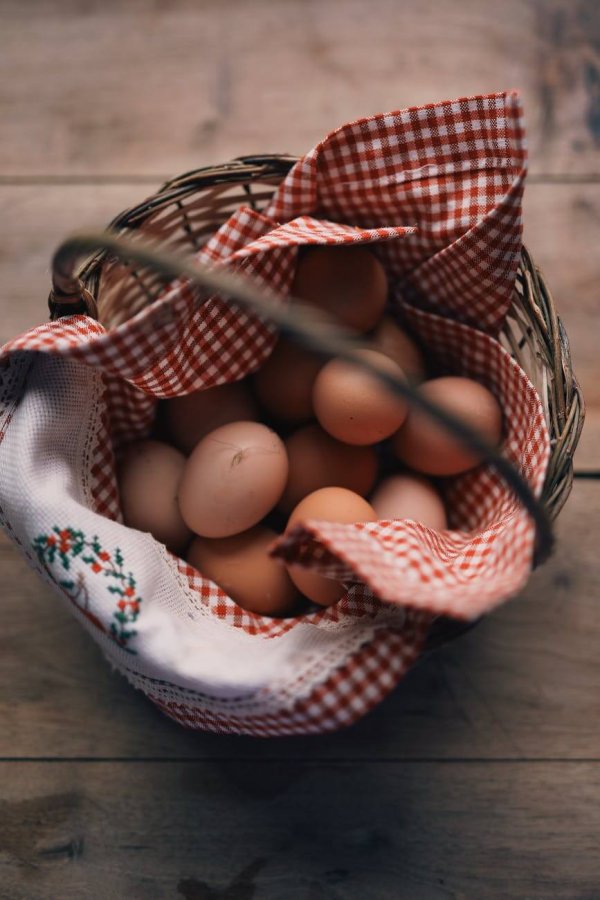
If purchasing eggs from the store, always keep them refrigerated. They no longer have the bloom.
Though, if you buy your eggs from a farmer, ask if they washed the eggs. Due to the difficulty peeling fresh-from-the-hen eggs, you’ll definitely want to leave some eggs on the counter for 4-5 days before boiling if you want hardboiled eggs. That’s because fresh eggs are just too fresh. But if not, refrigerate them, because they’ll definitely last longer.
Commit to the course! If you refrigerate, don’t take them out and leave them on the counter, because they’ll start to sweat, making the bloom disintegrate, and bacteria can get in. Trust me! This happened to me. And all I can say is, yucky!!
This next part is for people like me, who have chickens and ducks, and need to know reasons for cleaning eggs. Because most of the time, you don’t need to wash them.
At this point, a lot of sites would refer you on how to clean the chicken coop. And perhaps that might help. But my husband faithfully cleans our coop monthly; and I mean, the big clean-up that most people save for twice a year. (I suppose he just wants something to do.)
Reasons for Dirty Eggs
We’ve had some really dirty eggs before. However, I can honestly say that it wasn’t due to the coop being messy. And we’ve never had over 30 birds. Even now, we only have 27 chickens and 4 ducks.
Feathers, straw, and even chicken poo can sometimes get on the eggs.
But we have had some birds that would just make the biggest messes on their eggs. However that was most likely due to their diet. Also, it never lasted more than that one day, though it made an icky mess. So then all the eggs in that nest needed to be cleaned.
Since having chickens, and learning so much about them in 7 years, I can report that dirty eggs aren’t as common as they once were. Except regarding the ducks.
Ducks ALWAYS dirty their eggs. It’s in their nature, it’s what they do, and it serves a purpose. Though I don’t know what that is. And I’m not the only duck farmer who has observed this behavior. (Of course, there could be a genius duck guru who knows why ducks do what they do. Or God. But no one has informed me as of yet.) Anyway, we have this Pekin, Bakugo, who lays her eggs, dirties her eggs, and all of the other eggs in the nest.
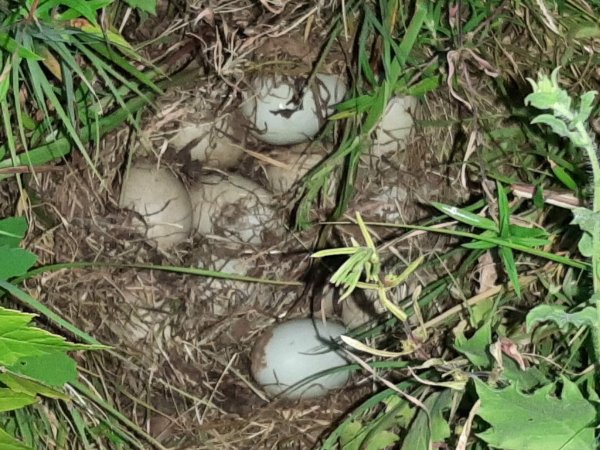
This clutch of eggs actually belongs to our Mallard, Aizawa.
Other possible reasons for dirty eggs: sick birds, roosts too close to the nesting boxes, or nesting boxes without roofs. Also, the hens could be scratching out the hay, straw, or pine shavings from their nesting boxes. I like this suggestion from the-chicken-chick. She recommends extra padding in the nesting boxes with empty feed bags, or something similar. That way if the nesting material gets scratched out, the eggs will still be on a padded surface.
So then, if you get really dirty eggs, what’s the best way to clean them?
Well, don’t get out the soap and water just yet, because you still want to try leaving the bloom intact. First, determine how often you’re gathering dirty eggs. If it’s once in a while like us, then proceed to the following steps.
But if you’re getting dirty eggs on a regular basis, you may need to change their diet, or inspect your flock for illness. Especially if the coop is in tip-top shape, with nesting boxes secure from roosting birds. And once you’ve sorted them out, do the following:
Collect eggs more often
If you’re collecting eggs multiple times a day, the chances that you’ll get nasty eggs that need to be cleaned decreases.
Add sand to floors of the run and coop
This is another recommendation from the-chicken-chick to avoid collecting dirty eggs. As a litter material, washed construction sand has many benefits dating back decades. But the main point here is the birds walk across it and, it sort of is like a scrubbing doormat, wiping off soiled feet before any hens get in the nests to lay eggs.
Dry washing
I typically use this method most often. And you can use your fingers, if it’s just dirt. Or a paper towel if it’s feces. Usually it comes off very easily, so long as you collect eggs frequently.
Sandpaper
If, however, you forgot to collect the eggs, you might find that the dirt or other has hardened onto the eggshell. So try sandpaper. But avoid coarse sandpaper, because it can easily strip the cuticle. McMurray Hatchery recommends .320 grit.
Water
When you’re ready to use the eggs, it’s recommended to wash them, making sure the dirt and feces are completely removed. And one of the best ways is with actual warm water, but never soak the eggs. And don’t use cold water, because that could actually cause bacteria to go below the surface of the eggshell, while warm water does the reverse; it draws it out of the shell.
These are the best ways to clean eggs while trying to leave their natural defense untouched. That’s because it’s without chemicals that can be leeched into the eggs themselves.
Thanks for stopping by! And if you enjoyed this post, please like, comment, share, and please don’t forget to follow!
This chicken casserole recipe originally was tuna casserole. But since my family isn’t too big on the idea of canned tuna with noodles, I changed it one day when I didn’t have any tuna. And the tuna casserole recipe I have came from my Great Aunt Jo on my mom’s side of the family.
I remember eating the original casserole for the first time in Scottsdale, Arizona. This was when I was a kid, and we were swimming in summer-time. Furthermore, I think my mom told us we were going to have tuna casserole. And we all thought, ‘Uugh, yuck.’ However, we were in for a delicious surprise.
Though you guys know I love to change recipes. The original calls for 10 oz can of albacore tuna; and to cook the noodles until they’re tender only, not fully cooked. Although, if you don’t cook them fully, then when the casserole comes out of the oven, a lot of the noodles, if not most of them, will be rock hard. Unless you know the trick to cooking them. Trust me, I’ve made this enough times to know. This is why I’ve added the water, so that the noodles have some way to cook prior to going in the oven.
Ingredients for Chicken Casserole:
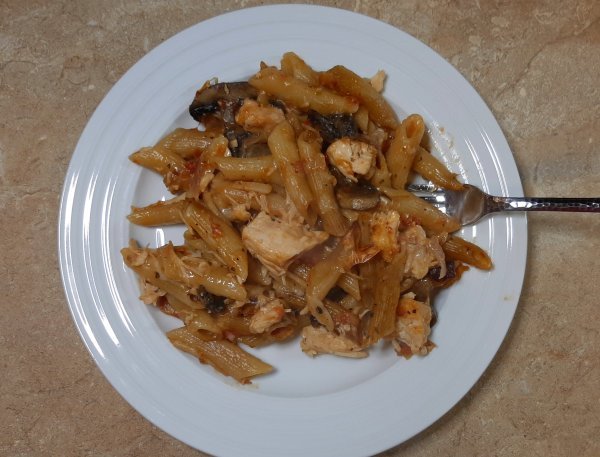
1 lb ziti or penne pasta
1 small onion, chopped
2 tbsp extra virgin olive oil
14 1/2 oz can tomatoes, pulsed in food processor with the juices
1 c shredded mozzarella cheese
4 oz can of mushrooms or 8 oz fresh sliced mushrooms
12.5 oz can of chicken
1 tsp basil
1/2 tsp salt
1/4 tsp cayenne pepper
14-35 oz of water
Instructions for Chicken Casserole:
First, preheat oven to 375 degrees; and spray a 9X12 inch casserole dish with non-stick cooking spray.
Next, cook the pasta with chopped onion in olive oil until pasta is golden. Then add the remaining ingredients, except chicken and cheese. And bring to a boil. When adding the water, do so 14 oz or less at a time, and stir frequently to prevent burning.
Cook until noodles are al dente. Remove pot from heat and add canned chicken; stir into the noodles. Then transfer to a casserole dish. And top with the shredded cheese. Stir and bake in 375 degree oven for 20-25 minutes.
I could only find one recipe that appeared similar to the one from my aunt, with the spices and tomatoes. Though there are others with tomatoes. But mostly when you look up tuna casserole, you’ll find recipes with mushroom soup, condensed mushroom soup, etc. So people associate tuna casserole more with a white sauce rather than a red tomato sauce.
And there are probably about as many chicken casserole recipes around as there are people. Chicken is extremely diverse, as are casseroles.
Thanks for stopping by! And if you enjoyed this post, please like, comment, share, and don’t forget to follow!
Eggs are one of the healthiest foods on the planet. They’re fairly easy to obtain and inexpensive. And there are other eggs besides the common chicken egg. Quail, turkey, duck, and goose eggs can also be eaten. Cooking with duck eggs has been around for a while, especially in Asian markets. Perhaps you’ve seen them at specialty markets or on a restaurant menu. The following is the difference between chicken eggs and duck eggs.
Most Apparent Difference Between Chicken Eggs and Duck Eggs: Appearance
Size of the egg
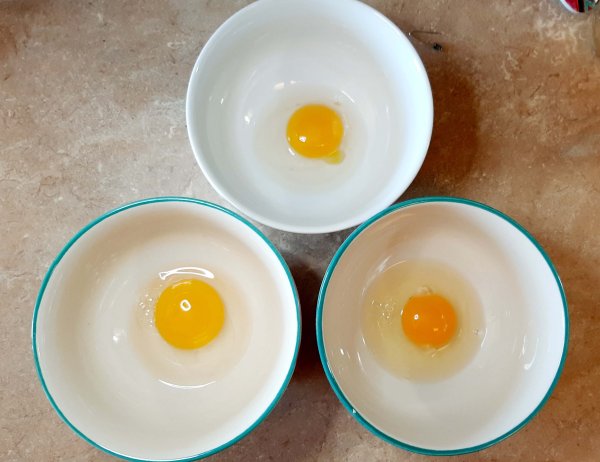
The 2 eggs on the left side are duck eggs, while the 2 on the right are chicken eggs. Pekin ducks lay large creamy white eggs, and Mallards lay smaller greenish blue eggs. At least ours do.
The size of duck eggs can be 50-100% larger than the average chicken egg. However it also depends on the duck. Some ducks, like our Mallard, are smaller than your typical chicken. And so their eggs will tend to be smaller than the average chicken egg.
Color of the eggshell
Just like with chickens, the color of a duck eggshell depends on the breed, diet, environment, and genes. And eggshells can be pale gray, creamy white, green, black, or blue.
Size and color of egg yolk
The dark orange on the bottom right is from a chicken. The egg in top center is from the Mallard, and the bottom left is from a Pekin. Notice how the chicken egg has more white than the duck eggs.
Duck egg yolks are also different in size and color. Chicken egg yolks can be yellow, yellow orange if the chicken is pasture-raised, while duck egg yolk can be a deeper shade of golden orange. In addition, the yolk tends to be bigger than chicken egg yolk.
Second Difference Between Chicken Eggs and Duck Eggs: Taste
Creamy taste
For the most part, chicken and duck eggs taste similar, but duck eggs are creamier.
Intense flavor
In addition to the creamy taste, people who eat duck eggs think their flavor is richer than chicken eggs.
Third Difference Between Chicken and Duck Eggs: Nutrition
Duck eggs have more fat, protein, and cholesterol than chicken eggs. Furthermore, they also contain more vitamins, particularly vitamin B12, which is important for red blood cell formation, DNA, and cell metabolism.
And according to Livestrong and Mayo Clinic, the cholesterol in eggs isn’t the same as bad cholesterol in our bodies. However, people with diabetes could be at risk for heart disease. (Though experts don’t know yet the connection between diabetes, eggs, and heart disease.)
Fourth Difference Between Chicken Eggs and Duck Eggs: Extra info
Chicken eggs are generally easier to obtain: at the grocery store, farmer’s markets, or from your neighbor, whereas duck eggs aren’t mainstream. Although they are gaining popularity with backyard bird enthusiasts.
Cost
Due to the fact that duck eggs can be difficult to find, that tends to drive up the price. However, chicken eggs, where I live, are about $2-3 a dozen at the store.
Allergies
Some people can be allergic to chicken eggs, but not to duck eggs. Or vice versa. And that’s because the proteins in both are similar but not exact. Therefore, if you have a known allergy to chicken eggs, it’s recommended to talk to your healthcare professional before trying duck eggs.
So, the next time you’re out grocery shopping, and assuming you don’t have an egg allergy, why not give duck eggs a try?
Thanks for stopping by! If you enjoyed this post, please like, share the post, comment, and don’t forget to follow!
I was living in Dallas when I first tasted gyros; this was a long time ago, so I don’t remember where. Likely the place is no longer there anyway. But when my daughter, Hannah, worked for a pizza place a few years ago, that also served gyros, I tried my hand at them. Scroll down to find the homemade gyros recipe that I continue to use today.
Some people mispronounce the word, making the hard ‘g’ sound. Rather the g is silent, more like a ‘yu’. ‘Yeeroh’ is really how it’s pronounced. And gyros originate in Greece. Gyro in Thessaloniki means to turn. While in Athens the generic word is ‘souvlaki’, and ‘souvla’ is a skewer. So both terms are correct, because a gyro is shaved meat on a rotating skewer, served in a pita.
Ingredients for Homemade Gyros:
2 tbsp butter or olive oil
one onion, peeled and sliced thinly
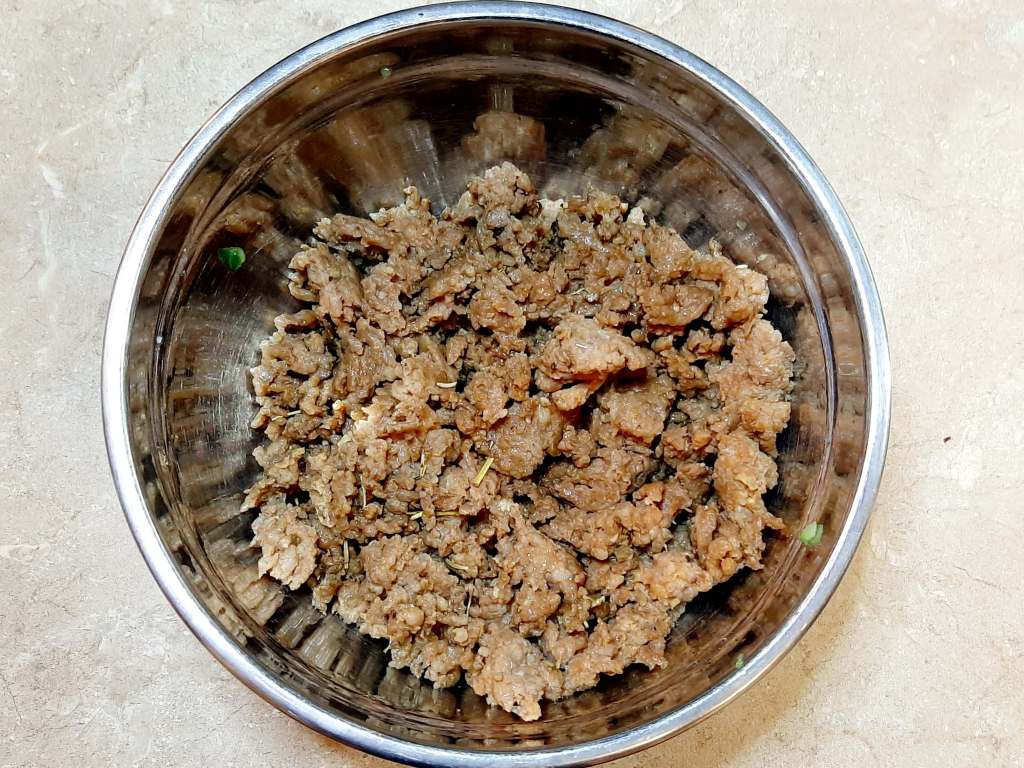
1 lb each of ground mild Italian sausage and ground beef
one green bell pepper, seeded and sliced thinly
1 1/2 tbsp minced garlic, divided
one tomato, seeded and diced
2 tsp each of dried oregano, ground cumin, dried marjoram, dried thyme, and ground dried rosemary, divided
salt and pepper to taste
12 pita bread rounds or 12 naan flatbreads
tzatziki sauce
Instructions for Homemade Gyros:
Heat butter or oil in large non-stick pan on medium heat. Add ground Italian sausage and ground beef. With a spoon, break apart the meat into smaller pieces.
While the meat is cooking, add 1 tbsp of minced garlic and 1 tsp each of the dried spices and herbs. And continue breaking up the pieces of meat till there is no pink remaining. Add salt and pepper to taste.
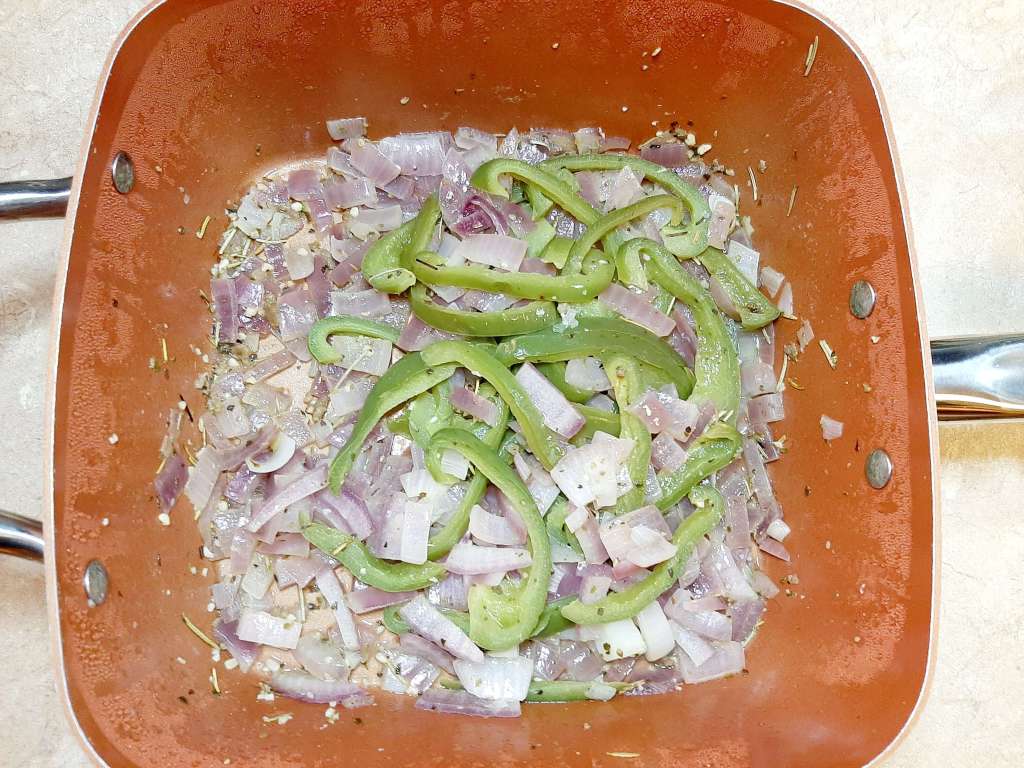
Transfer the meat to a bowl; cover and set aside. In the same pan, add a little more butter or oil for your vegetables. And keep the heat on medium.
Then add onion, bell pepper, remaining garlic, and the rest of 1 tsp of dried spices and herbs. Stir till well combined. Next, cover until the vegetables soften.
Toast the pita rounds or naan flatbread in the oven for ~ 2-3 mins on each side.
And spread tzatziki sauce on the bread, fill with the meat and vegetables; and top with diced tomatoes.
This is not a traditional gyro recipe. Because traditional gyro recipes sort of congeal the ground meats together before cooking them on a rotating skewer. And then the cooked, congealed meat is sliced. Also, there are instructions out there for that kind of recipe, if you’re interested. However, it takes some time to get the meat to congeal. And I don’t have that kind of patience. Sometimes I do, but it wasn’t important for me to have the congealed, and then, sliced meat.
Most meats, like beef, pork, chicken, and lamb go into gyros. Additionally, the spices and herbs I listed for this recipe seem to be common. Though, other recipes might have added or left off one item. So when I started making homemade gyros, I kept the meat ground up, just added the spices, and everything else. Then served them in flatbread. And this is definitely a family favorite. Although, the gyro isn’t complete without the tzatziki sauce.
Ingredients for Tzatziki Sauce:
1/2 European cucumber, finely grated
salt
1 c Greek plain yogurt
1/2 tbsp minced garlic, mashed with 1/8 tsp salt
1/2 tbsp dried mint
freshly ground pepper
1 tbsp extra virgin olive oil
Instructions for Tzatziki Sauce:
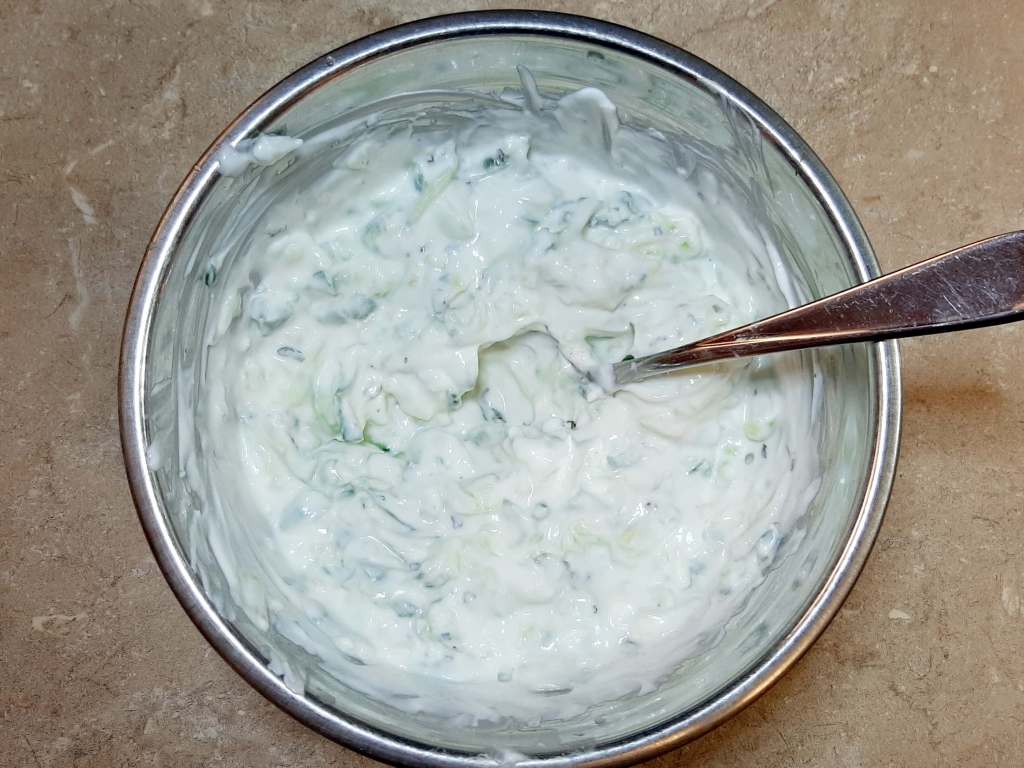
Toss the finely grated cucumber with a generous amount of salt. Next, leave in a colander in the sink to wilt for ~ 15-20 minutes. Then rinse and drain on paper towels.
With a whisk, mix together the yogurt, garlic, mint, salt and pepper to taste, and olive oil. Then stir in the cucumbers. And adjust the seasonings if needed, and serve.
Here’s a link to the original sauce recipe. You’ll notice I’ve cut the recipe in half, because it makes too much sauce. But even with it cut in half, there still remains a lot of sauce leftover.
Thanks for stopping by! If you enjoyed this post, please like, comment, share, and please don’t forget to follow!
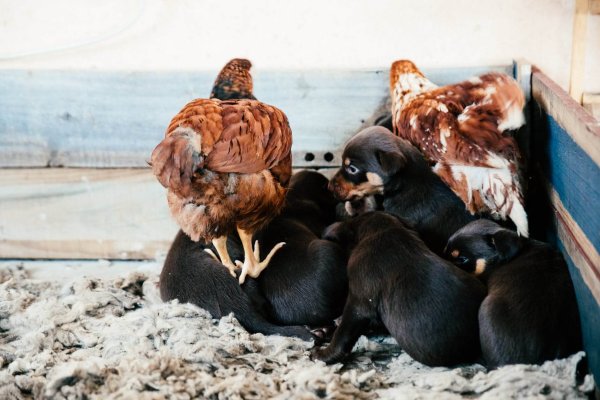
If you have a backyard flock and have had trouble with the occasional predator, you might want to know the best dog breeds for chickens. There are some that will guard your flock, keeping away danger. And then there are breeds that don’t necessarily do much guarding, per se; they just get along with and won’t actively attack your birds. However, if the dog lives outside, it could be enough of a deterrent to predators.
Some of you know we got an Australian Shepherd puppy several months ago. And if you follow this blog, you’re also aware I have chickens and ducks. Additionally, if you know anything about Aussies, you’ll know they have a strong prey drive. Which doesn’t make them exactly ideal for chicken people.
Prey drive is what affects whether dogs will or won’t attack other animals, including chickens. So dogs with a strong or high prey drive have a hereditary desire to chase, hunt, and sometimes even kill other animals. However, dogs can be trained. Just because you get a dog that’s ‘good’ with chickens doesn’t mean it won’t need to be trained as well.
The Great Pyrenees is a great dog, does well with families, but needs a firm hand in training. Also, it prefers cool climates, not making it suitable for the Southern U.S.
This next dog is also a good option, as it is calm and chill with other animals while also fearless when facing threats. However, the Pyrenean Mastiff requires firm training due to its stubbornness at times. And it prefers the great outdoors and doesn’t tolerate heat and humidity.
This next option I have for you is the Kangal Shepherd dog, which also needs broad spaces and a firm hand. It’s a loyal dog who will protect both the family and flock, but without clear boundaries, it can stray and attack others, including people and pets. Also, this was the only dog so far that I found that can tolerate the heat we get.
Finally, the Anatolian Shepherd is more business than cuddly fun, but it’s a fiercely loyal dog. Although training and early socialization are a definite must for this pooch. Again, this dog requires space and plenty of it outdoors. And did I mention training?
This list isn’t exhaustive; there are 4 other dog breeds usually included: the Komondor, Akbash, and Kuvasz. And all of the dog breeds are part of Livestock Guardian Dogs.
Some Caveats about Getting a Dog for the Chickens:
Don’t just get a dog and expect it to know what it’s supposed to do.
Having a dog takes training, especially one destined to guard the chickens. Ideally, get a puppy and train it to be around your flock, and the flock to be around the puppy, so they are familiar with each other.
Bring your dog around as you feed, water, and take care of your backyard birds, because this will teach your dog that the birds are to be protected.
Additionally, introduce your flock and dog slowly, preferably with treats once everyone is calm, since most animals love a good treat. So that in time, as you continue to bring your dog around your backyard birds, and proceed to hand out treats for good behavior, they will associate good things with each other.
When we first got our birds, we had a Shetland Sheepdog who would try to herd the birds when they strayed from their yard. Thus, he listened to us to keep them safe. We had Moses for many years by this point, he was highly intelligent, and obedient.
However, when we first got Sophie, our Aussie, she killed one of our ducks; it looked like she was ‘playing’ with it in her energetic enthusiasm. Though, with diligence, we’ve trained her that the birds are not for touching, molesting, eating, playing, etc. Although it didn’t really take her long to pick up on what we wanted. And now she completely ignores them.
Except now I’m on phase two of bringing her into their yard so she can know they’re part of the family and to protect them.
Other Dog Breeds as Options
Even though the Livestock Guardian Dogs are the best when it comes to guarding your chickens, with hard work and diligence, you can train other dog breeds to guard them too. Or at least to be a predator deterrent, like our dog Moses was. And how we’re working on Sophie currently.
Since most of the ‘chicken dogs’ have thicker coats and require cooler temperatures, that makes them unsuitable for the Southern half of the United States.
Although, herding dogs or shepherd dogs, if trained consistently, could at least deter predators, if not actively guard your chickens. Some breed examples include:
Keeping chickens attracts predators, especially living on acreage. And you want to protect your birds, your investment, and the eggs they produce. I hope I gave you some ideas on what dog breeds work the best with backyard birds. But the most important thing to know and remember is to train your dog to think of your chickens as part of the pack.
Thanks for stopping by! If you enjoyed this, please like, comment, share it, and please don’t forget to follow!
Maybe you’ve watched cooking shows or seen recipes that specifically called for duck eggs. Or perhaps you’ve seen them in your grocery store or at a specialty market. And if you live on acreage, no doubt you’ve heard ducks quacking in your neighborhood. Furthermore, if you’ve ever been given these prized objects, you might already be familiar with cooking with duck eggs.
However, if you’ve never tried duck or duck eggs, you don’t know what you’re missing. The meat is delicious, and so are the eggs. Though there’s more to it than that. There are a lot of benefits to cooking with duck eggs, primarily for baking.
Due to the first three items on the list, duck eggs are usually sought after by chefs. The protein in duck eggs, particularly in the whites, tends to make fluffier and creamier custards and cream fillings. But also breads, cakes, and quick breads are better as well.
duck yolks are bigger than chicken egg yolks
ducks continue to lay even during hot and cold temperatures
This is our Mallard, Aizawa, hidden in her nest.
This is important because chickens will have a down time during their molt. But they also won’t lay if the temperatures are on either extreme, too hot or too cold.
and the last benefit is that some people have discovered that if they’re allergic to chicken eggs, they can eat duck eggs just fine
But if you just want to have eggs, you can do that too. Boil them, fry them, or scramble them, you can cook duck eggs the same as chicken eggs. However, if you’re baking with them and the sizes are different than chicken eggs, figure 2 duck eggs for 3 chicken eggs.
Thanks for stopping by! If you enjoyed this post, please like, comment, share, and please don’t forget to follow!
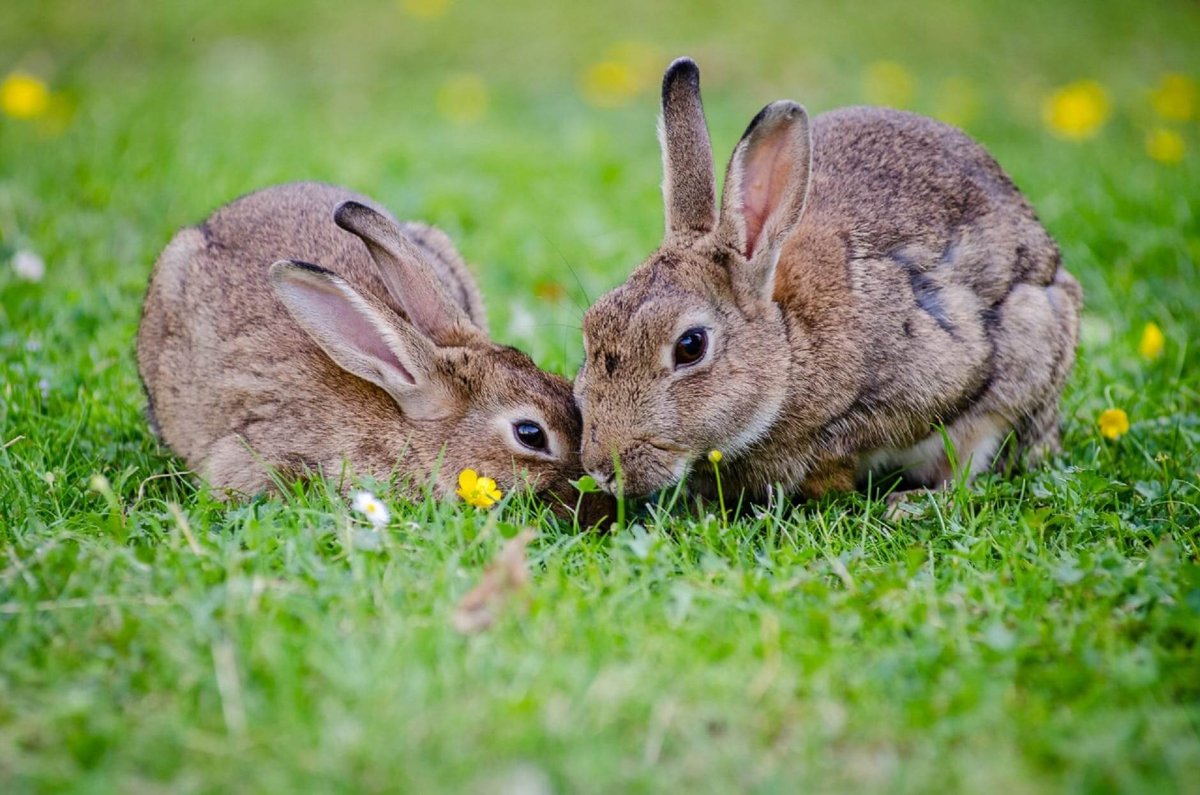
I promised this post over a few months ago when our bunny Mabel passed away. And I also hinted about bonded bunnies back in September with my post about gendering rabbits. But what does the term ‘bonded rabbits’ even mean?
Bonded rabbits are 2 bunnies who are personally bound to each other. And they help each other negotiate their world manually and mentally. Below are more bonded bunnies facts.
Bonded Bunnies Facts
They live in groups
Rabbits are meant to live in groups, not alone. They groom each other, rest, and eat together. So if you get a bunny, don’t just get one solo rabbit. It’s best to get a pair.
However, there are plenty of animals that can make a good companion to rabbits. Cats are at the top of the list, as long as the bunny isn’t afraid of said cat.
The bonds are lifelong
Bunnies form bonds for life. Maybe that’s because, in nature, the wild European bunnies bond for life.
Forming bonds can take time
It can take weeks to years to form a bonded rabbit pair. But you know your bunnies are bonded when they can hang out with each other, groom each other, and sleep with each other with no aggression. Because that means they feel safe with each other.
Thus, be patient, because it takes time.
DoNOTseparate them
This was after Mabel’s surgery. The fighting had already begun.
If you have a bonded pair and ever separate them, they’ll smell different to each other, could reject one another, and begin fighting. Bring them everywhere together. Period.
We experienced this when Mabel got fixed. We were totally unaware that we were supposed to BRING Ricky to Mabel’s appointment too, until the deed was already done.
After Mabel healed from being neutered, they started fighting; the fur was literally flying, and Ricky was no longer putting up with Mabel’s dominance. He started using the bathroom all over the living room, and they both looked so miserable.
So we confined them to the kitchen and living room as we tried helping them in their relationship. Then we phoned the vet, asking for advice, which is how we learned our mistake. We were advised to keep them separated, one in the hutch, the other loose, and yet have them in the same room. That was so they could start getting used to each other again.
They took turns being in the hutch and being loose. However Mabel’s unhappiness really weighed heavily on me, being restricted as he was and what he perceived as the loss of his friend.
The best pairing is a buck and a doe, as this is what occurs in nature. However, 2 does from the same litter can work, because usually they’re sisters. And finally, the least likely pairing to work is 2 bucks.
Although, that doesn’t mean it’s entirely impossible for 2 bucks to bond. They both need to be neutered, introduced slowly, and one of them needs to be submissive, otherwise there will inevitably be fighting. And a lot of it.
Mabel was fixed, but at the time, it was still too early to neuter Ricky. I think he still had at least a month to go before he could get fixed. And still neither of them wanted to back down on their power plays; neither was giving ground. So we found Ricky a home with other rabbits. I missed the Mabel who first came to live with us: his curiosity and joy at exploring the rest of the house and being the center of attention.
That’s our experience with bonded bunnies. And we messed up, because we didn’t know until too late. Hopefully, if you have rabbits of your own, you have better luck.
Thanks for stopping by! If you enjoyed this post, please like, post a comment, and share.
A week ago we were either cooking our Christmas meals, or traveling to visit family and friends. Or maybe even a combination of the two. And now that it’s New Year’s, we’re back in the kitchen for one last big meal of the year. Perhaps you need some ideas on what to eat on New Year’s Eve or Day? If so, keep reading, and I’ll go over some regional and global ideas. But I’ll also cover the reasons why we eat the food we eat on New Year’s.
Most, if not all, of us know that it’s traditional to eat black-eyed peas for New Year’s Eve or Day. That is if you live in the South. But are you familiar with the reason why? First, eating black-eyed peas can be dated back to 6th Century Jews celebrating Rosh Hashanah, their new year, for prosperity. Second, it is thought that Sephardic Jews moved to the Southern U.S. during the 18th Century, and they probably had slaves. Particularly black cooks who learned their cooking traditions.
However, eating black-eyed peas with rice is African in origin. And they continue to be a staple in Africa today. In addition, there are legends claiming that eating black-eyed peas dates to the Civil War. But as to the truth of why we started eating them on New Year’s? We’ll probably never really know. Some say it began with the Emancipation Proclamation, which commenced January 1, 1863.
What to Eat on New Year’s Eve
What to Eat on New Year’s Eve in the Southern United States:
A typical southern New Year’s Eve meal includes some kind of greens: collard greens, mustard greens, or turnip greens, which represents paper money. And cornbread is served to symbolize gold. Black-eyed peas are said to represent pennies by some. And then there is the pork; hog jowls is served like bacon to ensure health, prosperity, and progress. So you have health, wealth, and prosperity.
What to Eat on New Year’s Eve in the Northern United States:
While the Southern United States prefers Hoppin’ John, the Northern United States eats Gwumpkies, cabbage, and/or sauerkraut balls. The cabbage and variety also represents paper money and has ties to Eastern Europe. Additionally, Americans in the north eat herring, probably at the stroke of midnight like people in Poland, to ensure prosperity and bounty. Furthermore, the Northern U.S. serves roast pork to bring good luck; since it comes from the idea of the pig moving his snout around in a forward motion, not backwards.
According to CNN, Spain rings in the New Year with twelve grapes. At the stroke of midnight, people living in Spain eat one grape for each toll on the clock, signifiying one month each of good luck for the year.
Tamales are served, sold, and eaten in Mexico for New Year’s. Even though they’re usually important at most festive occasions, New Year’s is even more special for this food. And though there is no mystical or good luck associated with tamales, they tend to represent family and tradition.
On New Year’s Eve the Netherlands has powdered sugar, doughnut-like balls with currants or raisins. And they look similar to doughnut holes, including being fried like doughnuts. These were first eaten by Germanic tribes, and thought to be used as an offering to appease the Germanic goddess Perchta and her evil spirits.
Both Austria and Germany celebrate New Year’s Eve with spiced red wine punch, suckling pig, and marzipan pigs that are translated as good luck pigs. Bakers will be familiar with marzipan; it’s made out of almonds and sugar, so it’s a confection of sorts, much like candy.
Soba noodles are consumed at midnight on New Year’s Eve in Japan, to ring in the new year. The noodles represent longevity and prosperity. But another tradition involves family and friends spending the day before New Year’s making mochi rice cakes. The guests take turns making small buns that are later eaten as dessert.
What to Eat on New Year’s Eve in Italy:
Lentils are served in Italy for New Year’s, because they are round like coins, symbolizing fortune. However, there are other foods to eat, like raisins, representing good luck, and grapes, which symbolize wisdom and frugality.
What to Eat on New Year’s in Turkey:
Pomegranates are eaten on New Year’s traditionally in Turkey for 2 reasons. One, because the seeds are round, which once again represent coins, and therefore, wealth. And two, the color red symbolizes fertility.
Obviously this isn’t an exhaustive list, but as you can see, a lot of the themes are repeated. Pork, grapes, raisins, cabbage, peas, greens, and round bread. You get the idea. So what are you going to make this year? I hope I gave you some ideas. And that you were entertained as well. Have a fun and safe New Year’s Eve, whatever you do.
Thanks for stopping by! If you enjoyed this post, please like, comment, share it, and don’t forget to follow!